Install Unravel for GCP BigQuery (Manual)
Before setting up Unravel for BigQuery, you must complete the installation requirements .
You can install Unravel on a GCP instance. Unravel is then set up to monitor the jobs, datasets, tables, and data using a service account outside the Google Cloud environment. You must create a service account and download its private key as a JSON file. The path of the JSON file must be set in Unravel.
Follow the instructions to install and set up Unravel to receive BigQuery data.
Install and set up Unravel on the GCP instance
Do the following to set up Unravel on the GCP instance.
1. Create and configure the GCP instance
On your GCP console, go to the GCE dashboard and click Create Instance.
Select the following options based on Unravel's instance requirements:
Base OS
Instance type and size
Ports
Networking
The instance must be HTTPS and publicly accessible.
Firewall rules or policies
Sample inbound rule Type
Protocol
Port range
Source
All traffic
All
All
For example, 10.10.0.0/16
SSH
TCP
22
0.0.0.0/0 or trusted public IP for SSH access
Custom TCP Rule
TCP
3000
Custom TCP Rule
TCP
4043
Sample outbound rule Type
Protocol
Port range
Source
All traffic
All
All
0.0.0.0/0
Note
The GCP instance should have all TCP access to the BigQuery cluster (server/parent or worker) nodes. You can grant access by inserting adding firewall rules of the BigQuery server/parent and worker with all TCP, all port ranges.
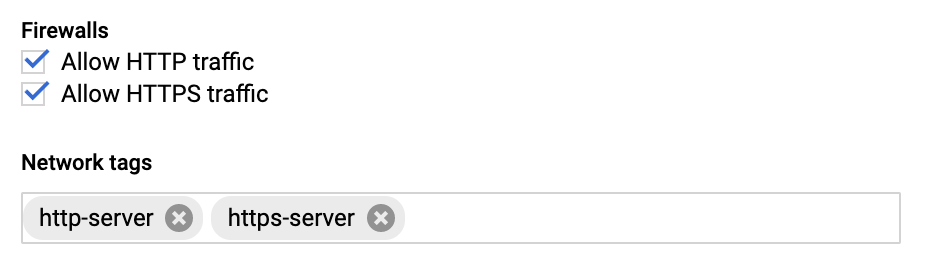
While creating the GCP instance add the Firewall properties, Enable the HTTP and HTTPS traffic Go to Network tab, and add Network tags. (This is the firewall rule that is already created.)
Disable
selinux.sudo setenforce Permissive
Edit
/etc/selinux/configto ensure the setting persists after reboot and ensureSELINUX=permissive.sudo vi /etc/selinux/config
Install
libaio.x86_64,lzop.x86_64, andntp.x86_64.sudo yum install -y libaio.x86_64 sudo yum install -y lzop.x86_64 sudo yum install -y ntp.x86_64
Start ntpd and check the system time.
sudo service ntpd start
sudo ntpq -p
Create a new Unravel user named unravel.
sudo useradd unravel
2. Download Unravel
Download Unravel onto the VM instance that you have created.
3. Deploy Unravel
Deploy Unravel on the GCP instance that you have created.
4. Setup and install Unravel
Set up and install Unravel.
You can run the setup command to install Unravel on GCP. The setup command allows you to do the following:
Runs Precheck automatically to detect possible issues that prevent a successful installation. Suggestions are provided to resolve issues. Refer to Precheck filters for the expected value for each filter.
Let you run extra parameters to integrate the database of your choice.
The setup command allows you to use a managed database shipped with Unravel, or an external database. When run without any additional parameters, the Unravel managed PostgreSQL database is used. Otherwise, you can specify one of the following databases in the setup command:
MySQL (Unravel managed as well as external MySQL database)
MariaDB (Unravel managed as well as external MariaDB database)
PostgreSQL (External PostgreSQL)
Refer to Integrate database for details.
Let you specify a separate path for the data directory other than the default path.
The Unravel data and configurations are located in the
datadirectory. By default, the installer maintains the data directory under<Unravel installation directory>/data. You can also change the data directory's default location by running additional parameters with the setup command.Provides more setup options.
To install Unravel with the setup command, do the following:
Switch to Unravel user.
su -
<unravel user>Notice
The Unravel user who owns the installation directory should run the setup command to install Unravel.
Run setup command:
Refer to Integrate database topic and complete the pre-requisites before running the setup command with any other database other than Unravel managed PostgreSQL, which is shipped with the product. Extra parameters must be passed with the setup command when you use another database.
Important
You can use either the Pull method or the Push method to receive data from BigQuery. Based on your method preference, the commands are run differently.
The Pull method is the default method to get data with the default polling interval of 300 secs (5 mins). You can change the polling interval after installation. Refer to Set polling period for BigQuery pull method. The Pull method is automatically implemented when you run the setup command to install Unravel.
To implement the Push method, you must configure the method and provide the LR endpoint for getting data from BigQuery. Refer to Implementing Push method to get data from BigQuery.
Caution
After you have determined and set the mode to receive data as Pull or Push, you cannot change it even during the upgrade.
When you use the Pull method, there is some delay for the BigQuery jobs to be displayed on the Unravel UI compared to the Push method, where the BigQuery jobs are displayed in real-time.
PostgreSQL
Unravel managed PostgreSQL
<unravel_installation_directory>/unravel/versions/
<Unravel version>/setup --enable-bigqueryExternal PostgreSQL
<unravel_installation_directory>/unravel/versions/
<Unravel version>/setup --enable-bigquery --external-database postgresql<HOST><PORT><SCHEMA><USERNAME><PASSWORD>/ ##TheHOST,PORT,SCHEMA,USERNAME,PASSWORDare optional fields and are prompted if missing. ##For example: /opt/unravel/versions/abcd.992/setup --enable-bigquery --external-database postgresql xyz.unraveldata.com 5432 unravel_db_prod unravel unraveldataNote
If you have configured the secure connection from Unravel GCP to the external PostgreSQL database with Cloud SQL Auth proxy, then run the command using the local host as follows:
<unravel_installation_directory>/unravel/versions/
<Unravel version>/setup --enable-bigquery --external-database postgreSQL 127.0.0.1 5432<SCHEMA><USERNAME><PASSWORD>##TheSCHEMA,USERNAME,PASSWORDare optional fields and are prompted if missing.
MySQL
Unravel managed MySQL
<unravel_installation_directory>/unravel/versions/
<Unravel version>/setup --enable-bigquery --extra /tmp/mysqlExternal MySQL
<unravel_installation_directory>/unravel/versions/
<Unravel version>/setup --enable-bigquery --extra /tmp/<MySQL-directory> --external-database mysql<HOST><PORT><SCHEMA><USERNAME><PASSWORD>##TheHOST,PORT,SCHEMA,USERNAME,PASSWORDare optional fields and are prompted if missing.Note
If you have configured the secure connection from Unravel GCP to the external MySQL database with Cloud SQL Auth proxy, then run the command using the local host as follows:
<unravel_installation_directory>/unravel/versions/
<Unravel version>/setup --enable-bigquery --extra /tmp/<MySQL-directory> --external-database mysql 127.0.0.1 3306<SCHEMA><USERNAME><PASSWORD>##TheSCHEMA,USERNAME,PASSWORDare optional fields and are prompted if missing.
MariaDB
Unravel managed MariaDB
<unravel_installation_directory>/unravel/versions/
<Unravel version>/setup --enable-bigquery --extra /tmp/mariadbExternal MariaDB
<unravel_installation_directory>unravel/versions/
<Unravel version>/setup --enable-bigquery --extra /tmp/<MariaDB-directory>--external-database mariadb<HOST><PORT><SCHEMA><USERNAME><PASSWORD>##TheHOST,PORT,SCHEMA,USERNAME,PASSWORDare optional fields and are prompted if missing.
Precheck is automatically run when you run the setup command. Refer to Precheck filters for the expected value for each filter. Also, refer to the Precheck sample.
Tip
Optionally, if you want to provide a different data directory, you can pass an extra parameter (--data-directory) with the setup command as shown below:
<unravel_installation_directory>/unravel/versions/
<Unravel version>/setup --enable-bigquery --data-directory/the/data/directorySimilarly, you can configure separate directories for other unravel directories. Contact support for assistance.
Note
Refer to setup Options for all the additional parameters that can be run with the setup command
Set the path of a license file.
<Unravel installation directory>/unravel/manager config license set
<license filename>This command takes a filename as input and performs the following actions:
Reads the license file path and the license file
The license YAML file contains product licensing information, license validity and expiration date, and the licensed number of clusters and nodes.
Verifies whether it is a valid license
Adds the com.unraveldata.license.file property to the
unravel.propertiesfile. For information, see License property.
Note
If you do not provide the license filename, the
manager config license setcommand prompts for the license information. You can copy the content of the license file.Sample content of the license file:
##### BEGIN UNRAVEL LICENSE
Licensee     : ACME Disintegrating Pistol Manufacturing
Valid from    :  2022-12-16 00:00:00 UTC
Expire after  :  2023-10-16 23:59:00 UTC
License type : Enterprise
Licensed number of nodes : 1000000
Signature    : c2Uvb2JqLnRhcmdldC92OF9pbml0aWFsaXplcnMvZ2VuL3RvcnF1ZS
Revision     : 1
##### END UNRAVEL LICENSE #####
Apply the changes.
<unravel_installation_directory>/unravel/manager config apply --restartCheck the status of services.
<unravel_installation_directory>/unravel/manager reportThe following service statuses are reported:
OK: Service is up and running.
Not Monitored: Service is not running. (Has stopped or has failed to start)
Initializing: Services are starting up.
Does not exist: The process unexpectedly disappeared. Restarts will be attempted 10 times.
You can also get the status and information for a specific service. Run the manager report command as follows:
<unravel_installation_directory>/unravel/manager report <service>
## For example: /opt/unravel/manager report auto_action
Verify if the default Pull method is implemented for receiving data. Run
<Unravel installation directory>/unravel/manager config bigquery show to verify. The results will reflect the Pullmethod used in the Mode field. For example:-- Running: config bigquery show BigQuery support: Enabled LR endpoint: Default Mode: pull No project configured.
If you want to implement the Push method, refer to Implementing Push method to get data from BigQuery
The Precheck output displays the issues that prevent a successful installation and provides suggestions to resolve them. You must resolve each of the issues before proceeding. See Precheck filters.
After the prechecks are resolved, you must re-login or reload the shell to execute the setup command again.
Note
In certain situations, you can skip the precheck using the setup --skip-precheck command
For example:
/opt/unravel/versions/<Unravel version>/setup --skip-precheckYou can also skip the checks that you know can fail. For example, if you want to skip the Check limits option and the Disk freespace option, pick the command within the parenthesis corresponding to these failed options and run the setup command as follows:
setup --filter-precheck ~check_limits,~check_freespace
Tip
Run --help with the setup command and any combination of the setup command for complete usage details.
<unravel_installation_directory>/unravel/versions/<Unravel version>/setup --help
/opt/unravel/versions/abcd.1004/setup
2021-04-05 15:51:30 Sending logs to: /tmp/unravel-setup-20210405-155130.log
2021-04-05 15:51:30 Running preinstallation check...
2021-04-05 15:51:31 Gathering information ................. Ok
2021-04-05 15:51:51 Running checks .................. Ok
--------------------------------------------------------------------------------
system
 Check limits        : PASSED
 Clock sync          : PASSED
 CPU requirement     : PASSED, Available cores: 8 cores
 Disk access         : PASSED, /opt/unravel/versions/develop.1004/healthcheck/healthcheck/plugins/system is writable
 Disk freespace      : PASSED, 229 GB of free disk space is available for precheck dir.
 Kerberos tools      : PASSED
 Memory requirement  : PASSED, Available memory: 79 GB
 Network ports       : PASSED
 OS libraries        : PASSED
 OS release          : PASSED, OS release version: centos 7.6
 OS settings         : PASSED
 SELinux             : PASSED
--------------------------------------------------------------------------------
Healthcheck report bundle: /tmp/healthcheck-20210405155130-xyz.unraveldata.com.tar.gz
2021-04-05 15:51:53 Prepare to install with: /opt/unravel/versions/abcd.1004/installer/installer/../installer/conf/presets/default.yaml
2021-04-05 15:51:57 Sending logs to: /opt/unravel/logs/setup.log
2021-04-05 15:51:57 Instantiating templates ................................................................................................................................................................................................................................ Ok
2021-04-05 15:52:05 Creating parcels .................................... Ok
2021-04-05 15:52:20 Installing sensors file ............................ Ok
2021-04-05 15:52:20 Installing pgsql connector ... Ok
2021-04-05 15:52:22 Starting service monitor ... Ok
2021-04-05 15:52:27 Request start for elasticsearch_1 .... Ok
2021-04-05 15:52:27 Waiting for elasticsearch_1 for 120 sec ......... Ok
2021-04-05 15:52:35 Request start for zookeeper .... Ok
2021-04-05 15:52:35 Request start for kafka .... Ok
2021-04-05 15:52:35 Waiting for kafka for 120 sec ...... Ok
2021-04-05 15:52:37 Waiting for kafka to be alive for 120 sec ..... Ok
2021-04-05 15:52:42 Initializing pgsql ... Ok
2021-04-05 15:52:46 Request start for pgsql .... Ok
2021-04-05 15:52:46 Waiting for pgsql for 120 sec ..... Ok
2021-04-05 15:52:47 Creating database schema ................. Ok
2021-04-05 15:52:50 Generating hashes .... Ok
2021-04-05 15:52:52 Loading elasticsearch templates ............ Ok
2021-04-05 15:52:55 Creating kafka topics .................... Ok
2021-04-05 15:53:36 Creating schema objects ....................................................................................................................................................................................................................................................................................................................................................................................................................................................................................................................................................................................................................................................................................................................................................................................................................................................................................................................................................................................................................................................................................................................................................................................................................................................................................................................................................................................................................................................................................................................................................................................................................................................................................................................................................................................................................................................................................................................................................................................................................................................... Ok
2021-04-05 15:54:03 Request stop ....................................................... Ok
2021-04-05 15:54:16 Done
[unravel@xyz ~]$
If you want to implement the Push method, you must set the method and provide the LR endpoint for getting data from BigQuery.
Stop Unravel.
<Unravel installation directory>/unravel/manager stop
Set the Push method.
<Unravel installation directory>/unravel/manager config bigquery set-mode pushSet the Log Receiver (LR) endpoint.
Important
Ensure that the LR endpoint supports HTTPS.
<Unravel installation directory>/unravel/manager config bigquery set-lr-endpoint<host><port>For example: /opt/unravel/manager config bigquery set-lr-endpoint myhostname.unraveldata.com 1234
Run
<Unravel installation directory>/unravel/manager config bigquery show to verify. The results will reflect the Pushmethod used in the Mode field. For example:-- Running: config bigquery show BigQuery support: Enabled LR endpoint: unravel@1234.com Mode: push
Apply the changes.
<Unravel installation directory>/unravel/manager config applyStart Unravel.
<Unravel installation directory>/unravel/manager start
Note
The HTTPS load balancer for Unravel endpoint must be configured only when using the Push model.
Unravel LR endpoint should be available over a publically accessible HTTPS endpoint to receive messages from BigQuery PubSub. The Load Balancer is an easier and more secure method to push the log messages between the Google Cloud Platform (GCP) and Unravel. Use the following instructions to configure an HTTPS load balancer for Unravel with public endpoint and SSL termination.
You must have the following information handy before you configure the Load Balancer:
Region and Zone where the Unravel VM is running.
Network and Subnet-network where the Unravel VM is running.
A valid SSL certificate in GCP.
Do the following to create a Load Balancer
Create an instance group. Refer to Create a managed instance group for detailed instructions.
In the New unmanaged instance group page, ensure to keep the following items the same as that of Unravel VM.
Location > Region
Location > Zone
Network and Instances > Network
Network and Instances > SubNetwork
Under Port Mapping, enter the following:
Port Name: http4043
Port Number: 4043
Set up an HTTPS Load Balancer. Refer to Set up an HTTPS Load Balancer for detailed instructions. Ensure to do the following:
Under Name, update the name as unravel-loadbalancer.
In Backends > New Backend > Instance groups, select the Unravel instance group that you had created in Step 1.
Under Health check, do the following:
Select Create a health check, and then add the name as unravel-4043-hc
Update the Protocol as HTTP and Port as 4043.
Update the Request Path as /lr/status.
Ensure that Port is set to 443 to allow HTTPS traffic.
After the Load Balancer is created, find the public IP address of the Load Balancer that is mentioned under Frontend section of the Load Balancer. Add the IP address of the Load Balancer to a valid DNS name.
5. Run the CURL command to fix a known issue
You can encounter a NoIndexFound exception for fresh installations of Unravel on GCP-BigQuery. This is a known issue in Unravel version 4.7.7.0. As a workaround for this issue, you must run the following CURL command on the Unravel node after the installation:
curl -XPUT http://localhost:4171/app-19700101_07
6. Enable Transport Layer Security (TLS) for Unravel UI
Refer to Enabling Transport Layer Security (TLS) for Unravel UI.
Set up Unravel to receive BigQuery data
Do the following to setup Unravel to receive BigQuery data:
Create a project for Unravel on the GCP instance. The project ID must be set in Unravel using manager utility.
Create a service account and assign the created role to the service account.
Generate a private key as a JSON file from the service account. This private key is used as an authentication mechanism for Google APIs in Unravel. The file path of the service key file must be set in Unravel using the manager utility.
Create a topic. When you run a query on BigQuery, logs are generated based on the type of query. You must set up the process of capturing and sending these logs to Unravel.
Create a Sink destination. Using Sinks, you can route the logs required by Unravel to supported destinations. The Sink offers multiple options to choose from (BigQuery, Cloud Storage, Pub/Sub, Splunk, Custom destination).
Configure Pub/Sub service and Unravel LR endpoint. For GCP to push data to Unravel, you must create a new subscription for the topic that was created and provide the Log Receiver (LR) endpoint in the subscription. The subscription ID must be set in Unravel using the manager utility.
Add the BigQuery details (Project ID, Subscription ID, and File path of service key file or Credentials file) in Unravel.
A project ID is a unique string used to differentiate your project from all others in Google Cloud. You cannot edit a Project ID after it is generated.
You can either create a project on the GCP account and get the Project ID or get the Project ID of an existing project and keep it handy. The Project ID must be set in Unravel later using the manager utility. See Add BigQuery details in Unravel.
Create a role for an Unravel project with the required permission for Unravel monitoring. This role is assigned to the Unravel service account that is used to authenticate Unravel applications.
On the GCP Console, go to the Roles page.
Using the drop-down list at the top of the page, select the Unravel project in which you want to create a role.
Click Create Role and enter a Name, Title, and Descriptionfor the role. Preferably keep the role name as unravel for easy identification. The description is optional, which can be maintained as Unravel monitoring.
Select Role launch stage as General Availability.
Caution
The role name cannot be changed after the role is created.
Click Add Permissions.
In the Add Permissions dialog box, filter and select the following permissions for the role, and then click Add.
Permission
Description
bigquery.jobs.get
Gets the job details.
bigquery.tables.get
Gets the table details.
pubsub.subscriptions.consume
Consumes the message from google pub-sub topic.
resourcemanager.projects.get
Gets the project details. For this permission, you must enable the Resource Manager API.
bigquery.datasets.get
bigquery.routines.get
bigquery.routines.list
bigquery.tables.getData
bigquery.tables.list
Permissions to get the tables and partitions metadata. These permissions are required for the Data page.
bigquery.jobs.create
Permissions to execute queries on BigQuery to fetch the metadata about the tables and partitions. These permissions are required for the Data page.
Click Create. The role is created.
A service account can be attached to a VM so that applications running on that VM can authenticate as the service account. To set up Unravel for BigQuery monitoring, you must create a service account and then assign the role created to this service account.
On the GCP Console, go to the Create service account page.
Select the Unravel project.
Under Service Account Details, enter a service account name to display on the GCP Console. Preferably keep the service account name as unravel-service-account.
Note
A service account ID is generated based on this name. Edit the ID if required. You cannot change the ID later.
Optional: Enter a description of the service account. Preferably keep the description as Unravel monitoring.
Click CREATE AND CONTINUE.
Under Grant this service account access to this project, select the role, which was created in Step 1 with the associated permissions.
Click Done. The service account is created, and the role is now attached to the service account.
Each service account is associated with a public/private RSA key pair. The Service Account Credentials API uses this internal key pair to create short-lived service account credentials and to sign blobs and JSON Web Tokens (JWTs). This key pair is known as the Google-managed key pair. The Google-managed key pairs are used to authenticate calls to APIs.
On the GCP Console, go to the Service accounts page.
Select the Unravel project.
Click the email address of the service account which you have created for Unravel.
Click the Keys tab.
Click the Add key drop-down menu, then select Create new key.
Select JSON as the Key type and click Create. A service account key file is downloaded. You can download this only once. Store the key file securely and transfer this file to Unravel node.
Following is a sample of the downloaded key file:
{
  "type": "service_account",
  "project_id": "unravel-test-337406",
  "private_key_id": "b111a5ad112bf0000d5c03b28b9a1d1f8ac31af",
  "private_key": "-----BEGIN PRIVATE KEY-----\n<privatekey>\n-----END PRIVATE KEY-----\n",
  "client_email": "unravel-service-account@unravel-test-337406.iam.gserviceaccount.com",
  "client_id": "112180000016964232364",
  "auth_uri": "https://accounts.google.com/o/oauth2/auth",
  "token_uri": "https://accounts.google.com/o/oauth2/token",
  "auth_provider_x509_cert_url": "https://www.googleapis.com/oauth2/v1/certs",
  "client_x509_cert_url": "https://www.googleapis.com/robot/v1/metadata/x509/service-account-email"
}
The file path of the service account key must be set in Unravel using the manager utility. See Add BigQuery details in Unravel.
When queries are run, logs are generated in BigQuery. The logs can be pushed to Unravel via Pub/Sub topics. To route logs to Unravel, a Pub/Sub topic must be created.
On the GCP console, go to thePub/Sub topics page.
Note
The logs are pushed to Unravel via Pub/Sub topics.
Click Create topic.
In the Topic ID field, enter an ID for your topic and click Create Topic. Preferably specify unravel-bigquery as the topic ID. The topic is now listed in the list of topics.
Sinks control how Cloud Logging routes log. Using sinks, you can route the logs to supported destinations.
On the GCP console, go to the Logs Router page.
Click Create Sink and provide a name and description for the sink. Preferably name the Sink as unravel-sink.
Under Sink Destination, from the Sink Service dropdown, select the Cloud Pub/Sub topic.
From Select a Cloud Pub/Sub topic, select the Cloud Pub/Sub topic that you had created for Unravel project in Step 5.
Under Choose logs to include in the Sink, add a filter to determine the logs that must be included in the log routing sink. For example
resource.type="bigquery_resource" AND (protoPayload.methodName="jobservice.insert" OR protoPayload.methodName="jobservice.jobcompleted")
In this example:
bigquery_resource indicates the BigQuery logs.
jobservice.insert indicates the jobs of running type.
jobservice.jobcompleted indicates the jobs of completed type.
Click Create Sink.
A subscription is created to subscribe to associated topics and set the process to send the logs to unravel. Do the following to create a subscription.
On the GCP console, go to the Pub/Sub topics page.
Select the topic that was created in Step 5.
Scroll down to the Subscriptions tab and click Create Subscription > Create Subscription.
In the Subscription ID text box, provide a name for the subscription. Preferably keep the Subscription ID as unravel-bigquery-sub.
Note
You must set the subscription ID in Unravel using the manager utility. See Add BigQuery details in Unravel.
Under the Delivery type, select Push or Pull.
If you have selected Push, then in the Endpoint URL text box, provide the Log Receiver (LR) endpoint URL for PUSH messages. LR server receives the logs from google Pub/Sub and is the entry point to unravel. The criterion for the LR endpoint URLs are as follows:
Has to be a POST verb.
Has to be an HTTPS endpoint. Refer to Enabling Transport Layer Security (TLS) for Unravel UI
Should serve a valid self-signed certificate.
The endpoint should be publicly accessible.
You must specify the endpoint URL in the following format:
https://
<unravel-hostname>:4443/logs/bigquery/<gcp-project-id>/bigquery/bigqueryFor example:
https://playground-bq-4770.unraveldata.com:4443/logs/bigquery/unravelsaas-329506/bigquery/bigquery
Provide the expiry time for the subscription.
Under Message ordering, select the Order messages with an ordering key option. This will allow the messages tagged with the same ordering key to be received in the published order.
Note
This option can be selected only once when you are configuring Pub/Sub service for the first time.
Optionally, you can filter the messages via Dead lettering and Retry Policy options.
Click Create.
The following details of BigQuery configurations must be specified in Unravel through the Unravel manager utility.
Project ID
File path to Service key file or Credentials file
Subscription ID
To add these details, do the following:
Stop Unravel.
<Unravel installation directory>/unravel/manager stop
Run the following command from the Unravel installation directory.
<Unravel installation directory>/unravel/manager config bigquery add
Enter the following details when prompted:
Project ID
File path to Service key file or Credentials file
For example:
Project id: unravel-test-331210
Subscription id: bigquery-sub
Credentials file: /tmp/unravel-test-331210-eoadad3feeea.json
Optional: Using the manager utility, set the frequency to poll Project data such as project name, state, etc. By default, it is one day that is 1440 minutes.
<Unravel installation directory>/unravel/manager config properties set com.unraveldata.bigquery.project.details.poll.delay.mins 720
Refer BigQuery properties to edit and set other BigQuery properties.
Apply the changes.
<Unravel installation directory>/unravel/manager config apply
Start Unravel.
<Unravel installation directory>/unravel/manager start
Verify BigQuery integration
To verify BigQuery integration with Unravel, do the following:
On the GCP console, run test queries from the project integrated with Unravel.
Using a supported web browser, navigate to Unravel URL (For example, https://
<unravel-host>:3000) and log onto Unravel UI using the credentials.Navigate to Jobs tab > Applications , and under Application type, select BigQuery. The details of the test queries run from the GCP console will be listed under the All tab.
Remove BigQuery project from Unravel
Stop Unravel.
<Unravel installation directory>/unravel/manager stop
Run the following command from the Unravel installation directory.
<Unravel installation directory>/unravel/manager config bigquery remove <project-ID>
Apply the changes.
<Unravel installation directory>/unravel/manager config apply
Start Unravel.
<Unravel installation directory>/unravel/manager start