Upgrading Unravel Databricks to 4.7.9.4 version
This topic provides instructions to upgrade Unravel Databricks to version4.7.9.4.
The following upgrade paths are supported:
Note
For Databricks v4.7.9.4, the latest Unravel version you can upgrade from is v4.7.9.3.
4.7.x (Databricks release) → 4.7.9.4
Before you upgrade to Unravel (Cloud), do the following:
Take a backup of the data directory and the external database if you use one. For backup and recovery, refer to Backing up and recovering Unravel.
Note
If an upgrade fails, you can roll back the upgrade to the release from which you had upgraded. For information, see Rollback after a failed upgrade. For this rollback to work, you must ensure to take a backup of the data directory and the external database before you upgrade.
Go to the Download section. The complete list of Unravel downloads is available in this section.
Download the Unravel version that you want to upgrade. The section provides the details and necessary instructions to download Unravel.
Extract the Unravel binaries of the Unravel version you want to upgrade.
tar zxf unravel-
<version>tar.gz -C</path/to/installation/directory>For example: tar zxf unravel-4.7.9.4.tar.gz -C /opt
Stop Unravel.
<Unravel installation directory>/unravel/manager stopActivate Unravel version 4.7.9.4.
<Unravel installation directory>/unravel/manager activate 4.7.9.4Start all the services.
<unravel installation directory>/unravel/manager start
Check the status of the services.
<unravel_installation_directory>/unravel/manager report
The following service statuses are reported:
OK: Service is up and running.
Not Monitored: Service is not running. (Has stopped or has failed to start)
Initializing: Services are starting up.
Does not exist: The process unexpectedly disappeared. A restart will be attempted 10 times.
Delete the previous installation directory from
unravel/versions/<THE.OLD.VERSION>.
Important
Ensure to perform the post-upgrade steps. Refer to Post upgrade steps .
After you upgrade Unravel, do the following:
Replacing the existing cost files
Go to {unravel_install_dir}/versions/{unravel_version}/core/etc/dbx/cost.
Copy the following files:
prices_workload_tier_aws.tsv
prices_workload_tier_azure.tsv
Paste the copied files and replace the existing files in this location:
{unravel_install_dir}/data/conf/cost
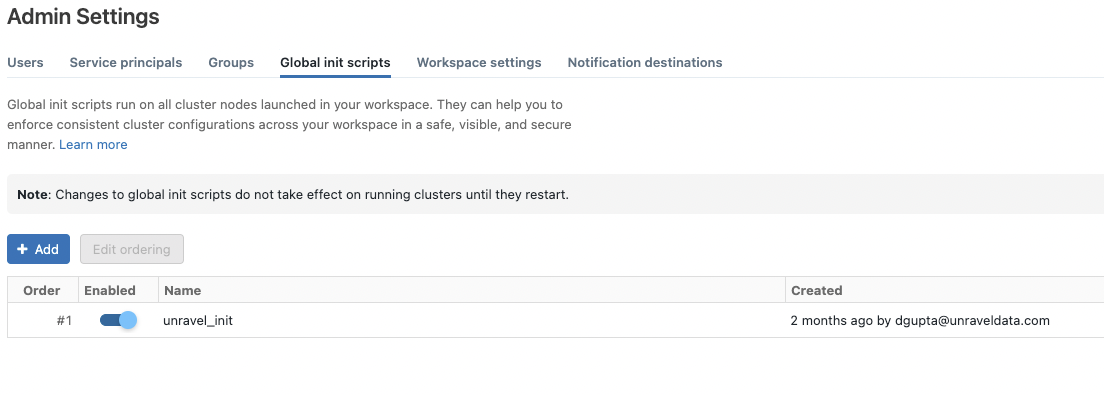
Enabling the Global init script
Global init is deployed automatically on the Workspace and needs to be enabled manually from the location shown in the following image:
You can now find the Global initialization script in your workspace at this path: /Workspace/Unravel/install-unravel.sh
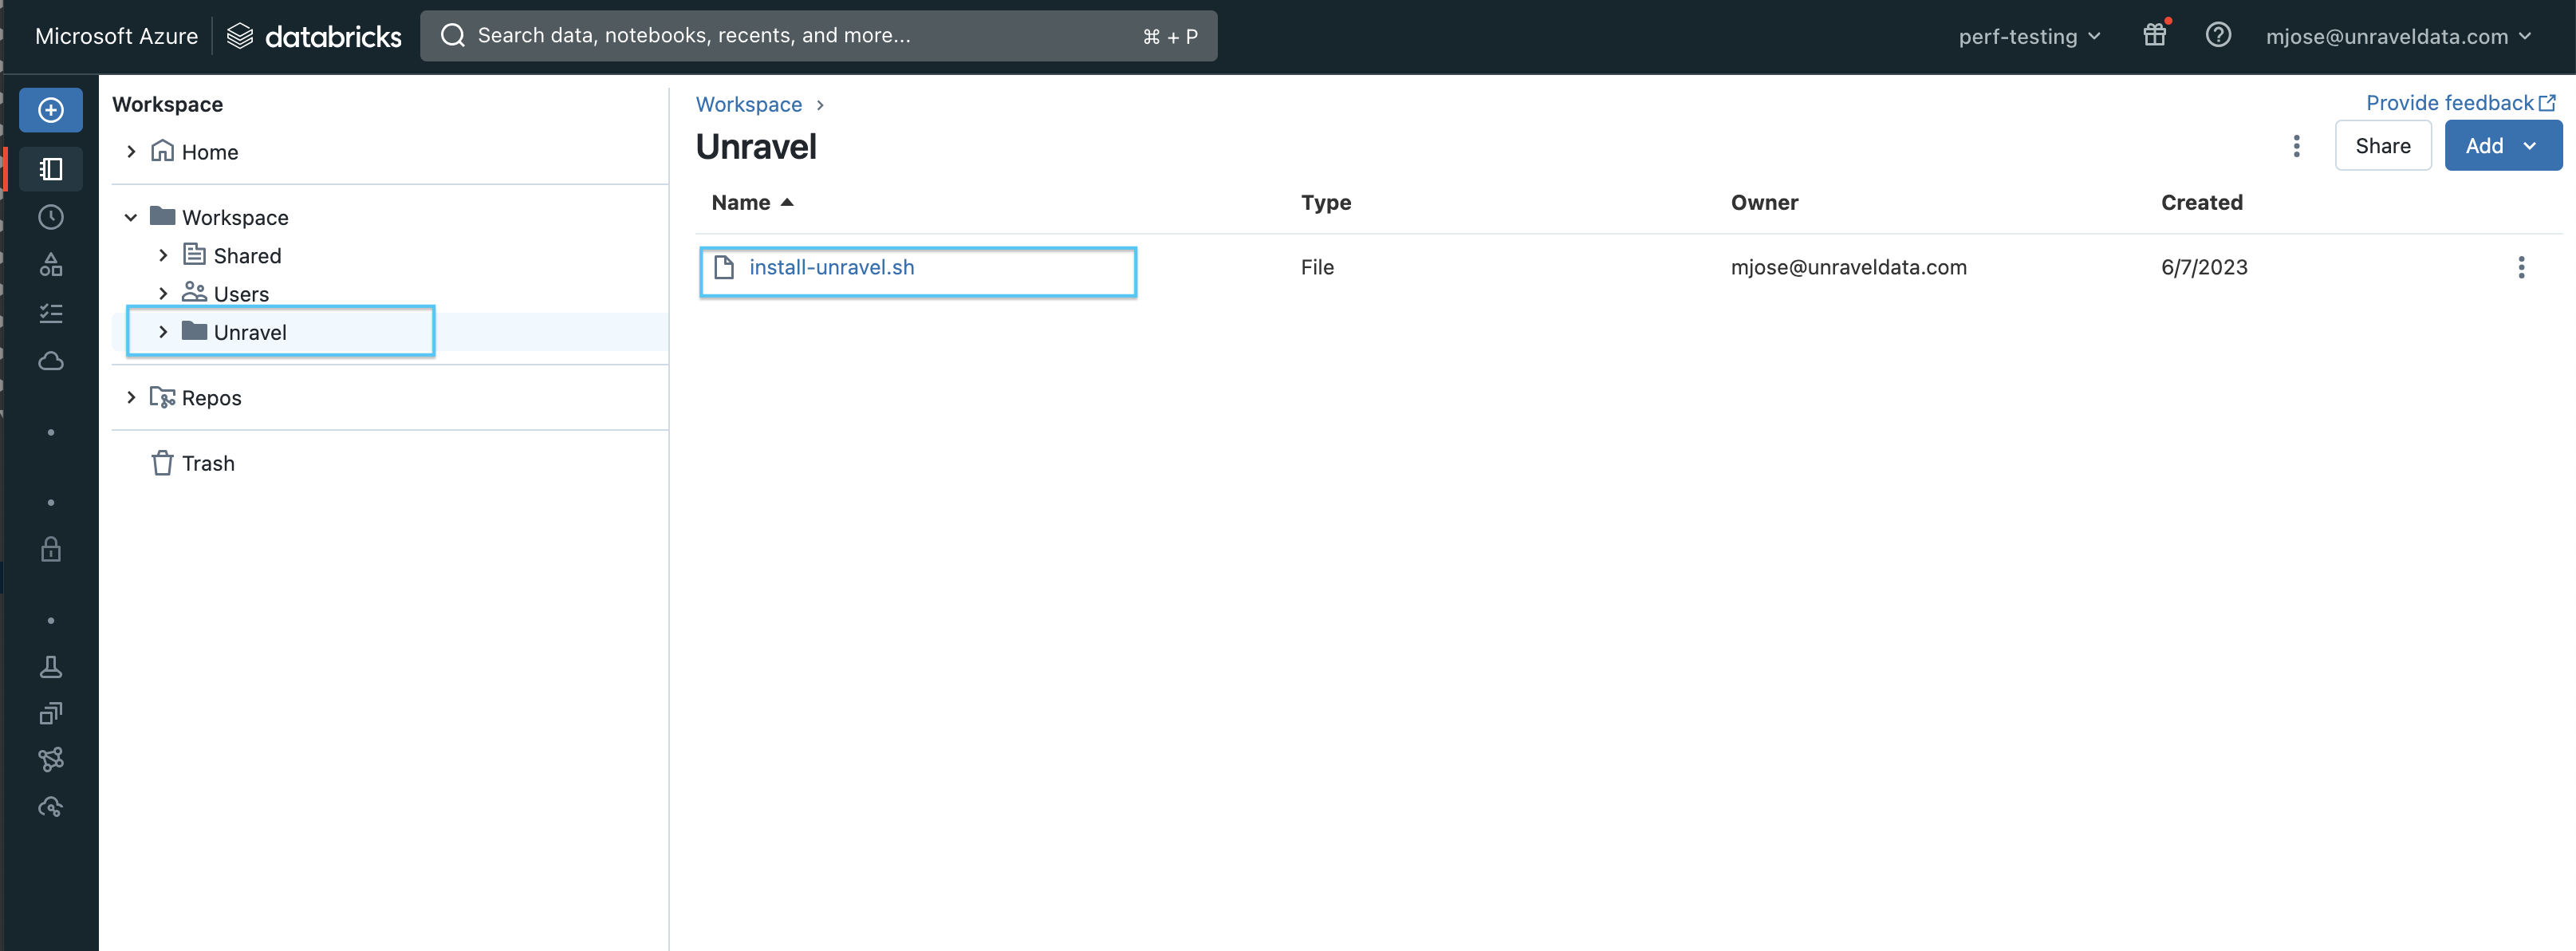
This script is copied as the Global init script for new installations, upgrades, or when you add a new workspace. If it does not copy automatically, you can manually copy it from this file: Unravel/install-unravel.sh
Configuring the cluster init script
You can now configure the cluster init script from the workspace by following these steps.
Go to Unravel UI, and click Manage > Workspaces, and select the Workspace URL.
Sign in to the workspace.
Access the required cluster you want to monitor through Unravel.
Set the path as: /unravel/install-unravel.sh.

Note
Prior to configuring the new cluster-level init script, ensure you remove any existing cluster-level init script configurations that are pointing to the DBFS location. For cluster-level init script setup, make sure to configure it using the workspace file path: /unravel/install-unravel.sh.
Managing tokens for workspace access
If you have a premium workspace and the workspace access control is enabled, you must provide the appropriate tokens when adding a workspace. The type of token required depends on whether the workspace is an Admin workspace or a read-only (RO) workspace.
Admin workspaces
Admin access token
Token of a user who has Can Manage permission on Workspace
Read-only (RO) workspaces
Navigate to Workspace Settings > Access Tokens > Manage Tokens and generate a Read-Only Access Token.
Setting the backward compatibility for init scripts
To maintain the backward compatibility of your init scripts, run the following command:
<Installation_directory>/unravel/manager config databricks copy-to-dbfs --id <workspace-id> --unsafe-copy-init-to-dbfsThis command copies the init scripts to the DBFS (Databricks File System) location, specifically the dbin folder. By default, during workspace addition, updates, or Unravel upgrades, the dbin folder can be removed. However, running this command prevents its removal and guarantees that it is also transferred to the DBFS.
For example:
/opt/unravel/manager config databricks copy-to-dbfs --id 6679977360960347 --unsafe-copy-init-to-dbfs
Alternatively, you can use the --all option in the command instead of specifying --id for a single workspace. This streamlined approach ensures that the same step is applied to all currently registered or added workspaces in Unravel.
For example:
/opt/unravel/manager config databricks copy-to-dbfs
Run the insights_upgrade.sh script
The insight_upgrade.sh script be run after the upgrade. This script performs the following tasks:
Deletes older RealTimeLightProcessorEvent entries from the database and elasticsearch index.
Regenerates new NodeRightSizing events for certain clusters.
Go to {unravel_install_dir}/unravel/services/insights_worker_1_1
Run the insights_upgrade.sh script.
Regrouping multiple Spark worker instances for enhanced performance (Optional)
Caution
The following task requires planning and should be performed only in collaboration with Unravel support team. This is a one-time task.
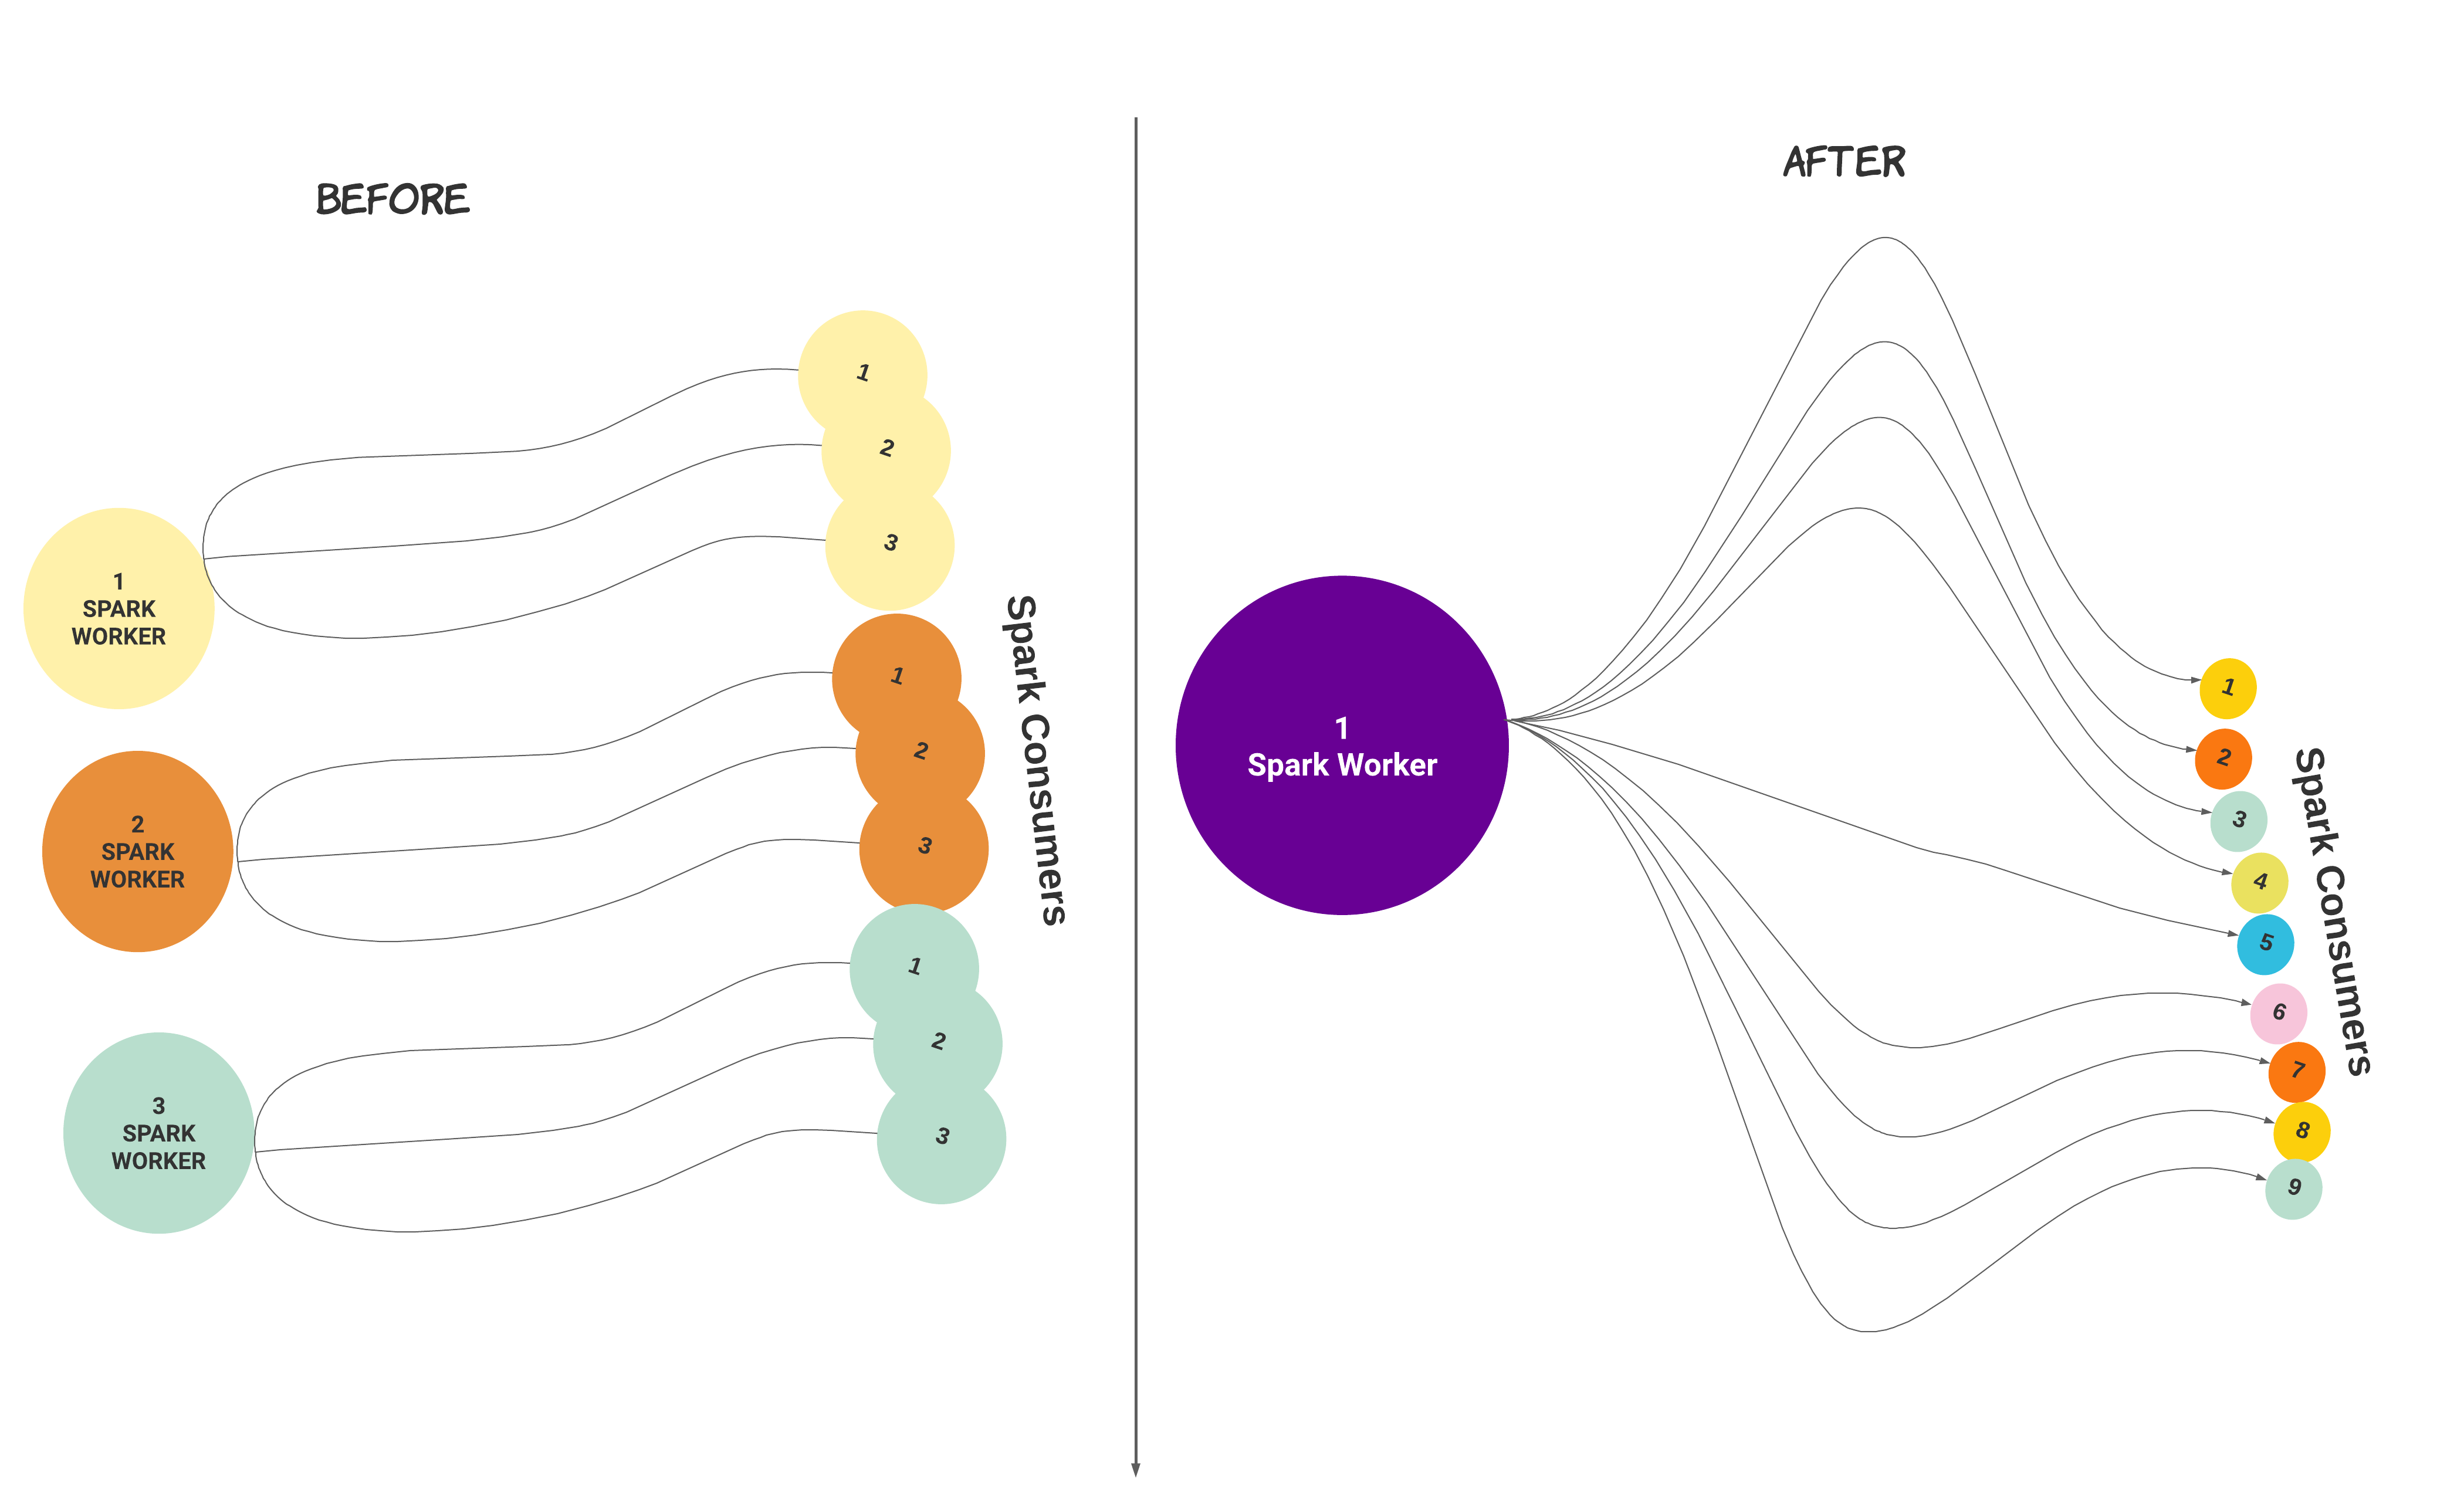
Spark worker is multi-threaded from Unravel version 4.7.8.0. After installation or upgrade, you can migrate a setup with multiple Spark worker instances with consumers to a setup with a single Spark Worker with multiple consumers.
When you run the following command, the number of Spark workers and the number of consumers configured get regrouped under a single Spark worker with an equivalent number of consumers.
In the following illustrated example, three Spark workers with three consumers each get regrouped into one Spark worker with nine consumers.
Caution
To avoid out-of-memory issues, you must review the memory configuration and ensure that you have sufficient memory.
To regroup multiple Spark worker instances with consumers, do the following:
Stop Unravel on the worker node.
/
<unravel_installation_directory>/unravel/manager stopCheck the number of Spark workers that are configured.
/
<unravel_installation_directory>/unravel/manager config worker showCheck the status of memory.
/
<unravel_installation_directory>/unravel/manager config memory showRun the following command:
<unravel_installation_directory>/unravel/manager config worker coalesce spark_workerApply the changes.
<Unravel installation directory>/unravel/manager config applyCheck the status of memory again to ensure that the total memory for the Spark worker is sufficient. If you want to set more memory per consumer, refer to Set memory for Spark worker per consumer.
/
<unravel_installation_directory>/unravel/manager config memory showStart Unravel on the Spark worker node.
/
<unravel_installation_directory>/unravel/manager start
Troubleshooting
PostgreSQL fails while upgrading
PostgreSQL is upgraded to 15.5 from Unravel version 4.7.9.4 onwards. However, if the PostgreSQL fails during the upgrade, do any of the following based on the urgency:
This is the recommended method.
Caution
You can perform a rollback to troubleshoot the PostgreSQL upgrade failure only with Unravel support assistance. The preferred solution is to fix the upgrade issues and roll forward. The rollback should only be done if the upgrade issue cannot be resolved in a timely manner, and Unravel must be brought back online.
When the PostgreSQL upgrade fails, you must fix the upgrade issues, roll forward with the upgrade, and do the following:
Delete the failed progress upgrade directory.
rm /
<Installation directory>/unravel/data/postgres_1.upgUpdate
unravel/data/conf/unravel.effective.yamlto point the PostgreSQL home back to the original version. For example, if you upgrade from 4.7.9.2.3456 to 4.7.9.4.4321 and the PostgreSQL upgrade fails, you must update theunravel.effective.yamlfile as follows:home: pgsql: /opt/unravel/version/4.7.9.4.4321
Should be updated to

home:
  pgsql: /opt/unravel/version/4.7.9.2.3456
Complete the upgrade with the setup command instead of using the manager utility.
unravel/versions/
{NEW}/setup --config unravel/data/conf/unravel.yaml