Databricks workspace setup guide
This section provides instructions to connect a Databricks workspace to Unravel SaaS.
Enable Personal Access Token in Databricks.
Note
If you are using Service Principals for generating the Personal Access Token (PAT), refer to Manage service principals for the steps to enable the PAT on Databricks for AWS and Manage service principals for the steps to enable PAT on Databricks for Azure.
Enable personal access token authentication for the workspace.
Go to your workspace, and from the dropdown located in the upper right corner, select Settings.
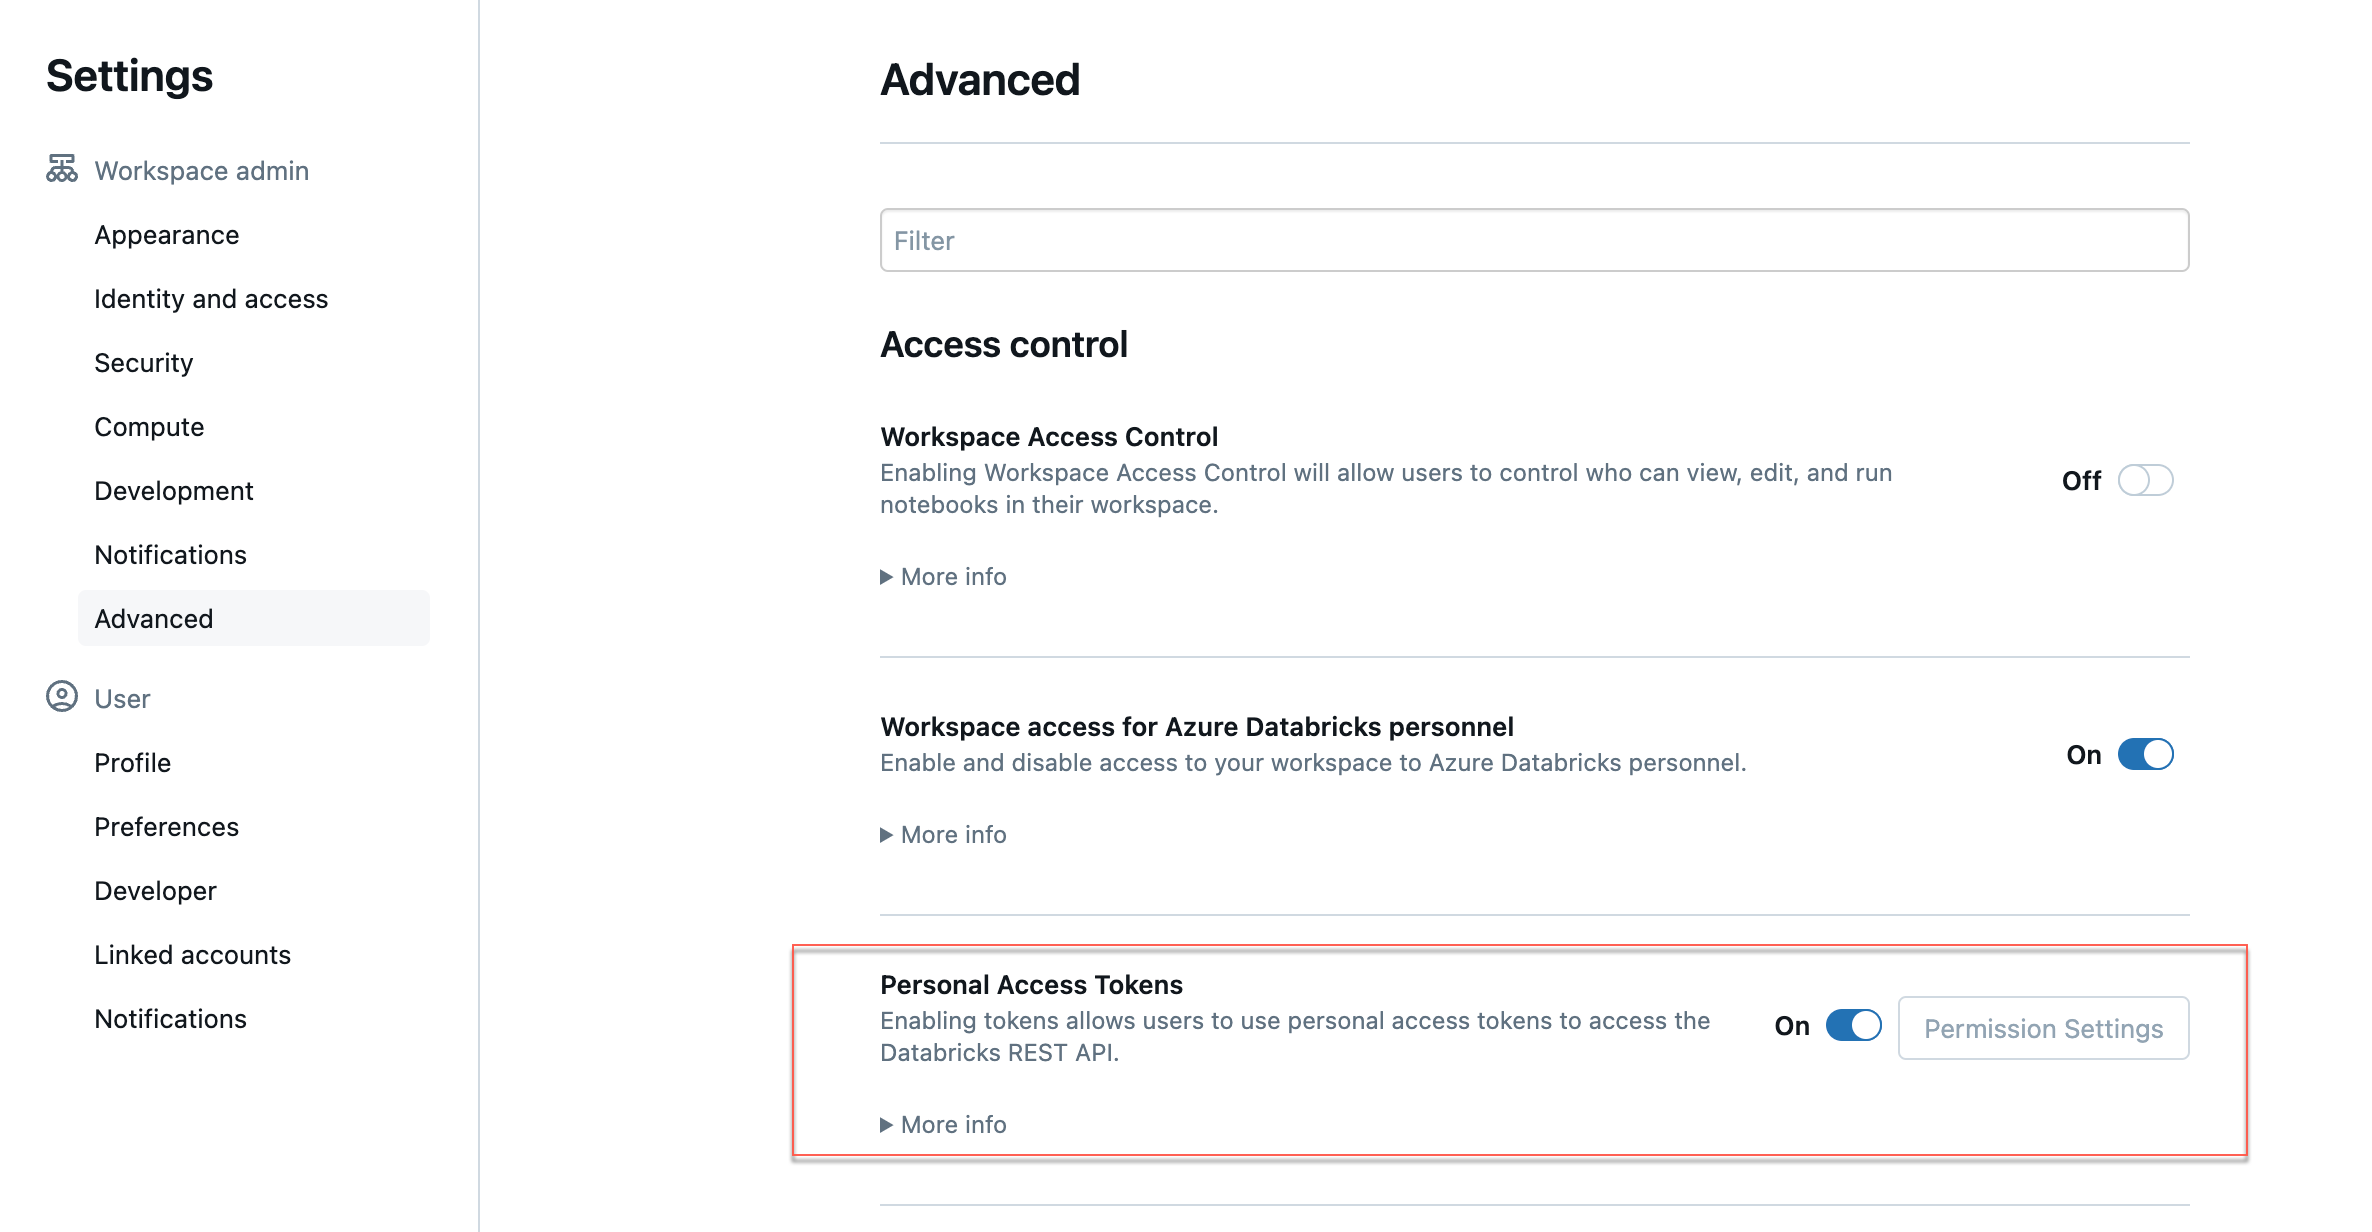
Click the Advanced tab and click the Personal Access Tokens toggle. For more details, refer to Manage personal access tokens.
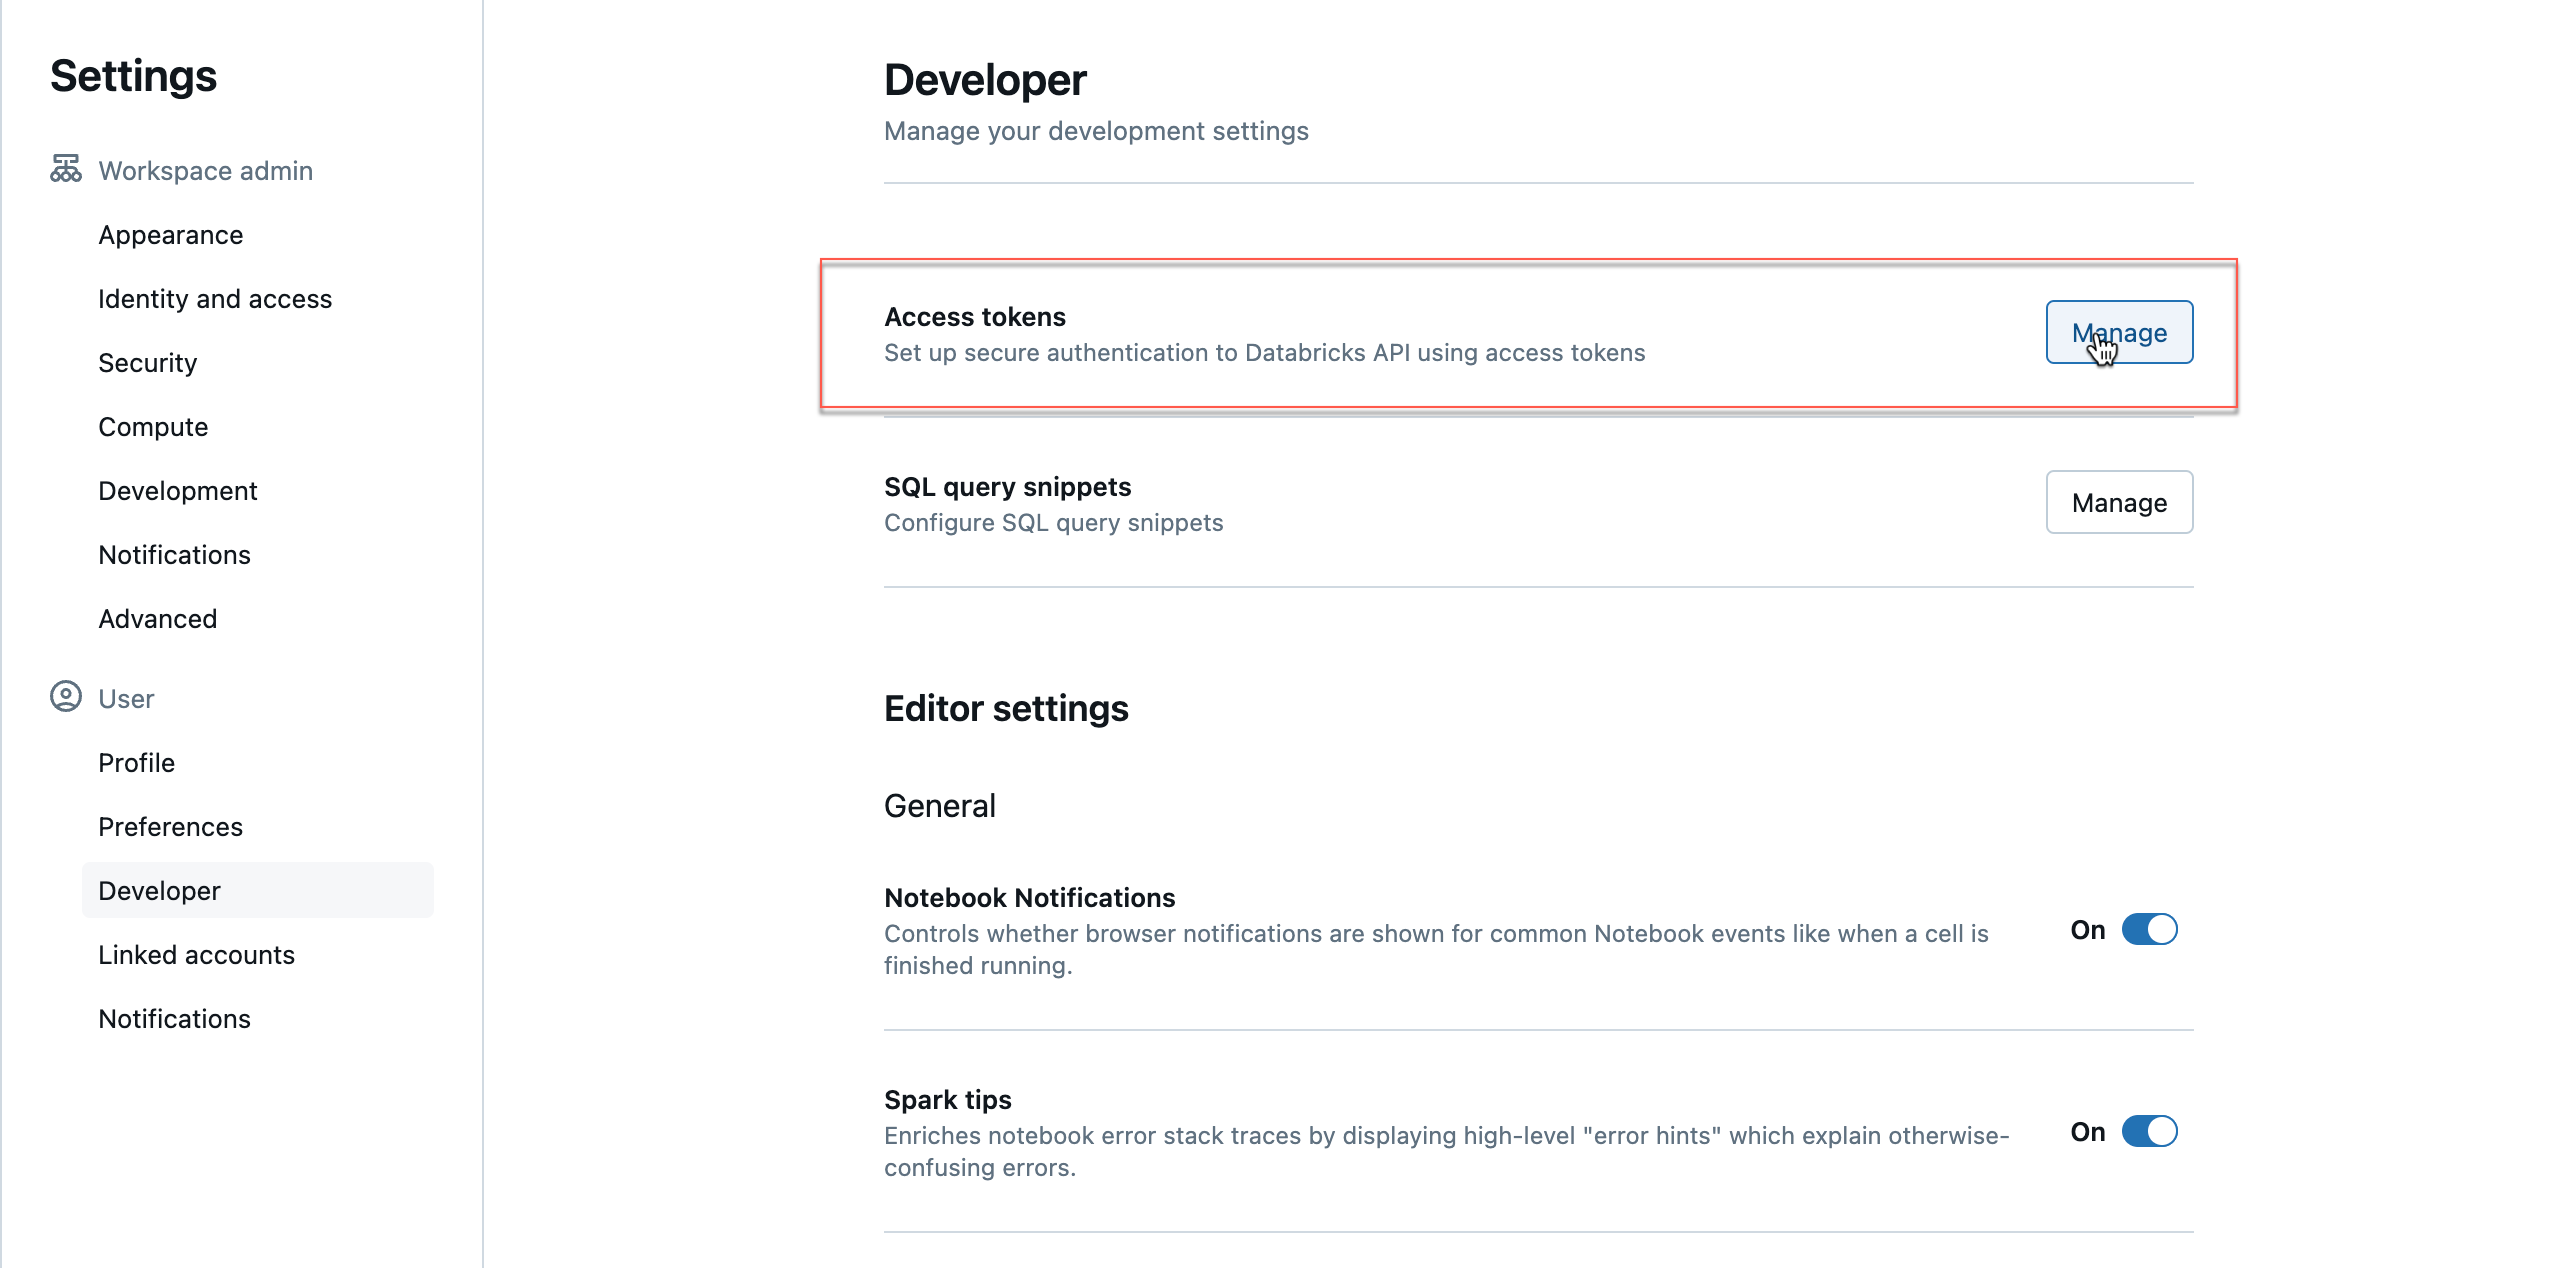
Create a Databricks personal access token for your Databricks workspace user.
Go to your workspace, and from the dropdown located in the upper right corner, select Settings.
Click Developer > Access Tokens > Manage. The Access Tokens page is displayed.
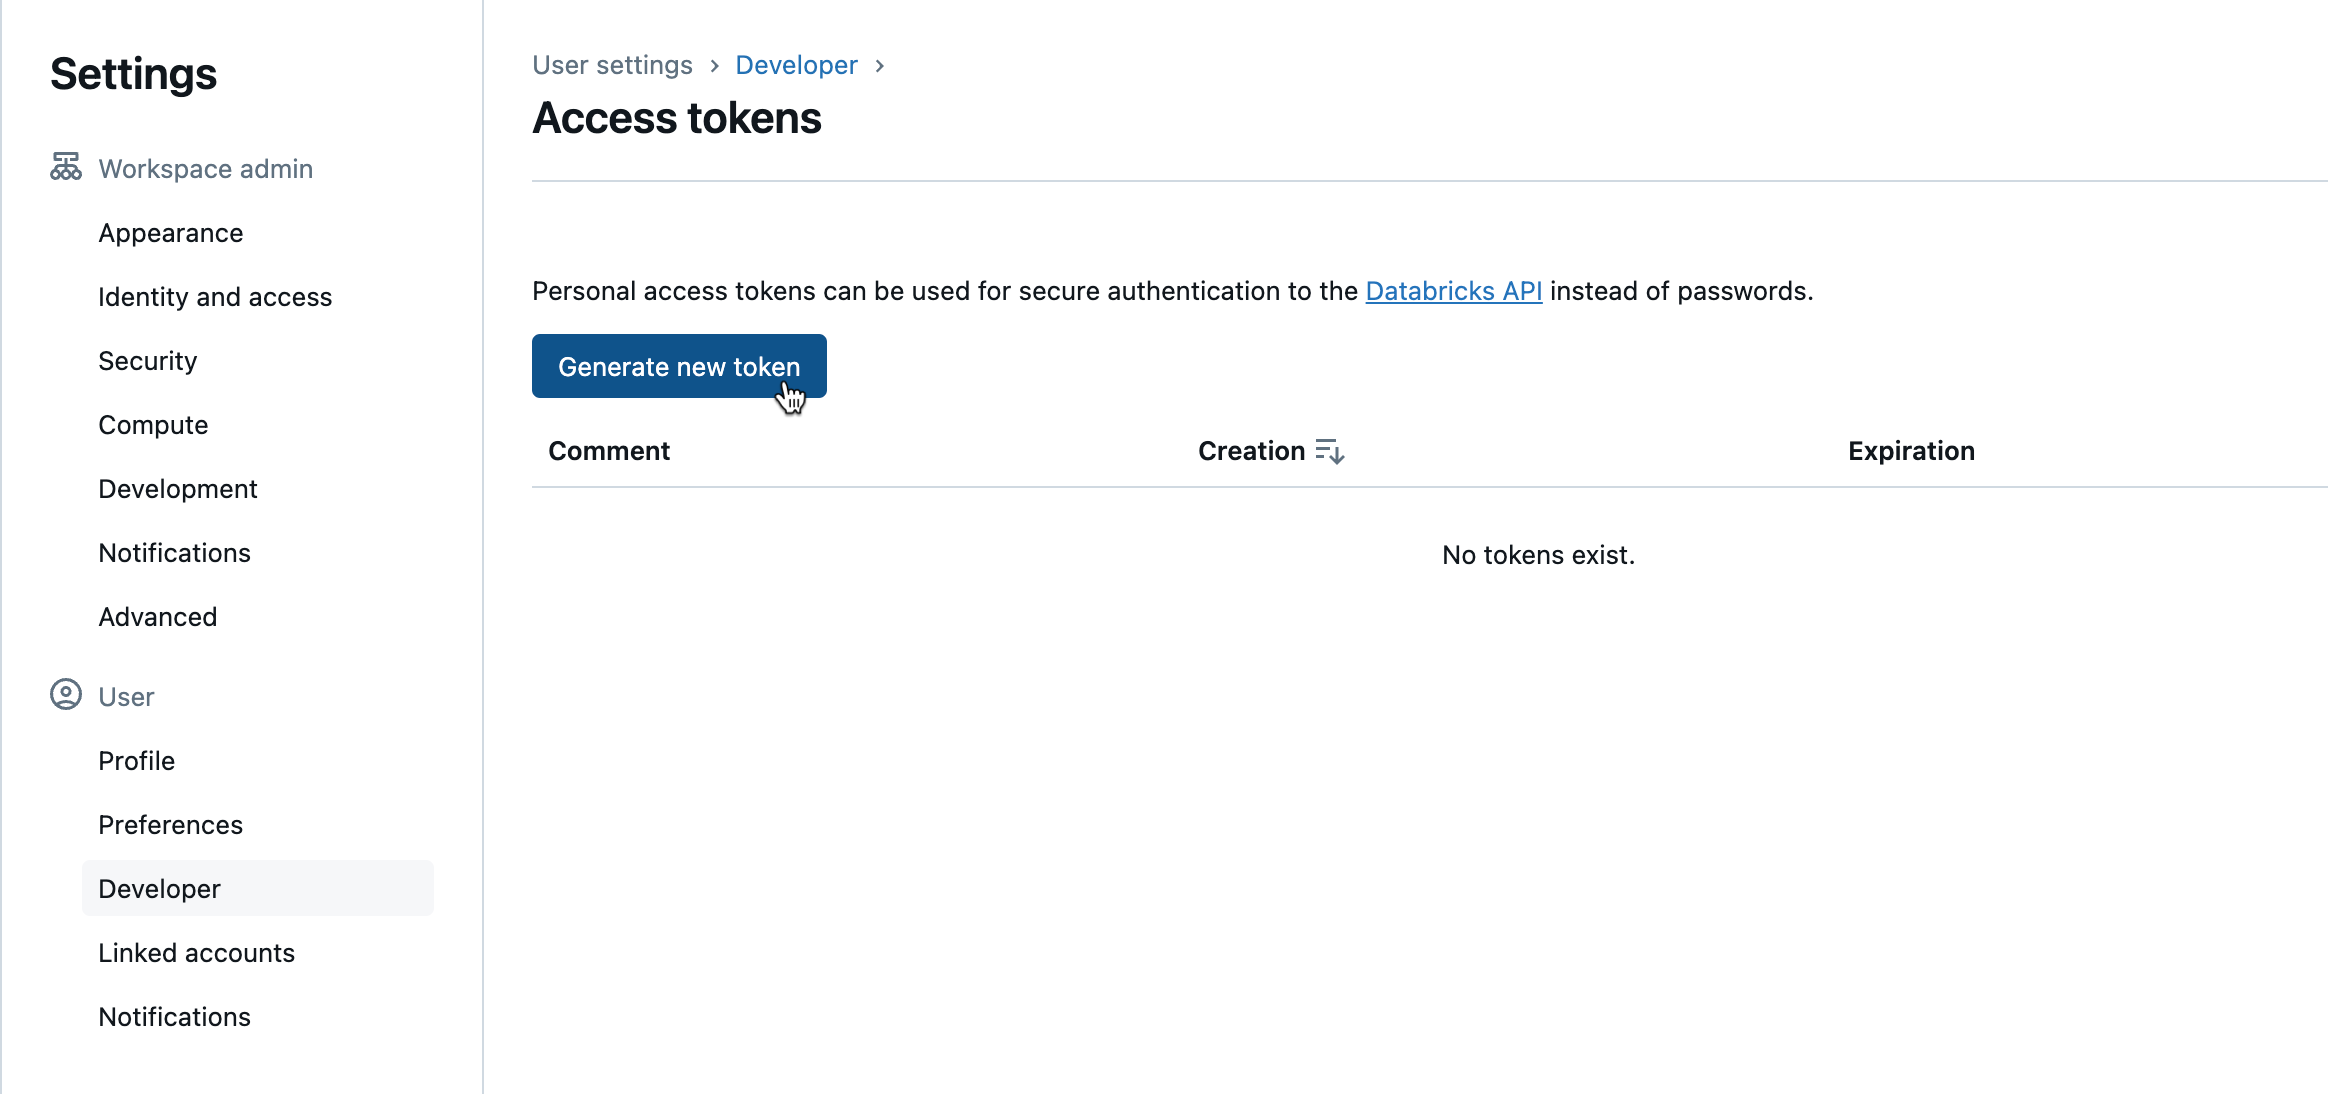
Click the Generate New Token button. The new token is generated. You must save this token and keep it handy to register a new Databricks workspace. For more details, refer to Authentication using Databricks personal access tokens.
Register a new Databricks workspace or edit details of an existing Databricks workspace.
Sign in to Unravel UI, and from the upper right, click
 > Workspaces. The Workspaces Manager page is displayed.
Click Add Workspace. The Add Workspace dialog box is displayed. Enter the following details:

Field
Description
Workspace Id
Databricks workspace ID can be found in the Databricks URL.
The numbers shown after o= in the Databricks URL become the workspace ID.
For example, in this URL:https://<databricks-instance>/?o=3205148689792956, the Databricks workspace ID is the number after o=, which is 3205148689792956.

Workspace Name
Databricks workspace name. A name for the workspace. For example,
ACME-Workspace. The Workspace name can be got from the Azure portal.Instance (Region) URL
Regional URL where the Databricks workspace is deployed. Specify the complete URL. The expected format is protocol://dns or ip(:port). Ensure that the URL does not end with a slash. For example, a valid input is: https://eastus.azuredatabricks.net. An invalid input is: https://eastus.azuredatabricks.net/.
The URL can be got from the Azure portal.
Tier
Select a subscription option from: Standard, Premium, Enterprises, and Dedicated. For Databricks Azure, you can get the pricing information from the Azure portal. For Databricks AWS you can get detailed information about pricing tiers from Databricks AWS pricing.
Token
Use the personal access token to secure authentication to the Databricks APIs. You can generate the token from your Databricks workspace.
Contact Unravel support for generating a personal access token through SPN on Databricks for AWS and Azure.
See Authentication using Databricks personal access tokens for more details.
Note
Users with admin or non-admin roles can create personal access tokens. Non-admin users must ensure to fulfill certain requirements before creating personal access tokens.
Note
After you click Add, it takes around 2-3 minutes to register the Databricks Workspace with Unravel.
Configure the Databricks cluster with Unravel using Global init script:
Global init script applies the Unravel configurations to all clusters in a workspace. The following steps take you through the cluster configuration with Global init. If you are configuring the clusters without Global init, proceed to the next step.
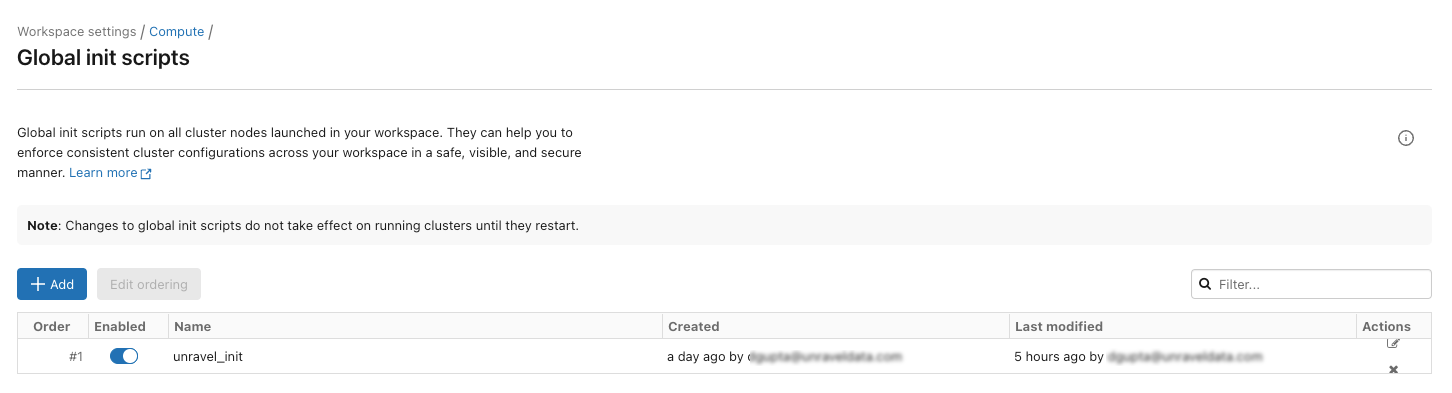
Global init is deployed automatically on the Workspace and needs to be enabled manually from the location shown in the following image:
Go to your workspace, and from the dropdown located in the upper right corner, select Admin Settings.
From Settings, click Compute and then click Manage next to Global init scripts. The Global init scripts page is shown.
Use the toggle key under the Enabled column to enable the Global init scripts.
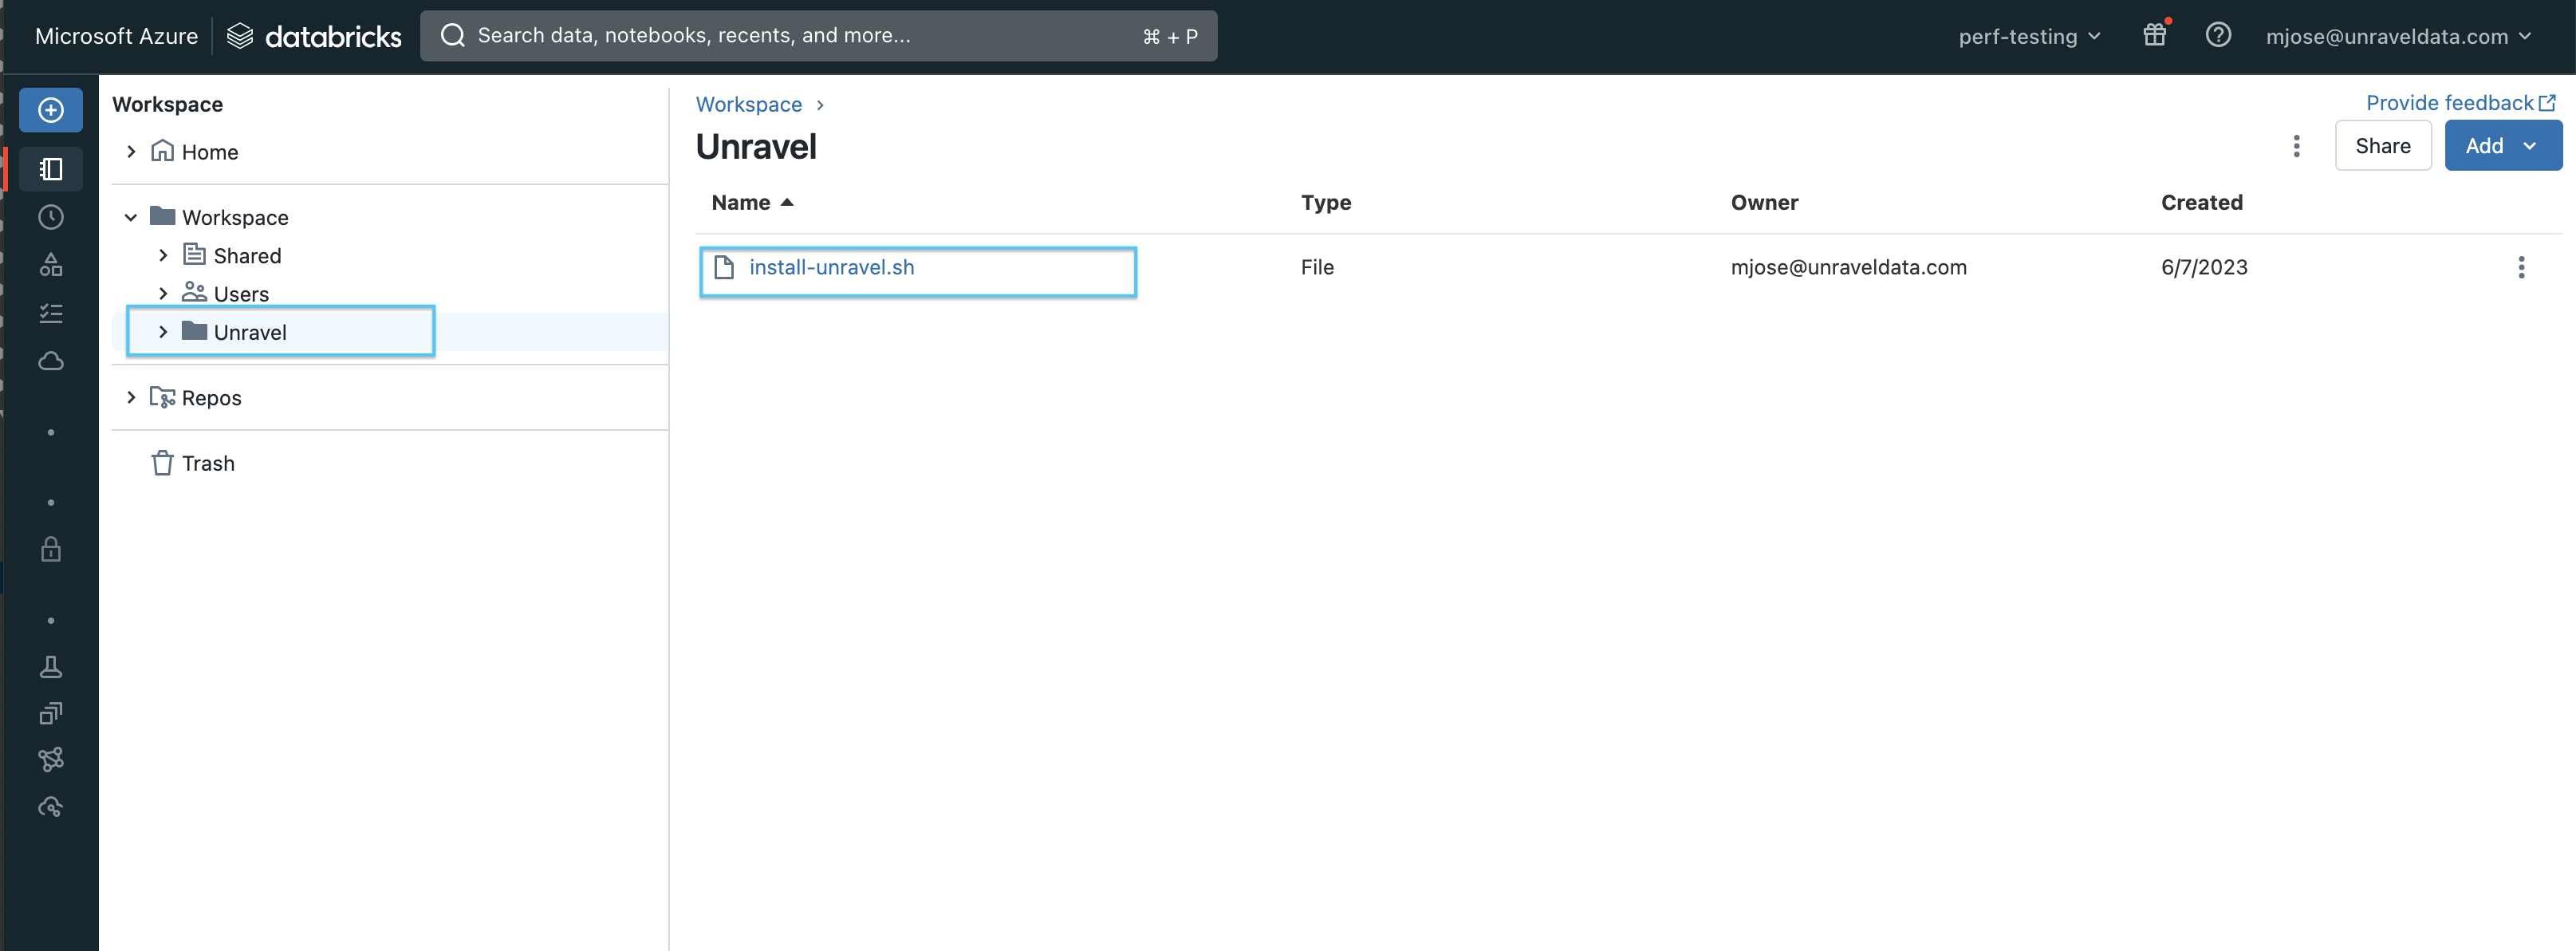
You can also find the Global initialization script in your workspace at this path: /Workspace/Unravel/install-unravel.sh
If it is not deployed automatically, you can do one of the following
Use this script as a Cluster init script.
Add Unravel configuration to Databricks clusters using the Global init script by referring to these instructions.
Note
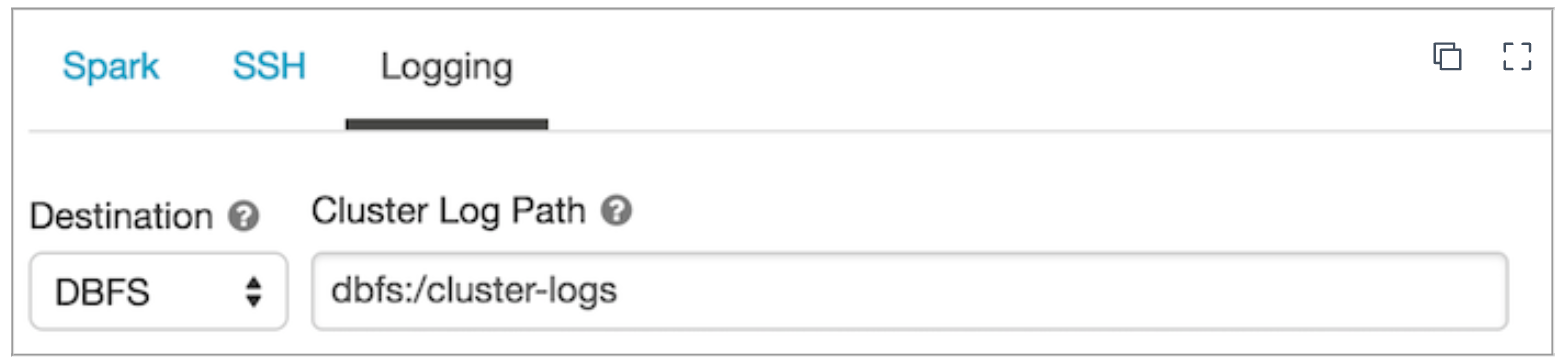
Cluster logging should be enabled at the cluster level. See Logging in Cluster init script for instructions.
Under Logging, set Destination to DBFS and copy the below snippet as Cluster Log Path.
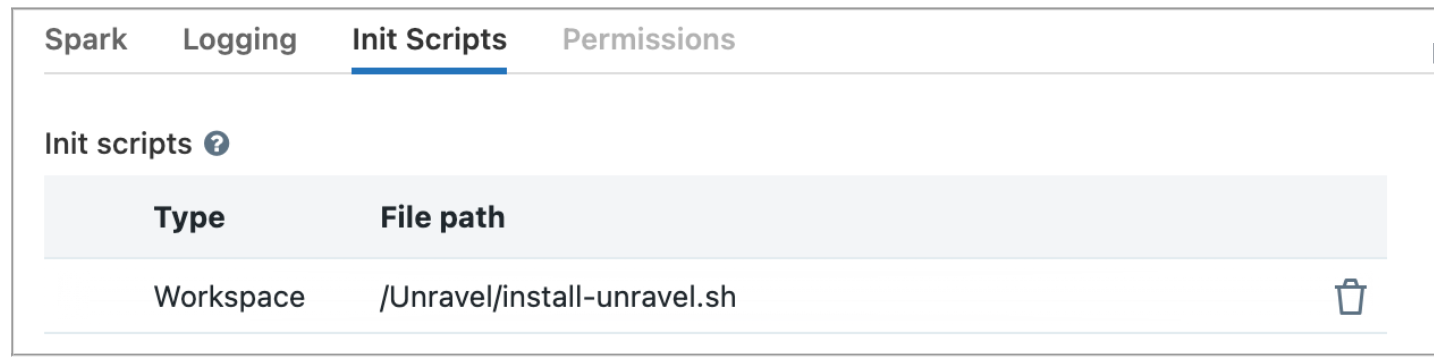
Under Init Script, set Destination to Workspace, copy the snippet below as the Init Script Path, and click Add.
From your Azure Workspace, access Settings > Advanced and apply the following settings:
Requirements for non-admin tokens
Note
If you are using Service Principals for generating the Personal Access Token (PAT), refer to Manage service principals for the steps to enable the PAT on Databricks for AWS and Manage service principals for the steps to enable PAT on Databricks for Azure.