Enabling SAML Authentication for Unravel User
Follow these steps to set up SAML authentication for Unravel using Microsoft Entra ID.
Create a New Entra ID Application
Access your organization’s Entra ID portal and log in.
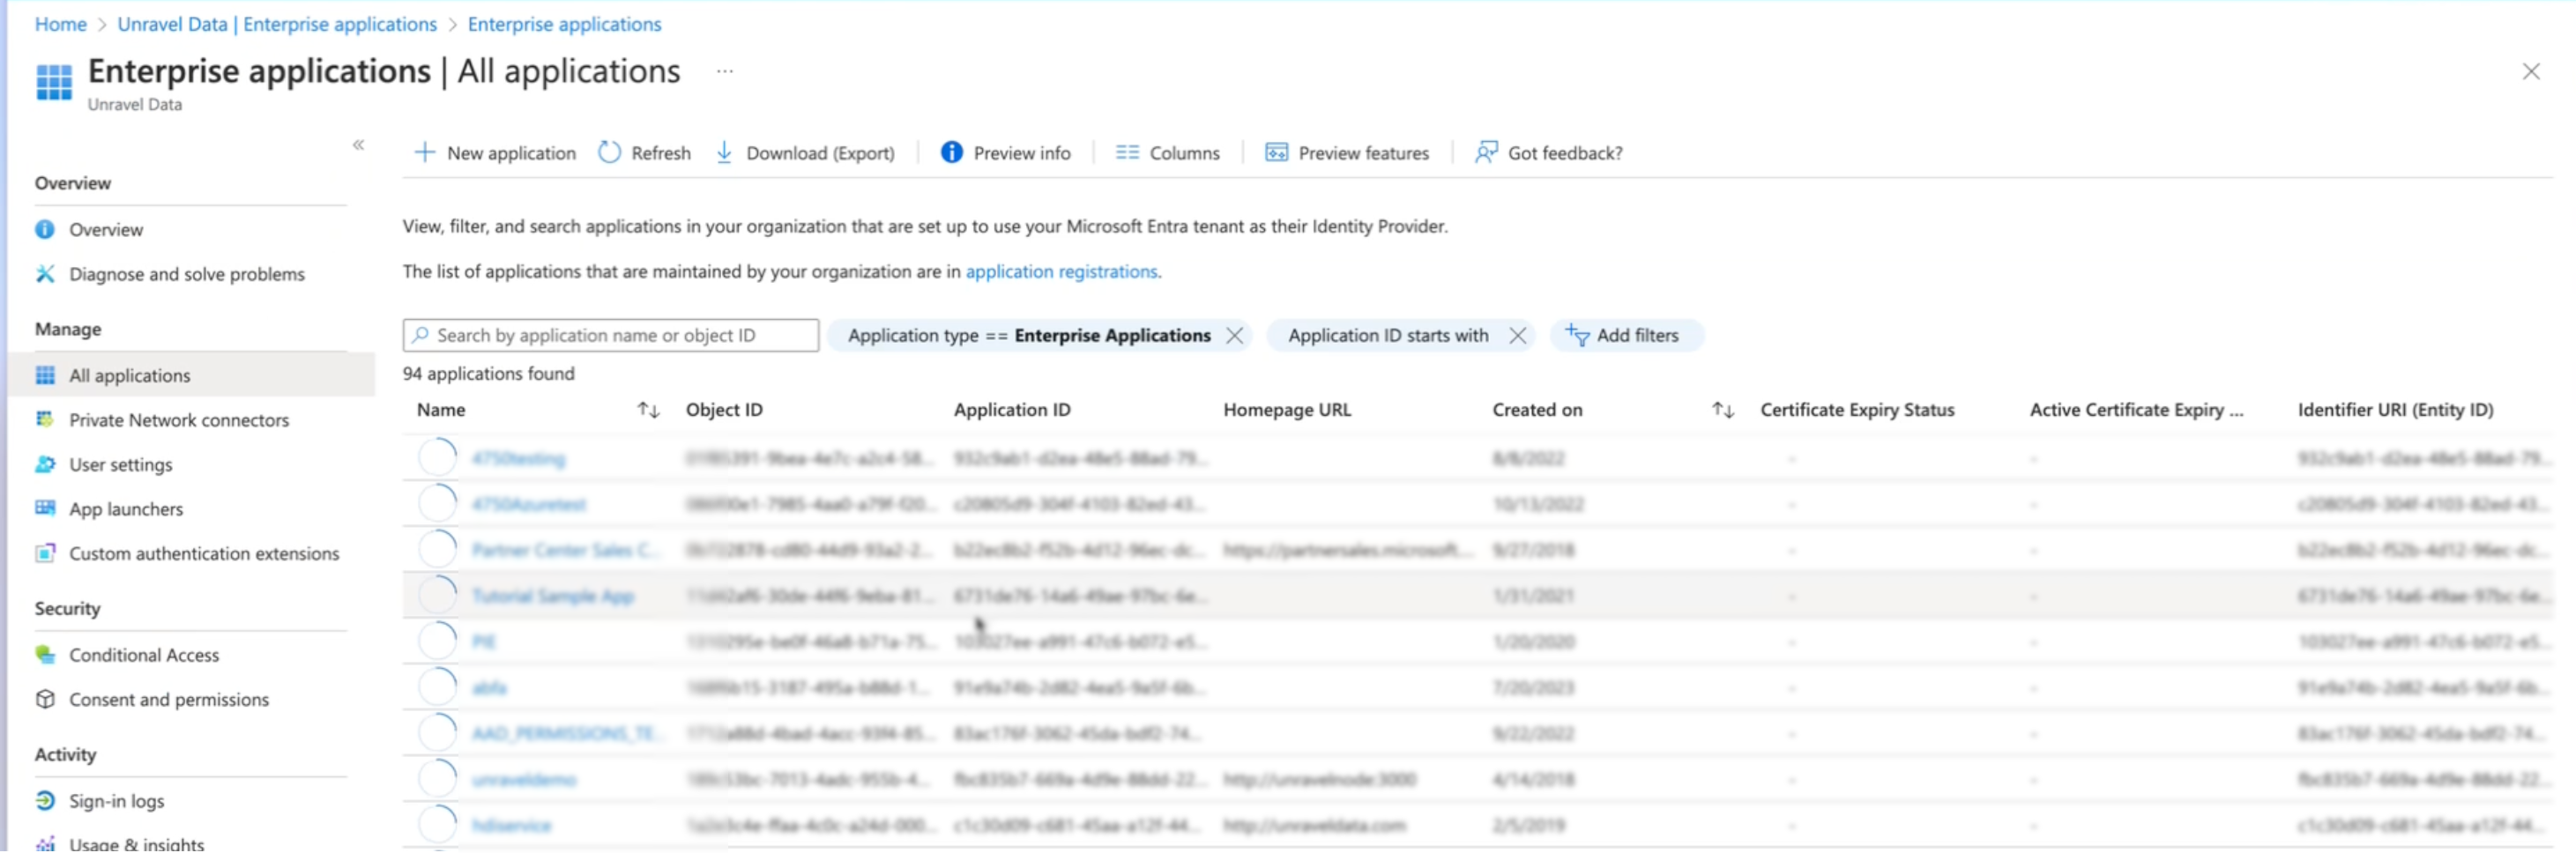
Navigate to Enterprise applications and click on New Application.
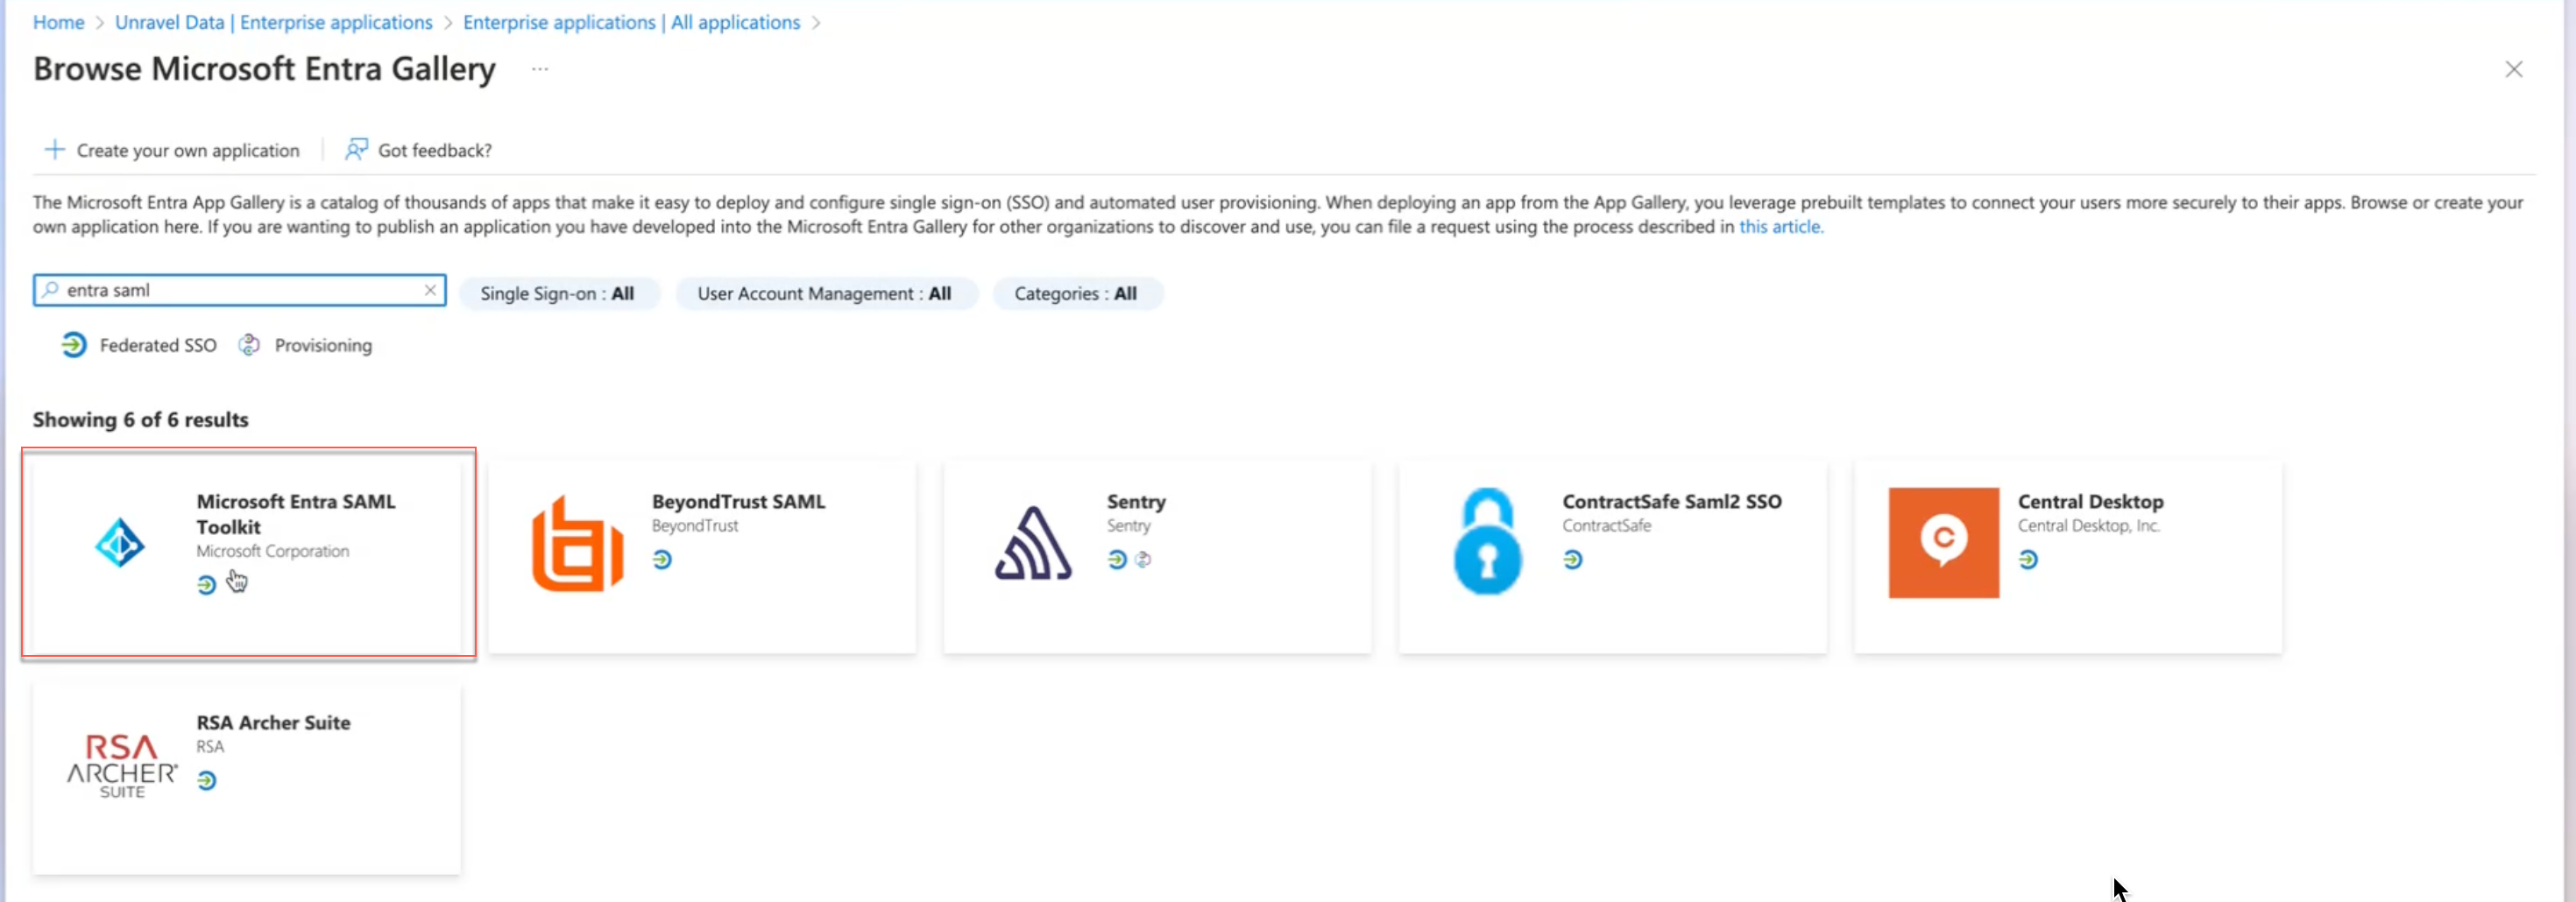
Search for SAML and select Entra SAML.
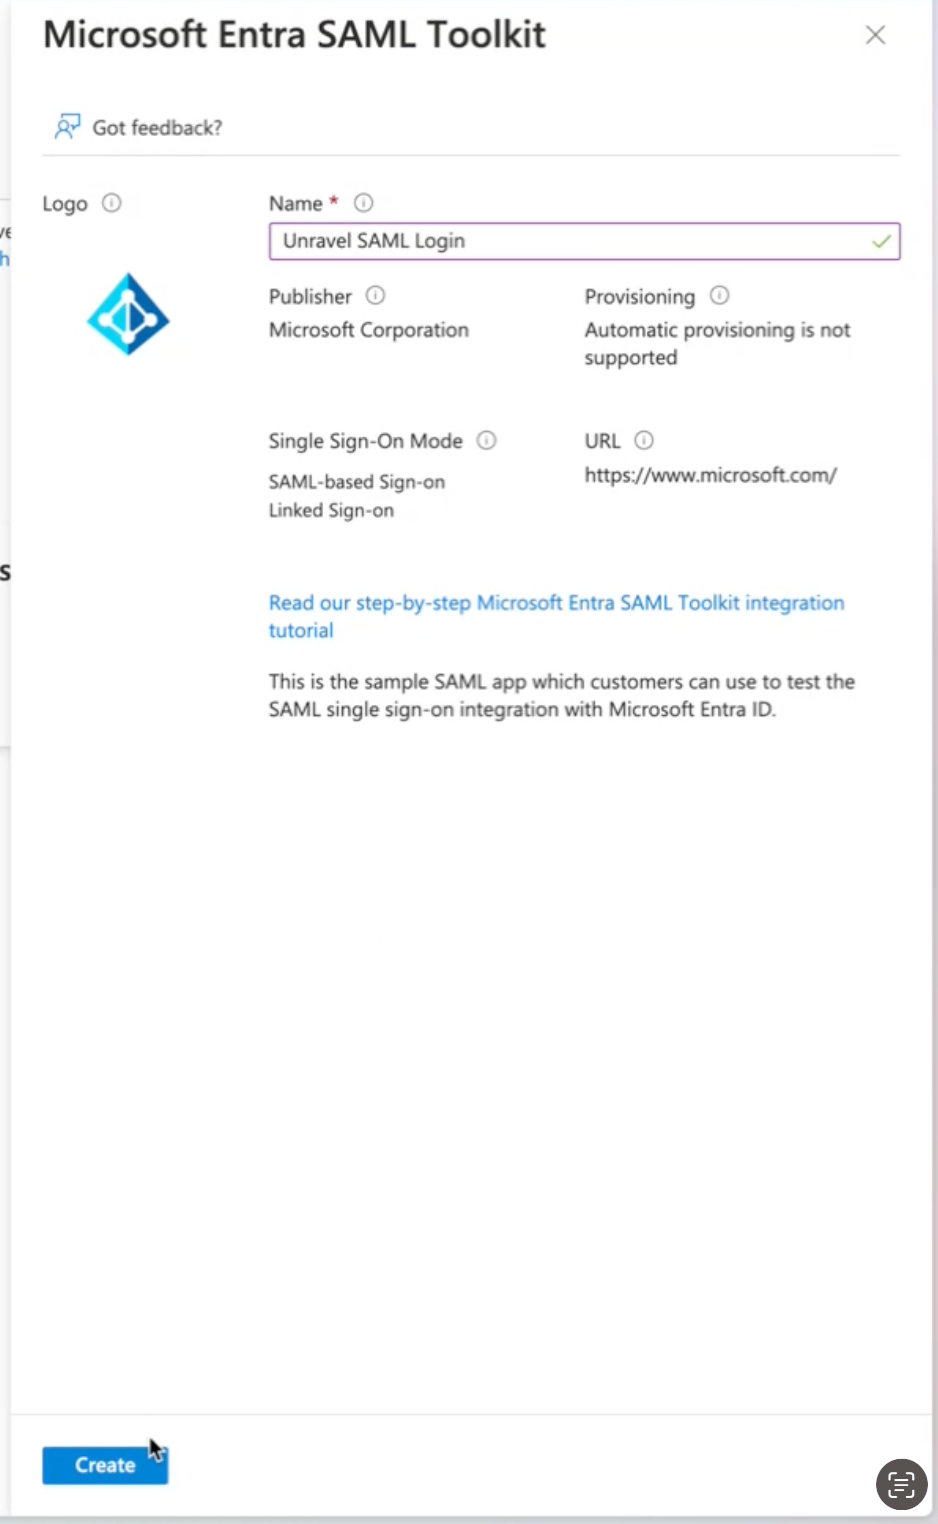
Give a name for the application. For example, Unravel SAML Login and click Create.
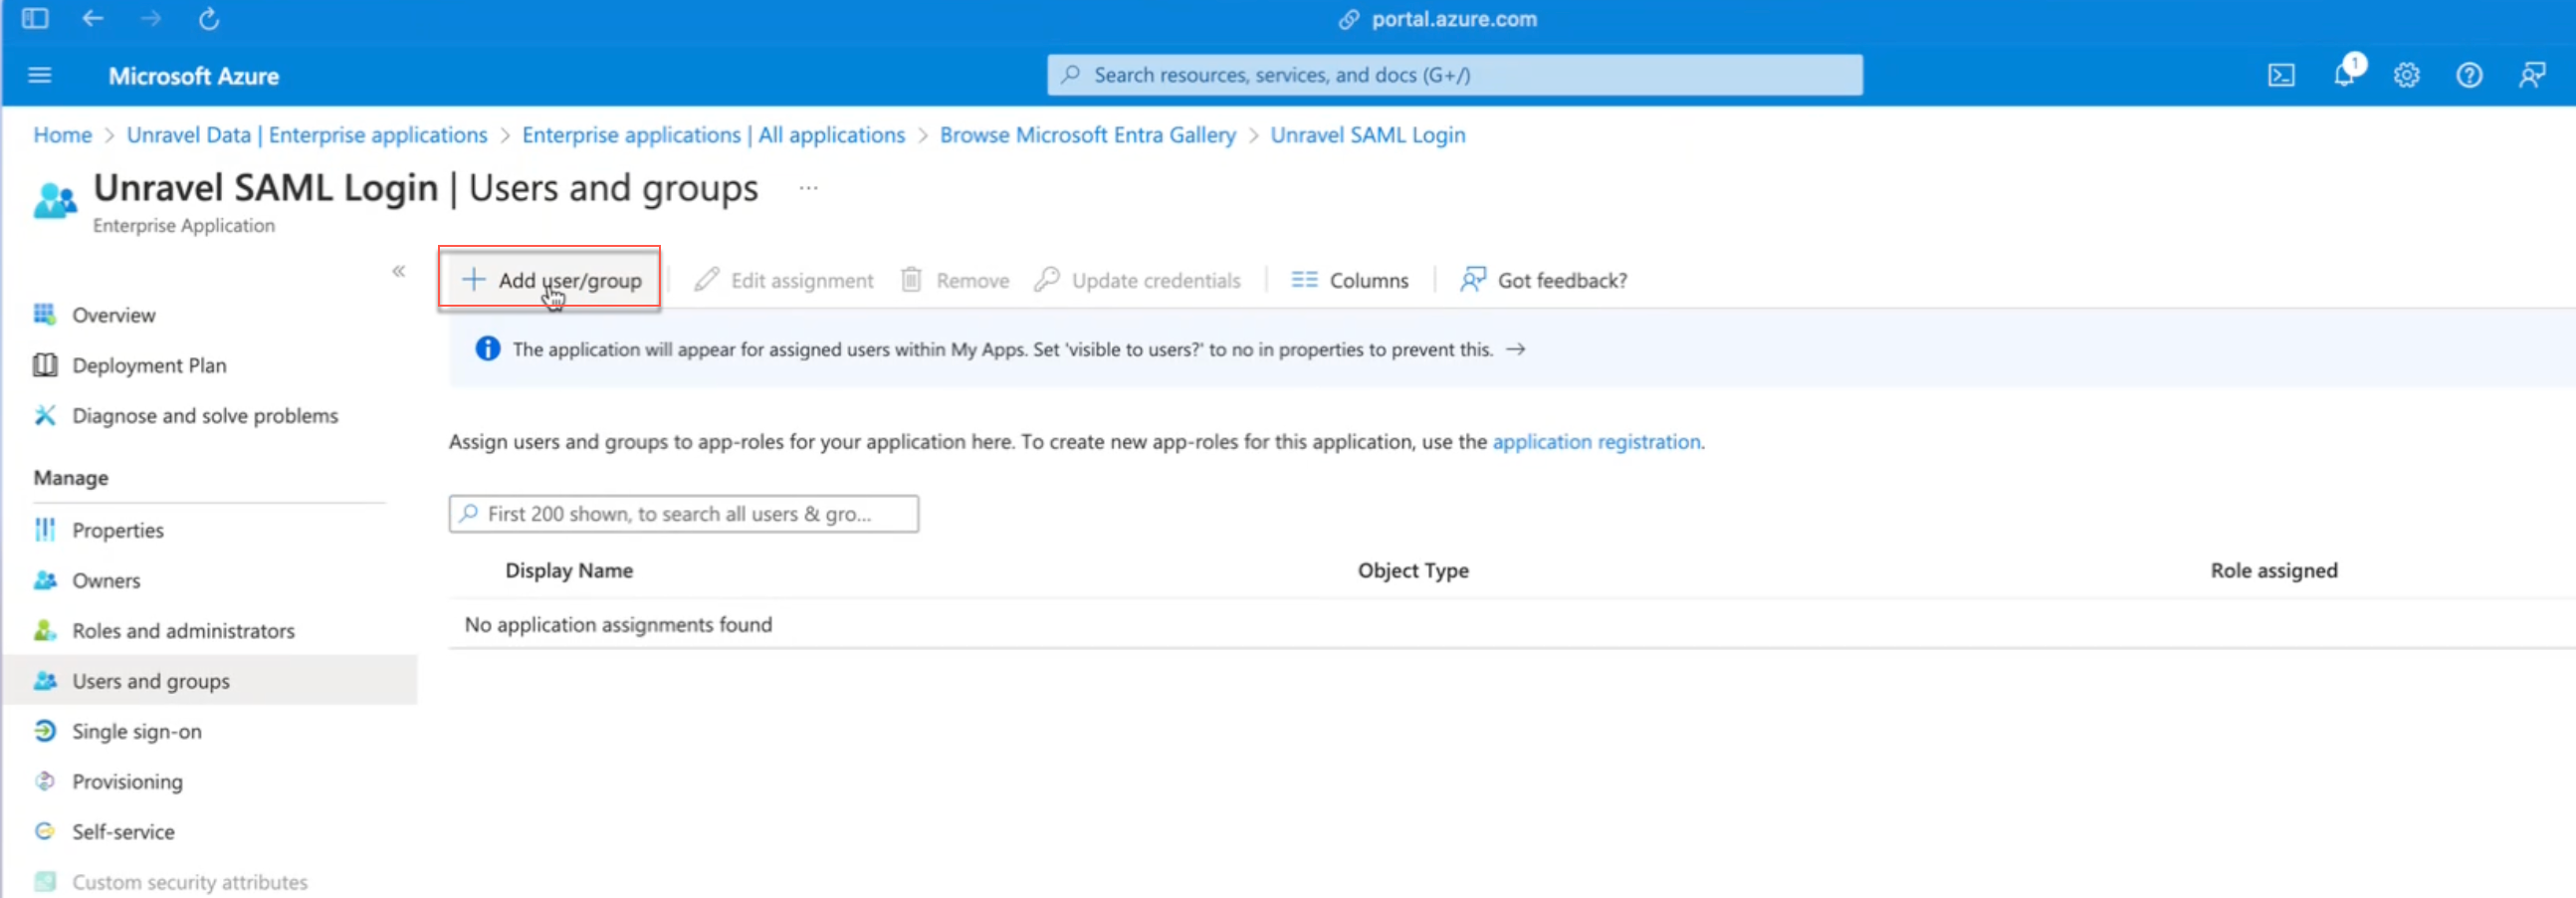
Add a User to the Application
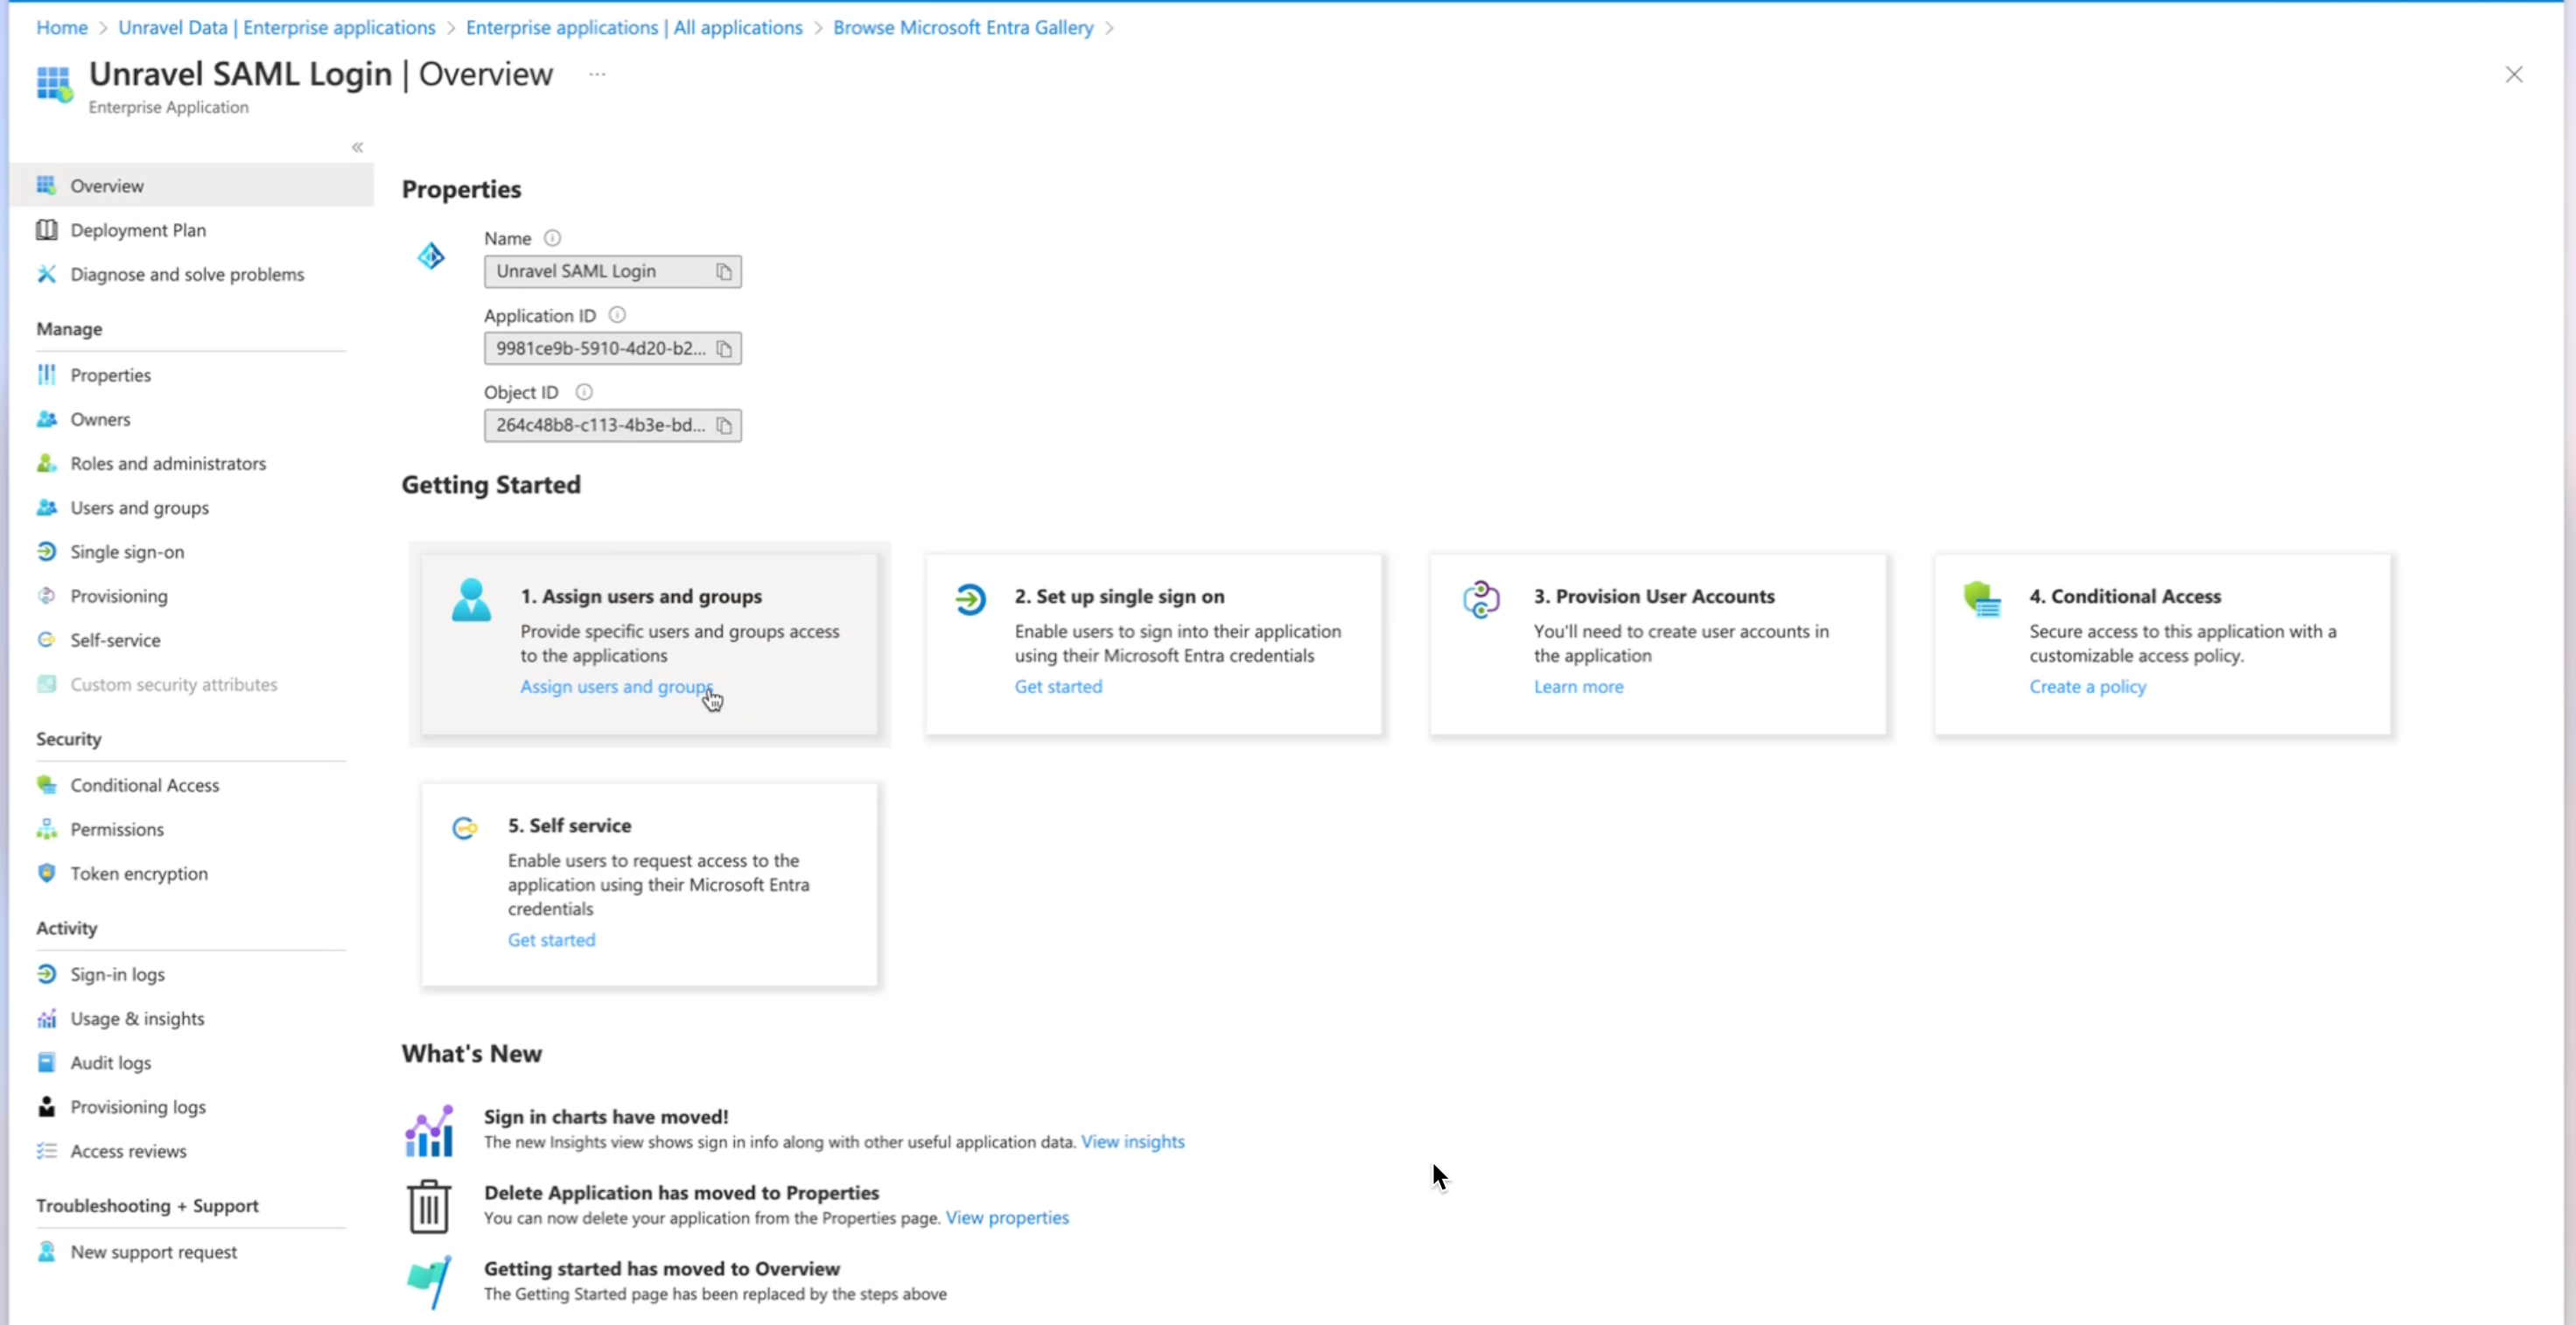
Access the Overview page of the application that you have created.
Select Assign Users and Groups.
Select Add user/group.
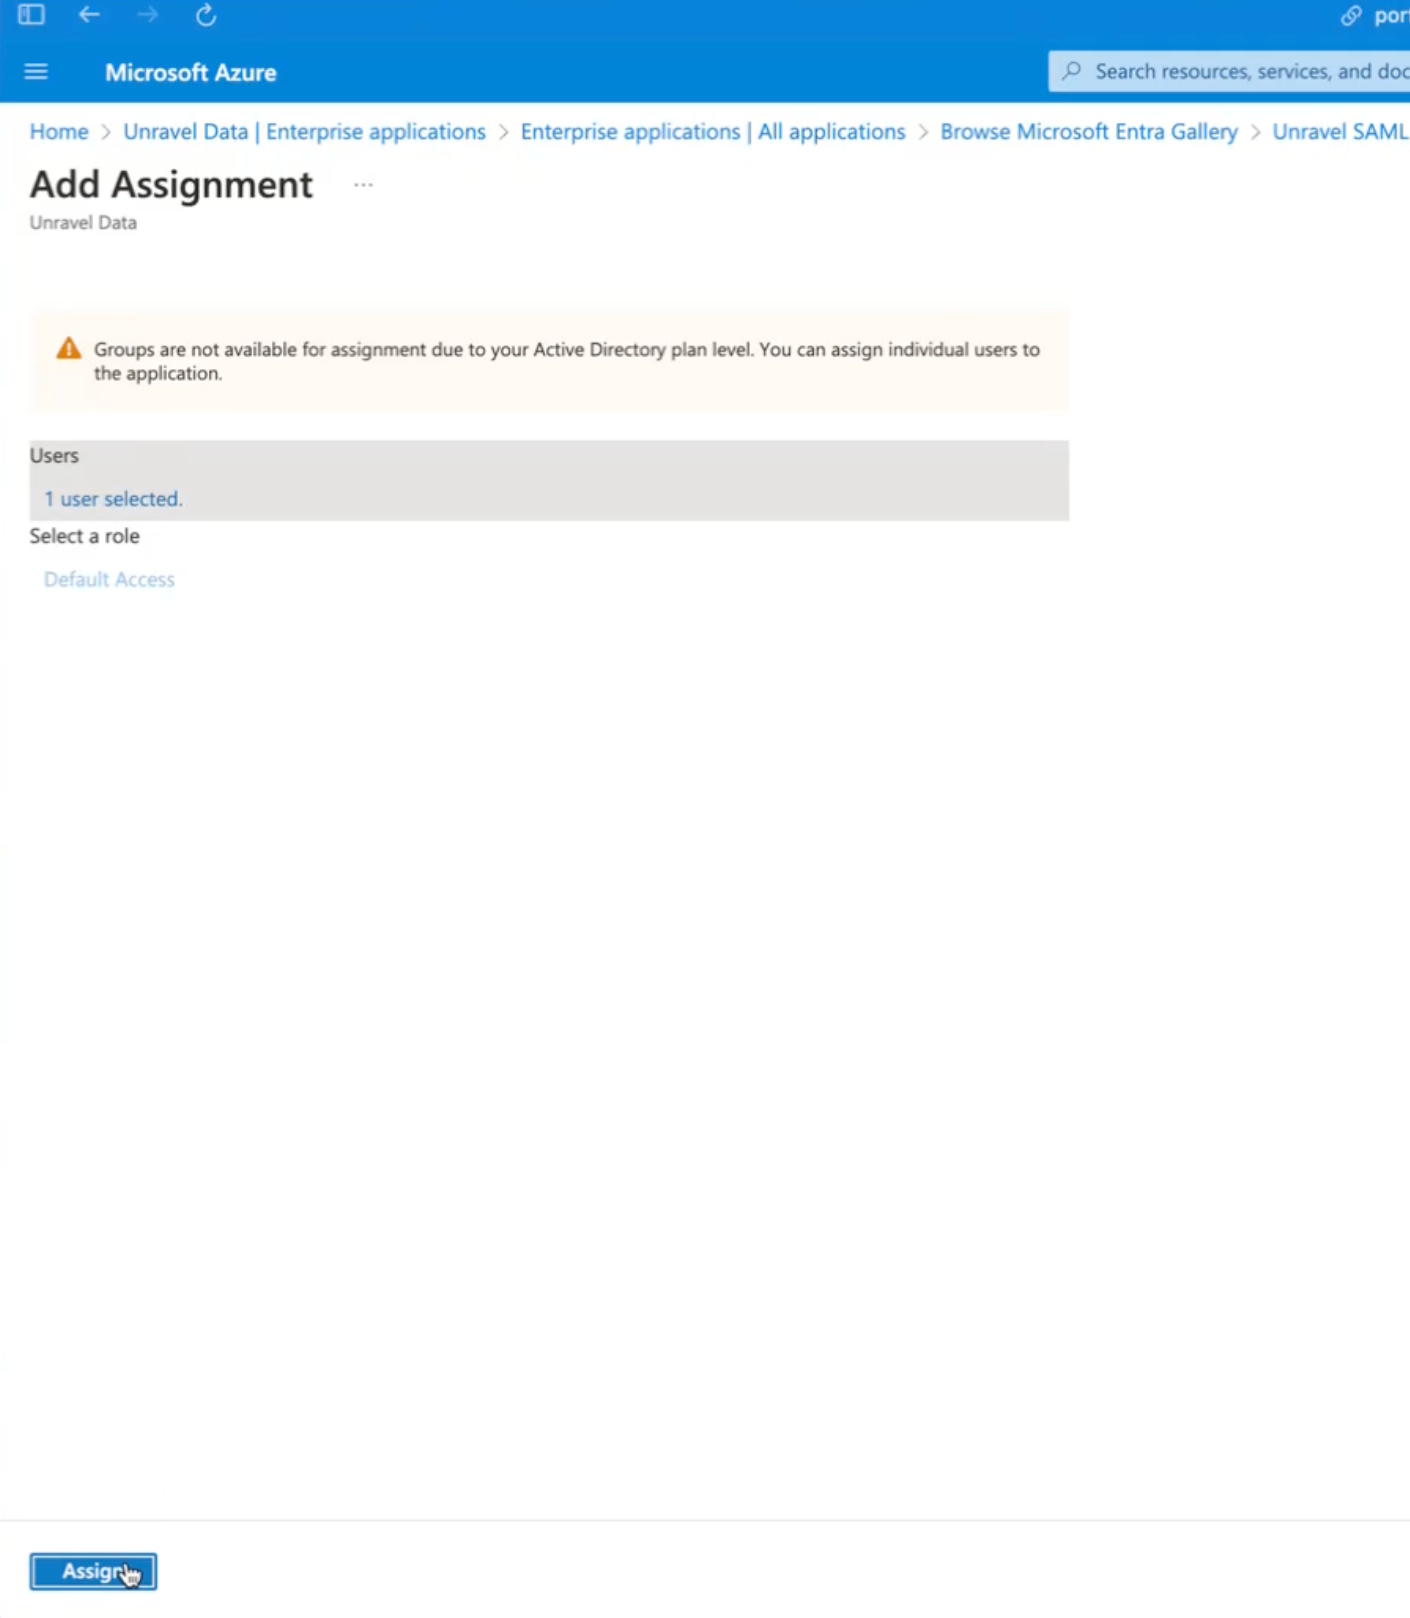
Add the required user and select Assign.
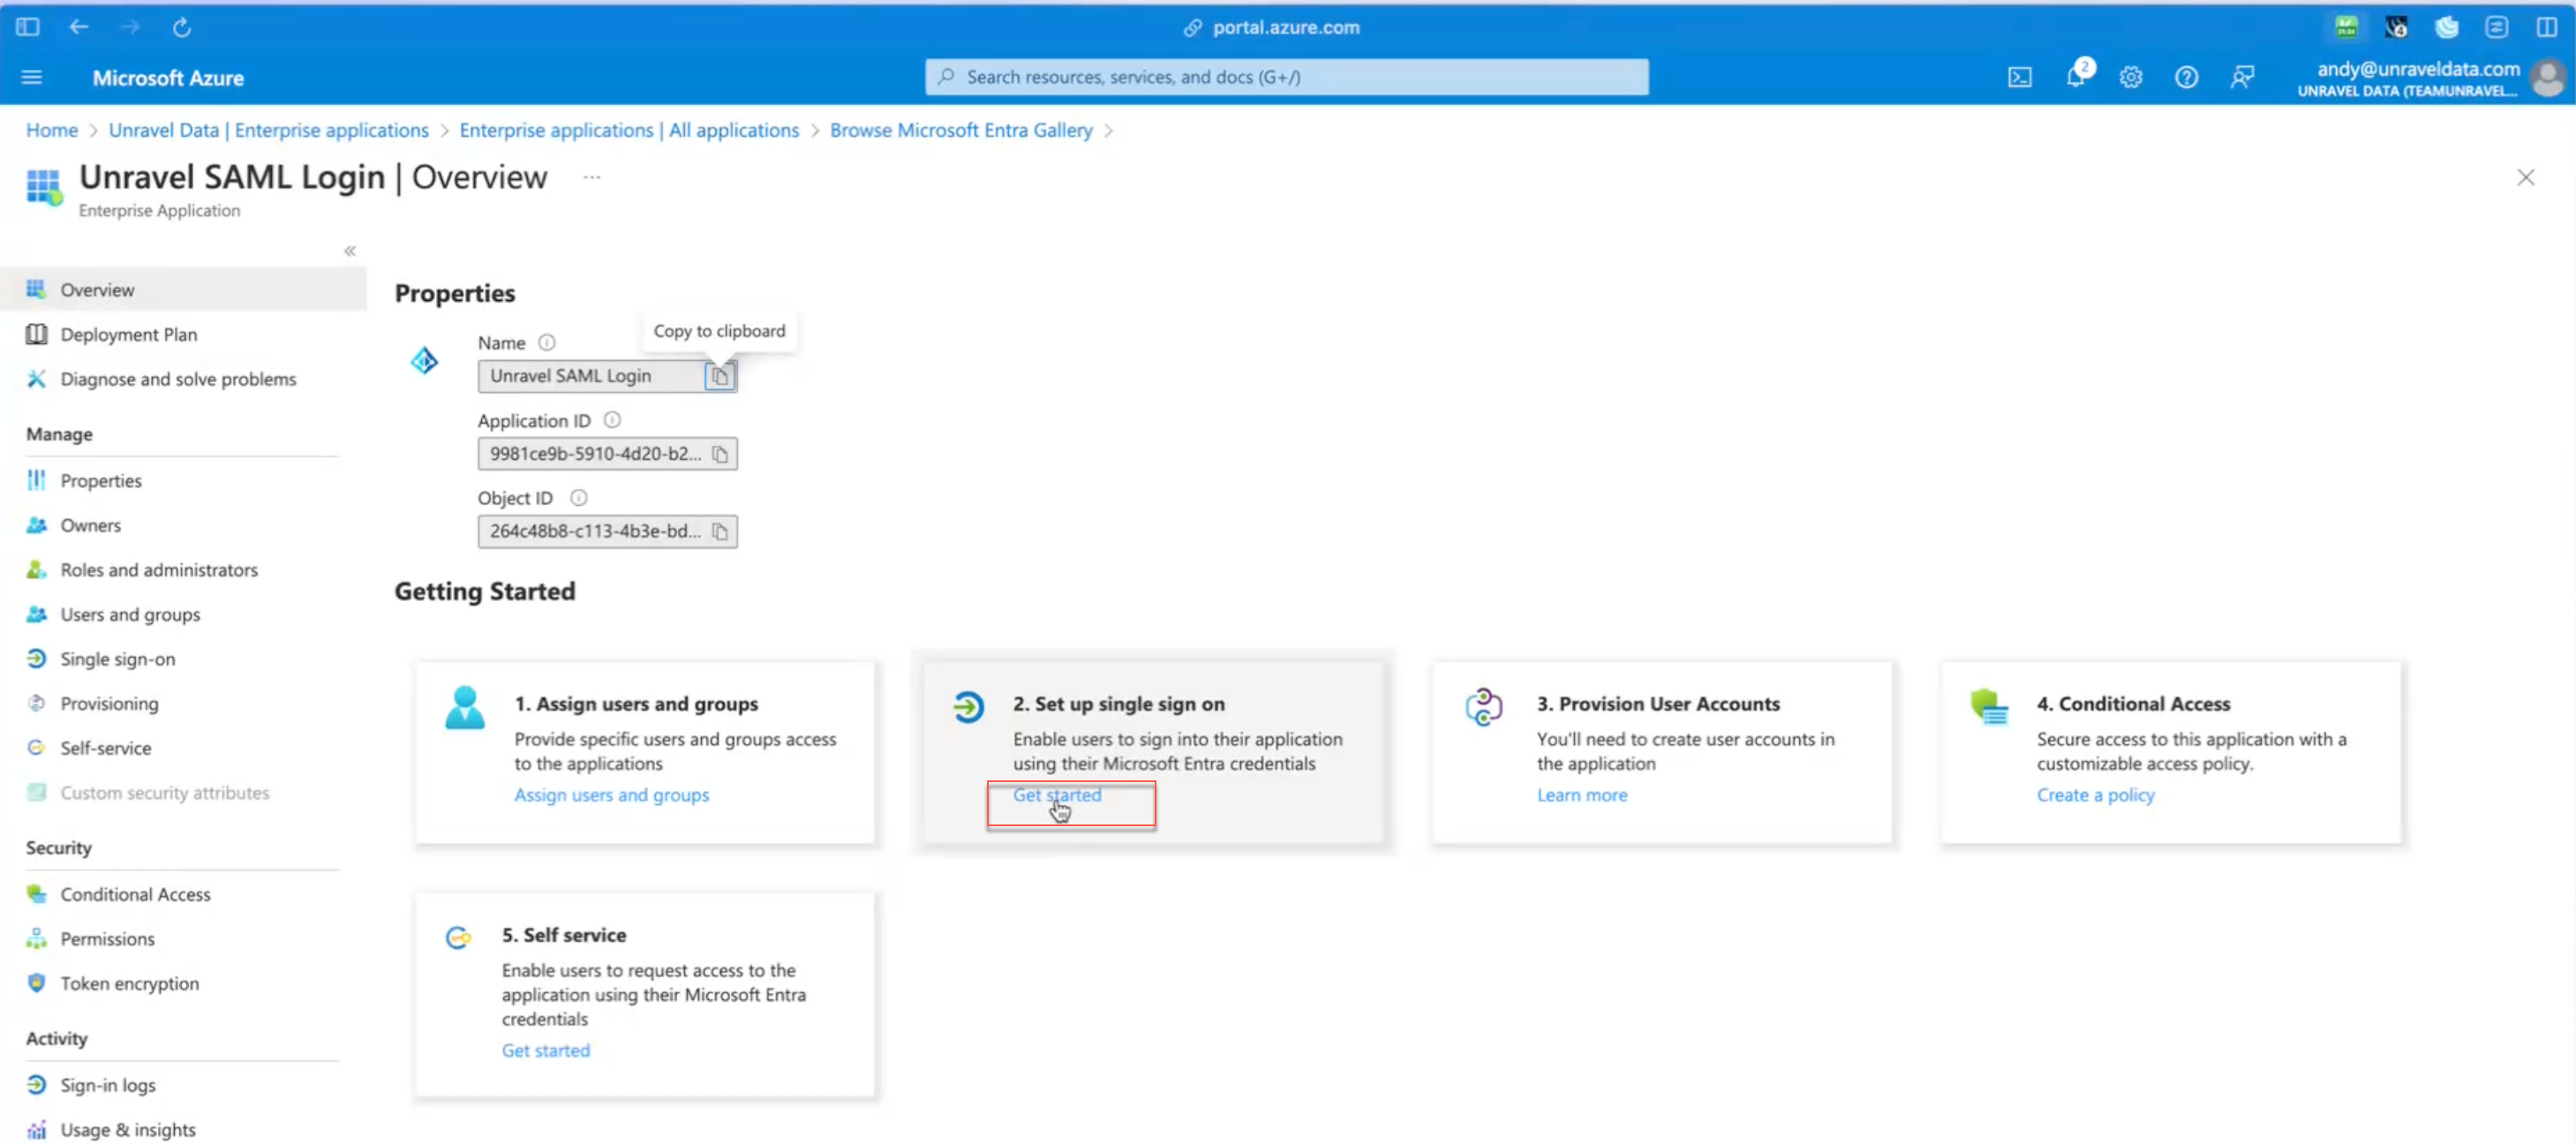
Set Up Single Sign-On (SSO)
Go to the application’s overview and select Single sign-on.
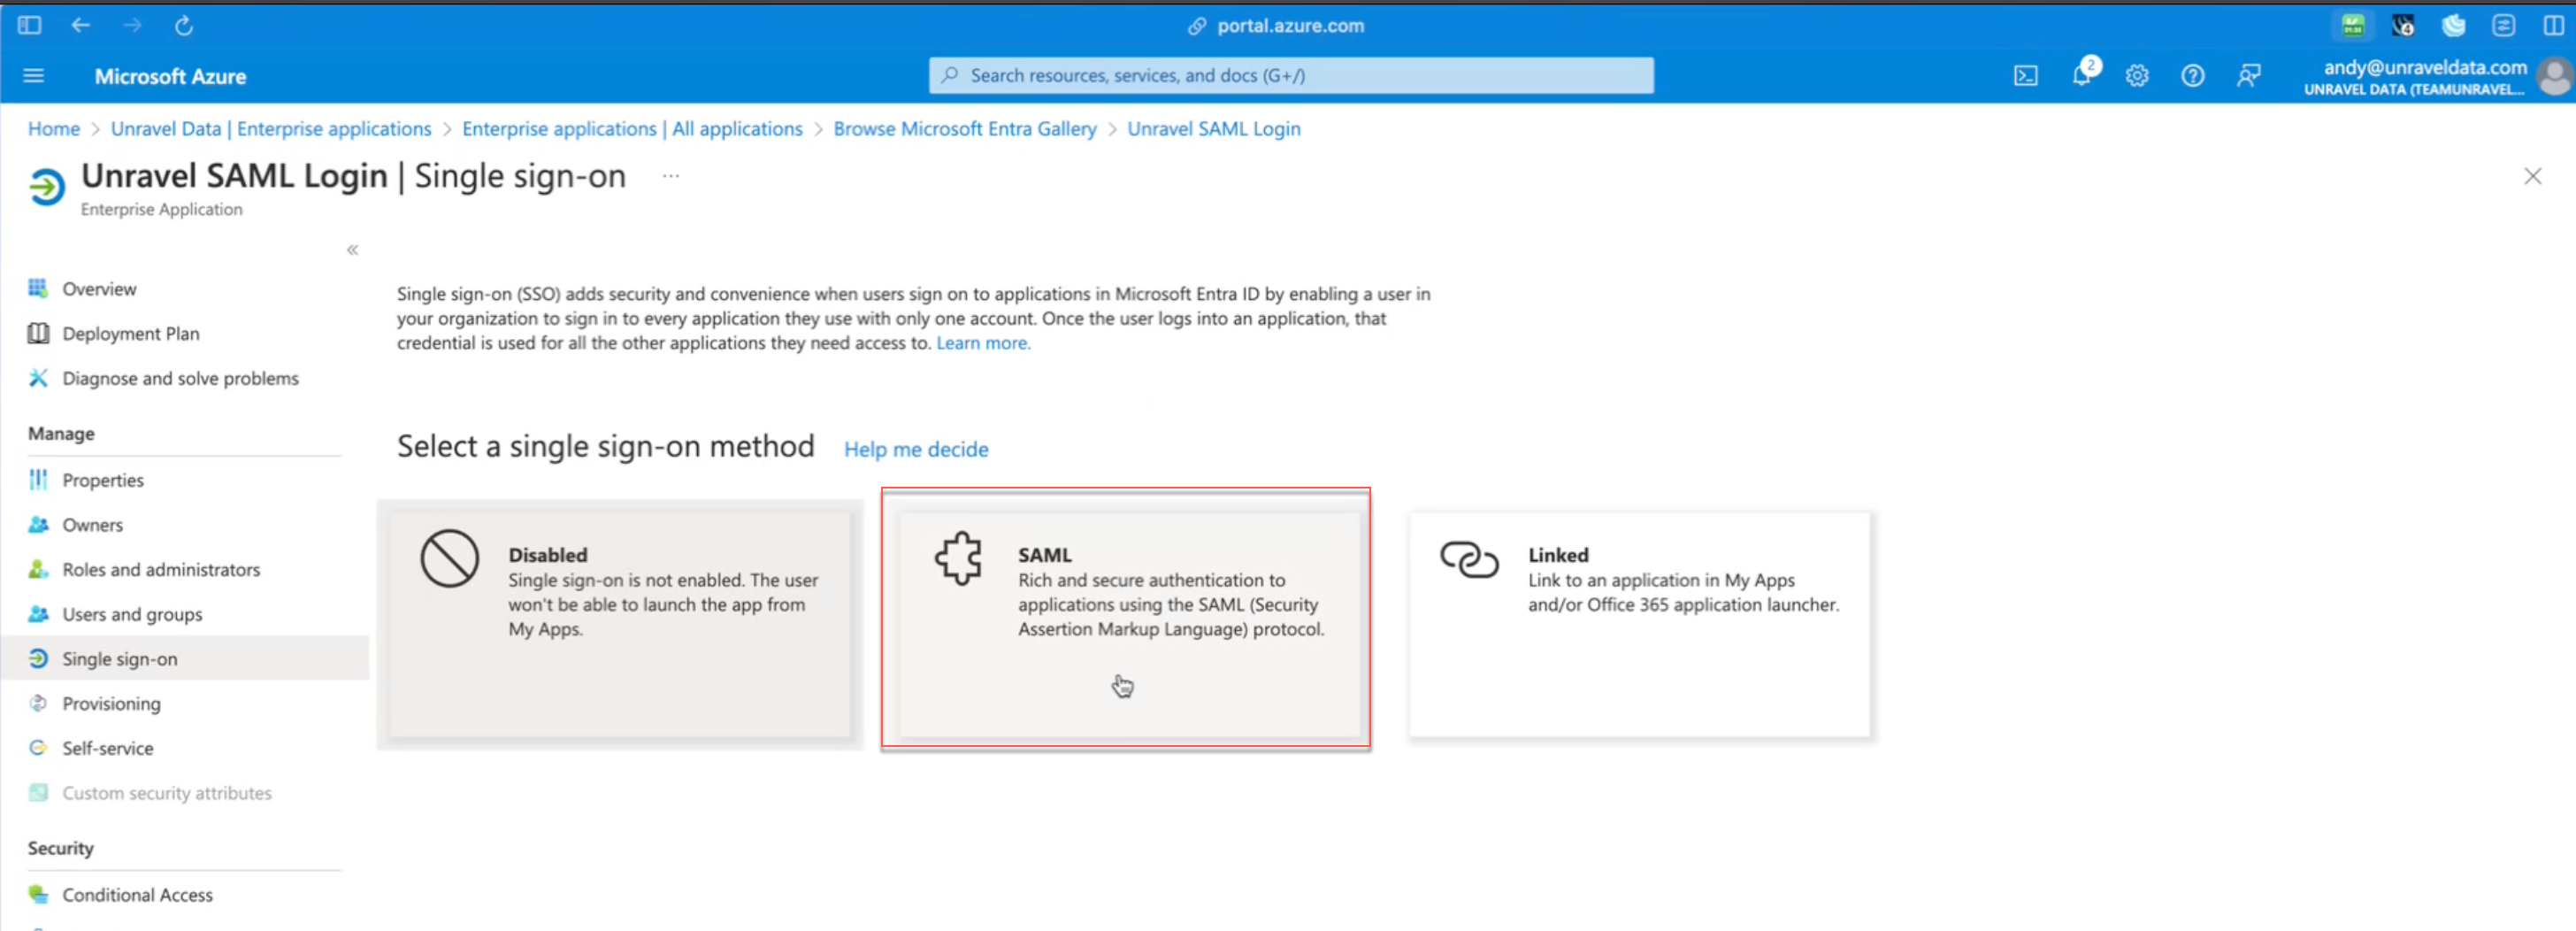
Select SAML as the SSO method.
Configure SAML settings and click Save.
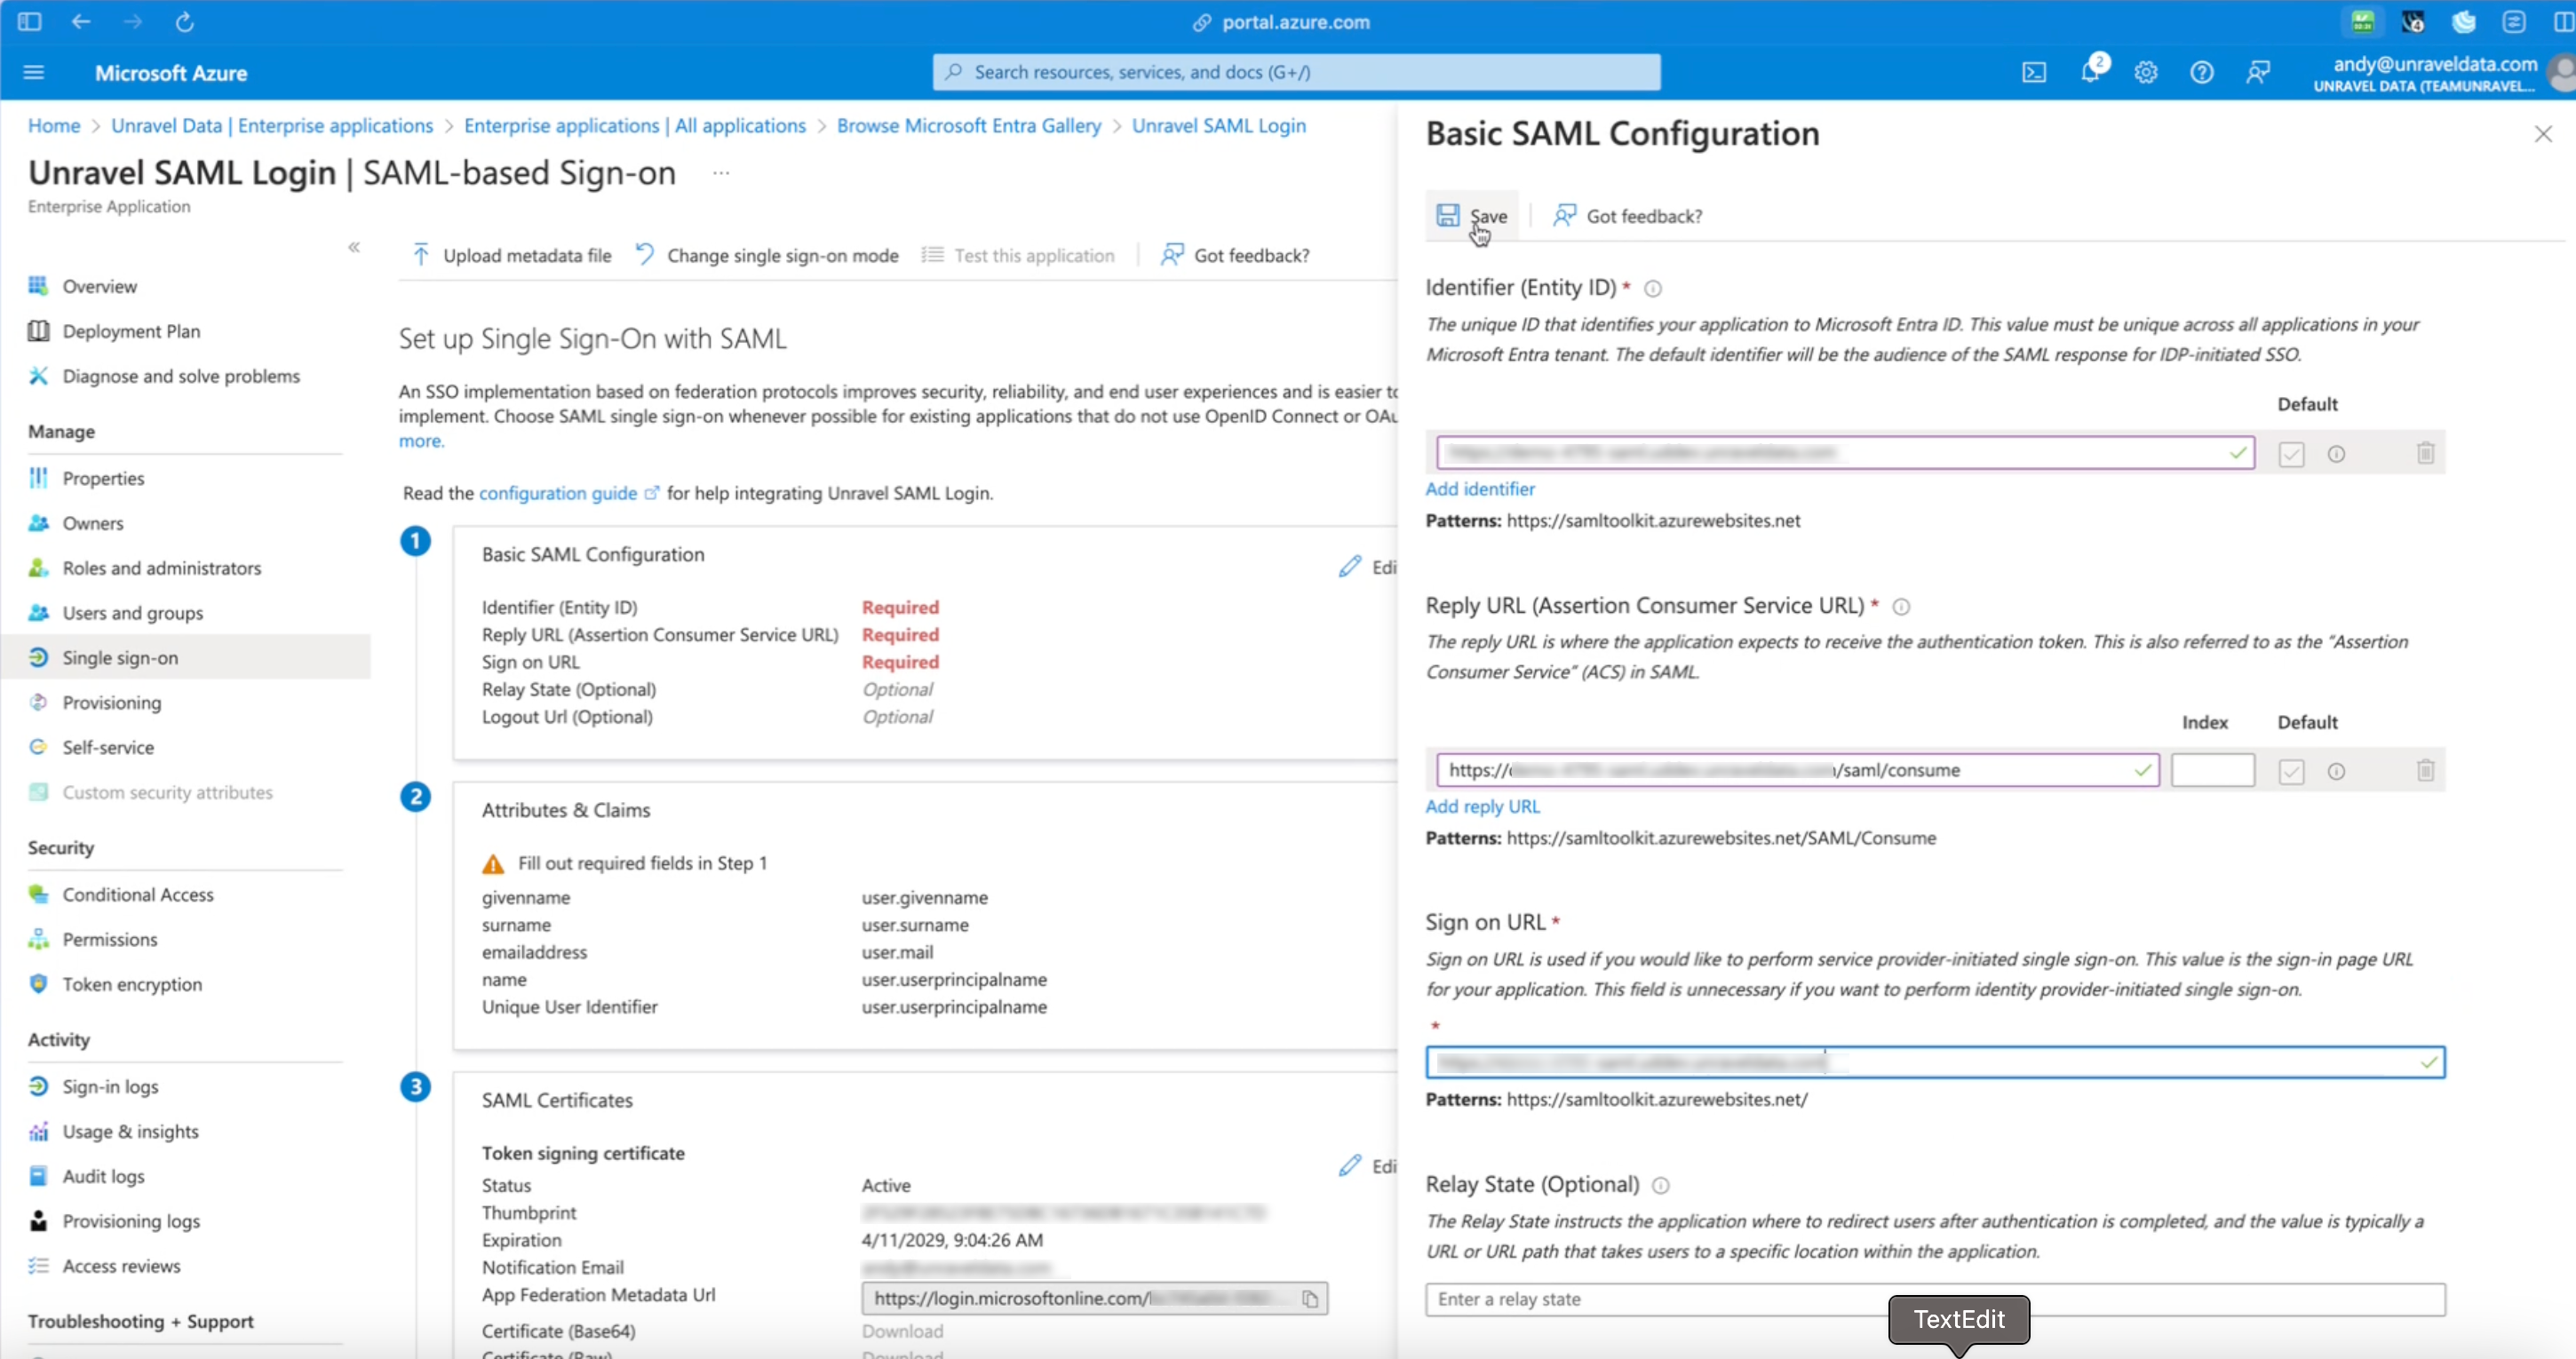
Identifier: Use the Unravel instance name.
Reply URL: <Unravel instance>/saml/consume
Sign-on URL: Instance domain name.
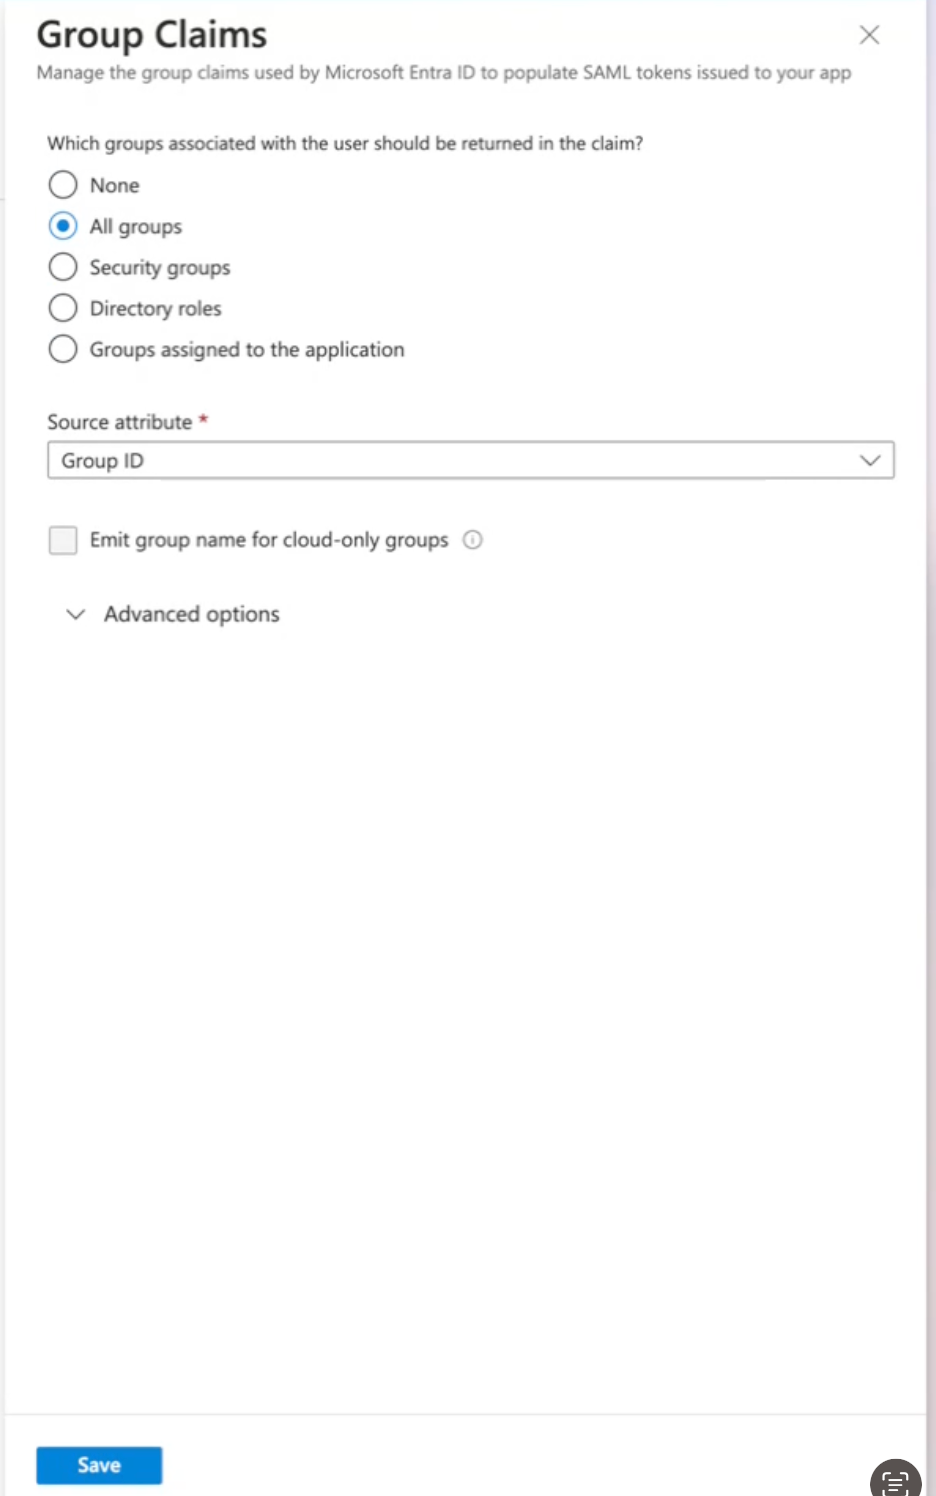
Click Add Group Claims, select the required Group Claims, and click Save. This is an optional step.
Create the Unravel configuration JSON file
Example JSON file:
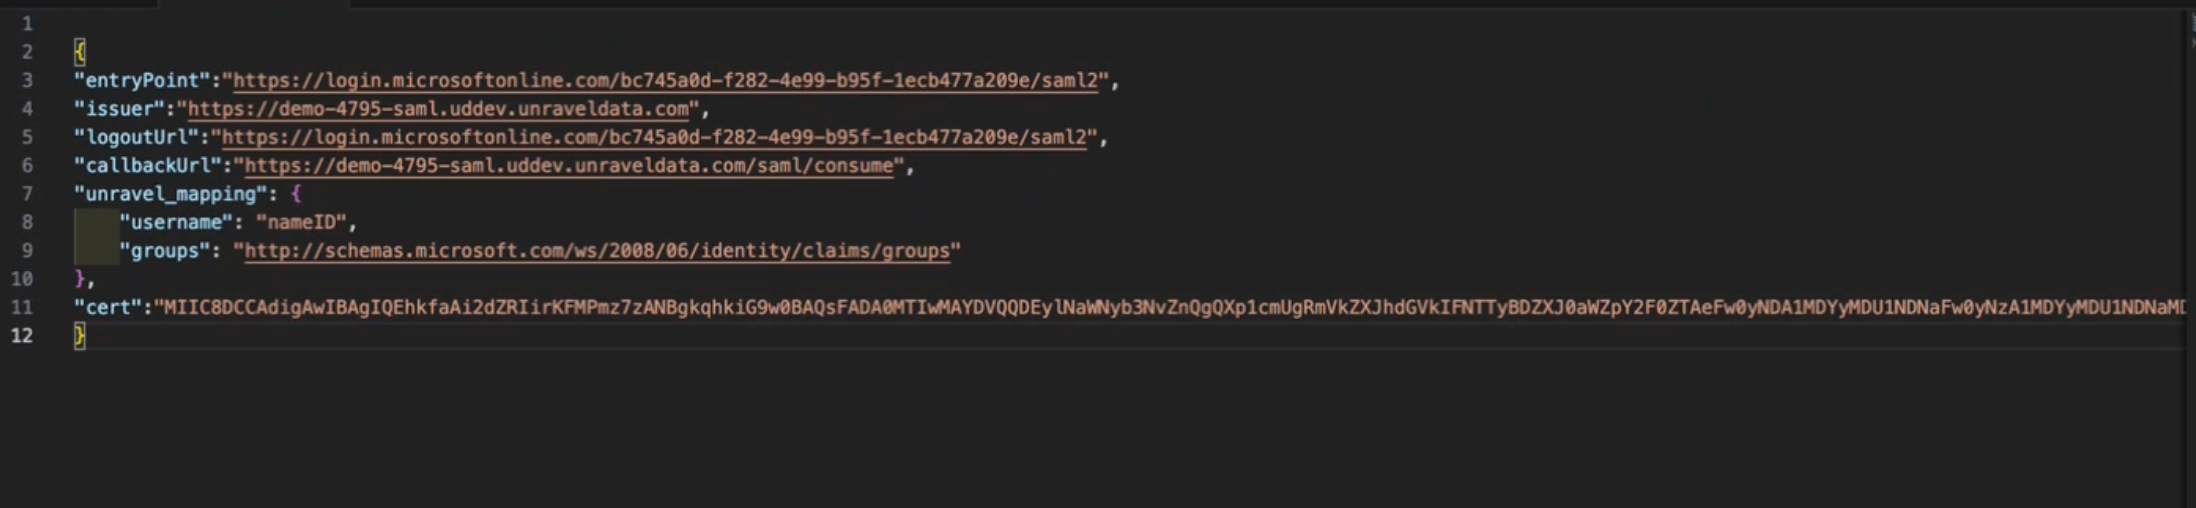
Open a text editor and create a new JSON file.
Enter configuration details based on the following SSO settings.
entrypoint
SAML Login URL
issuer
Identifier
Logouturl
Logout URL under Set up Unravel SAMl Login
Callbackurl
Reply URL under Basic SAML Configuraiotn
Unravel mapping
username
The default is User email address
groups (optional)
Claim name of the group under Attributes and Claims
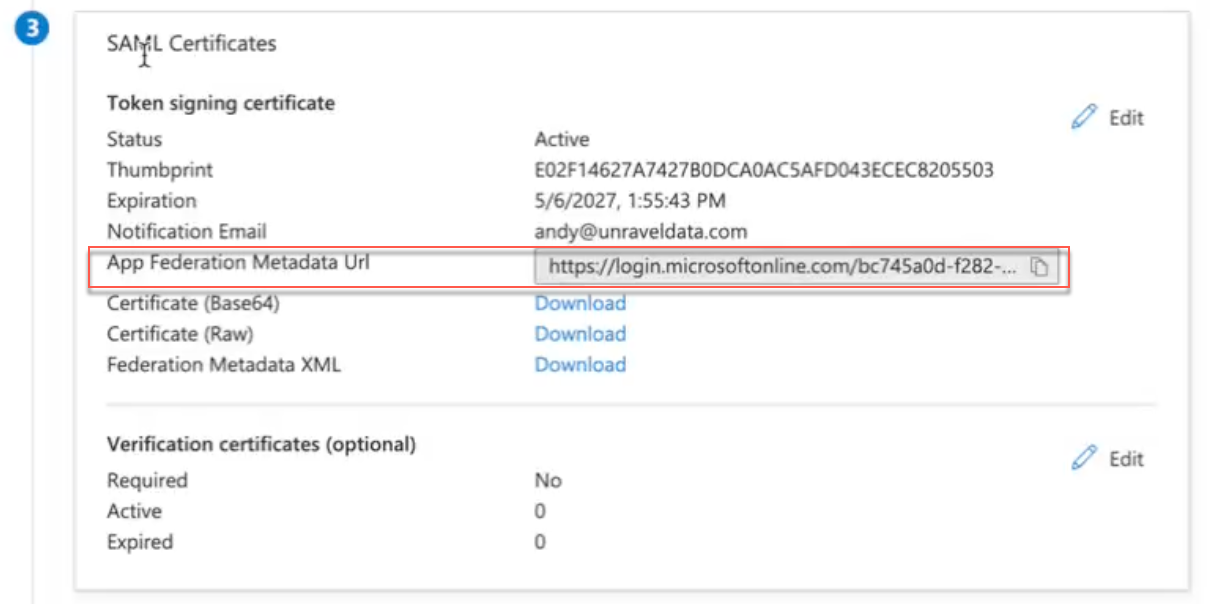
certificate
SAML Certificate
Save the file as unravel_saml_config.json.
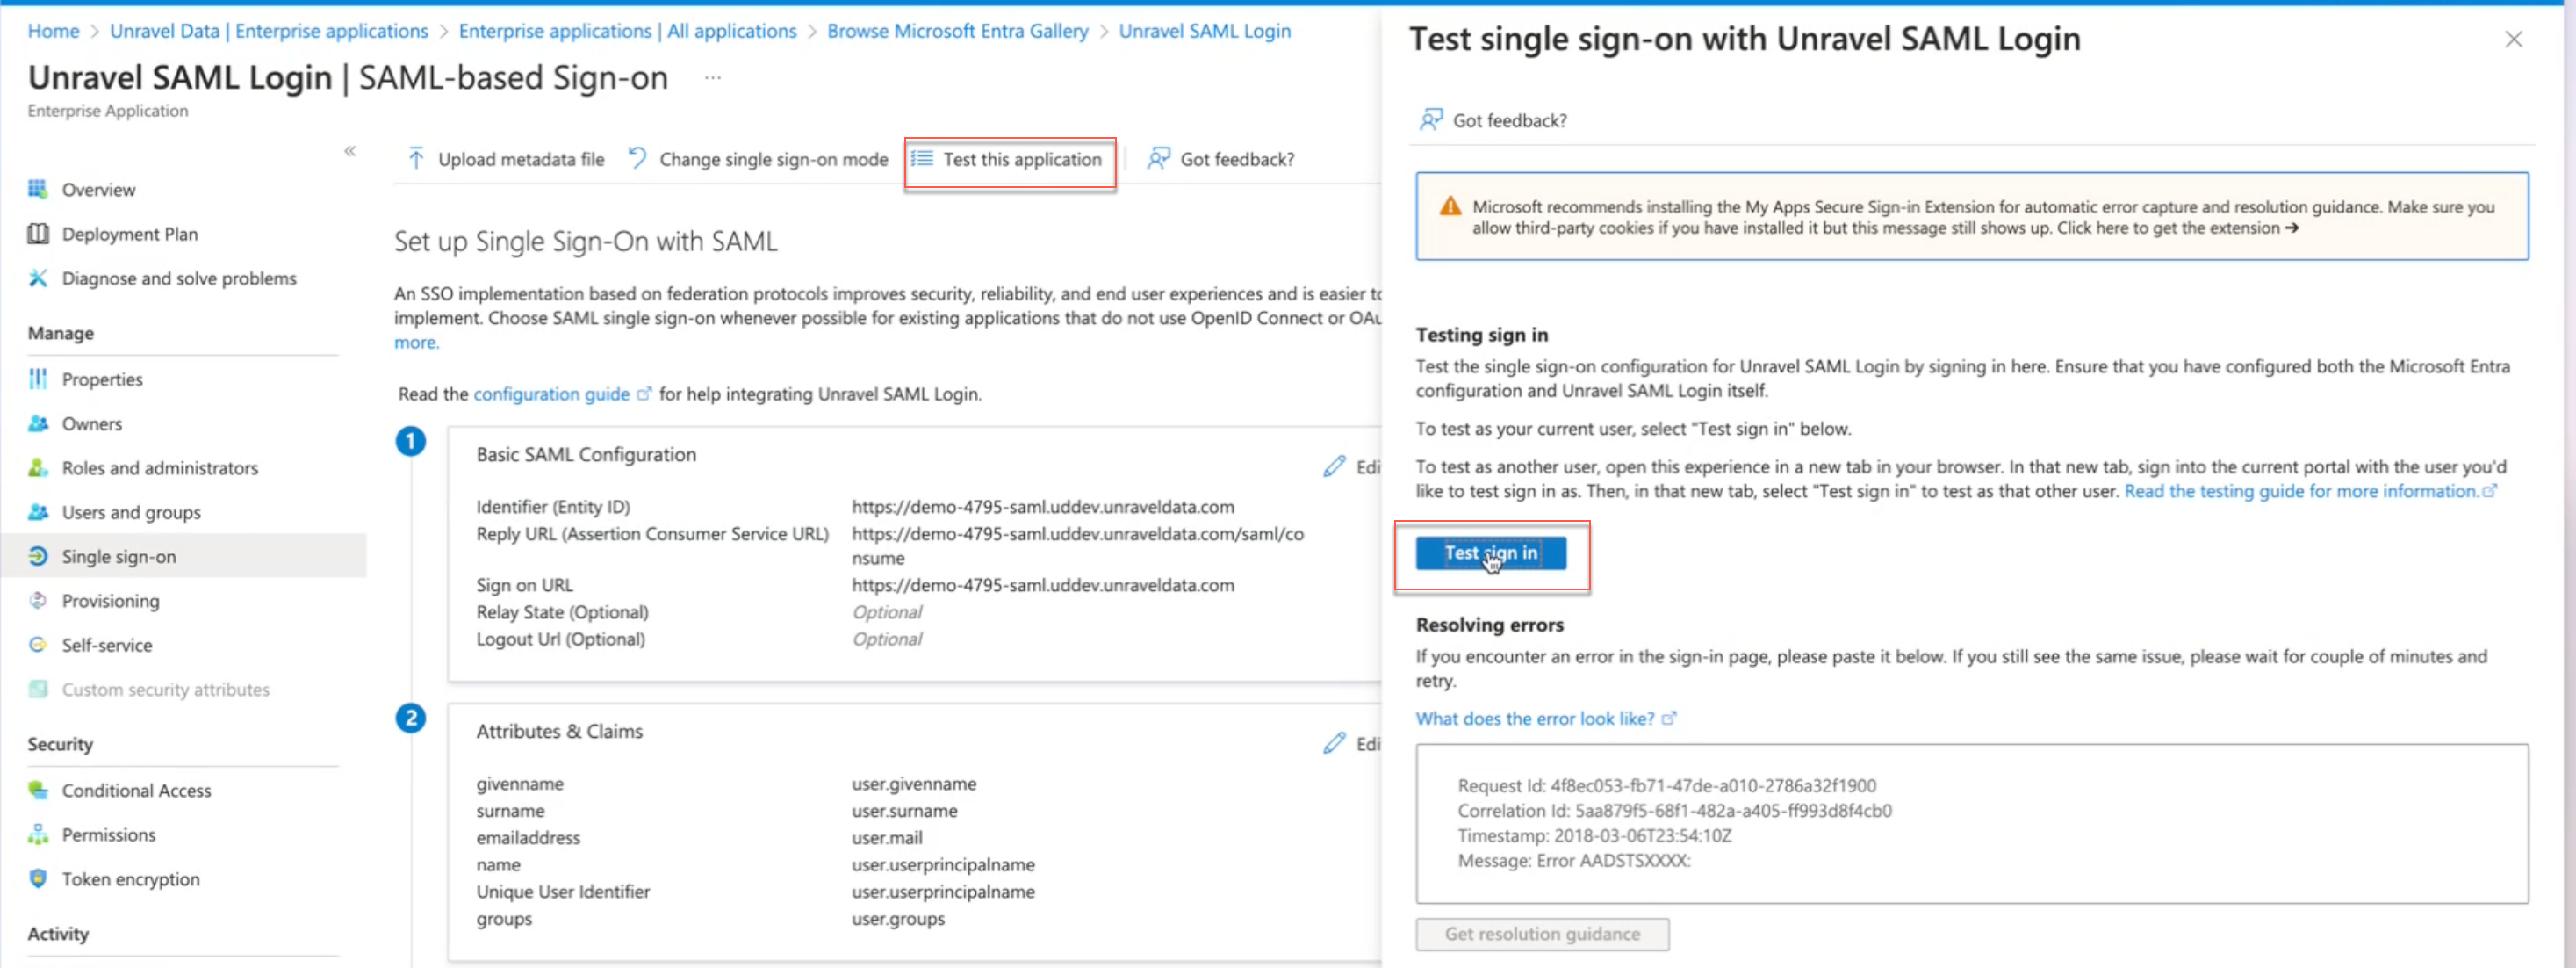
Test the application
Select Test this application on the Single Sign-on page. The Test Single Sign on with Unravel SAML Login page is displayed.
SelectTest Sign in. The Unravel URL opens.
Click SAML Sign in. The Microsoft account is displayed, allowing you to log in using SAML.
