Deploying Unravel from the AWS Marketplace
Overview
This page describes how to launch an Unravel Server from the AWS Marketplace and connect EMR clusters to it. Use these instructions for test or development environments only; for production environments, see Amazon Elastic MapReduce (EMR).
Unravel for Amazon EMR is the only solution to provide full-stack monitoring, tuning, troubleshooting and resource optimization for big data running on Amazon EMR. Unravel goes beyond passive monitoring to highly automated and intelligent management and optimization of data pipelines and applications.
Important
For best results, follow the instructions below.
Background
A few things to note before getting started...
For Unravel Server to be able to monitor your EMR cluster(s), you need to:
Allow Unravel Server to access EMR cluster(s) nodes' TCP ports 8020, 50010, 50020.
Open Unravel Server's port 4043 for receiving traffic from the EMR cluster(s).
To access Unravel UI, you need to open port 3000 on Unravel Server for HTTP access.
No action is needed right now. We'll walk you through these actions later.
Step 0: Meet the network prerequisites
You can choose your own VPC/subnet settings/security groups as long as you can achieve the requirements mentioned in Background. In this case, you would also have appropriate VPN connections or NAT Gateways available for this VPC do you can connect to the Unravel Server via the internal/external IP address as applicable.
OR
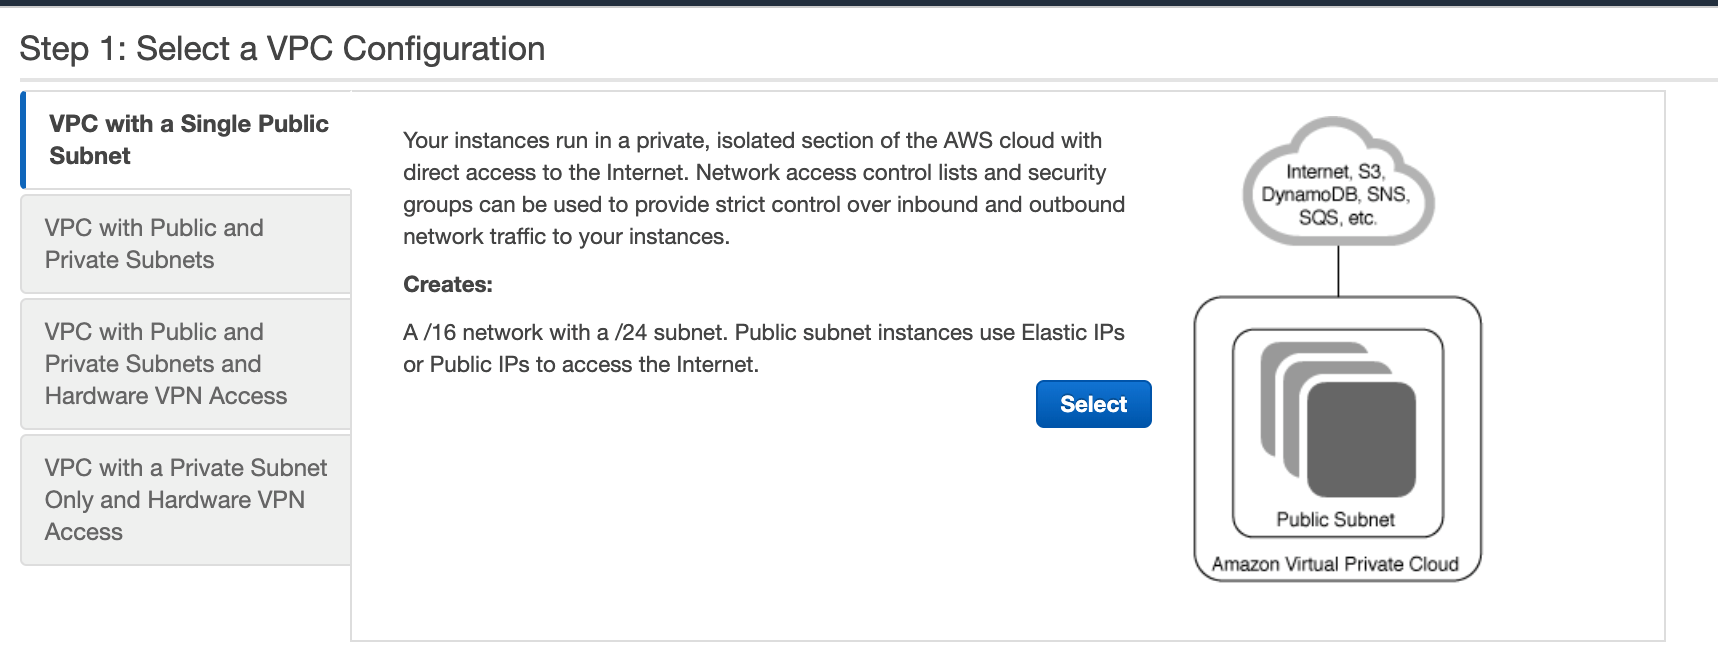
You can create a new one to quickly check out Unravel for EMR as described below. For ease of use, we are creating a VPC with a Single Public Subnet.
Log into the AWS VPC Dashboard.
Click Launch VPC Wizard.

Select the first option, Select a VPC Configuration.
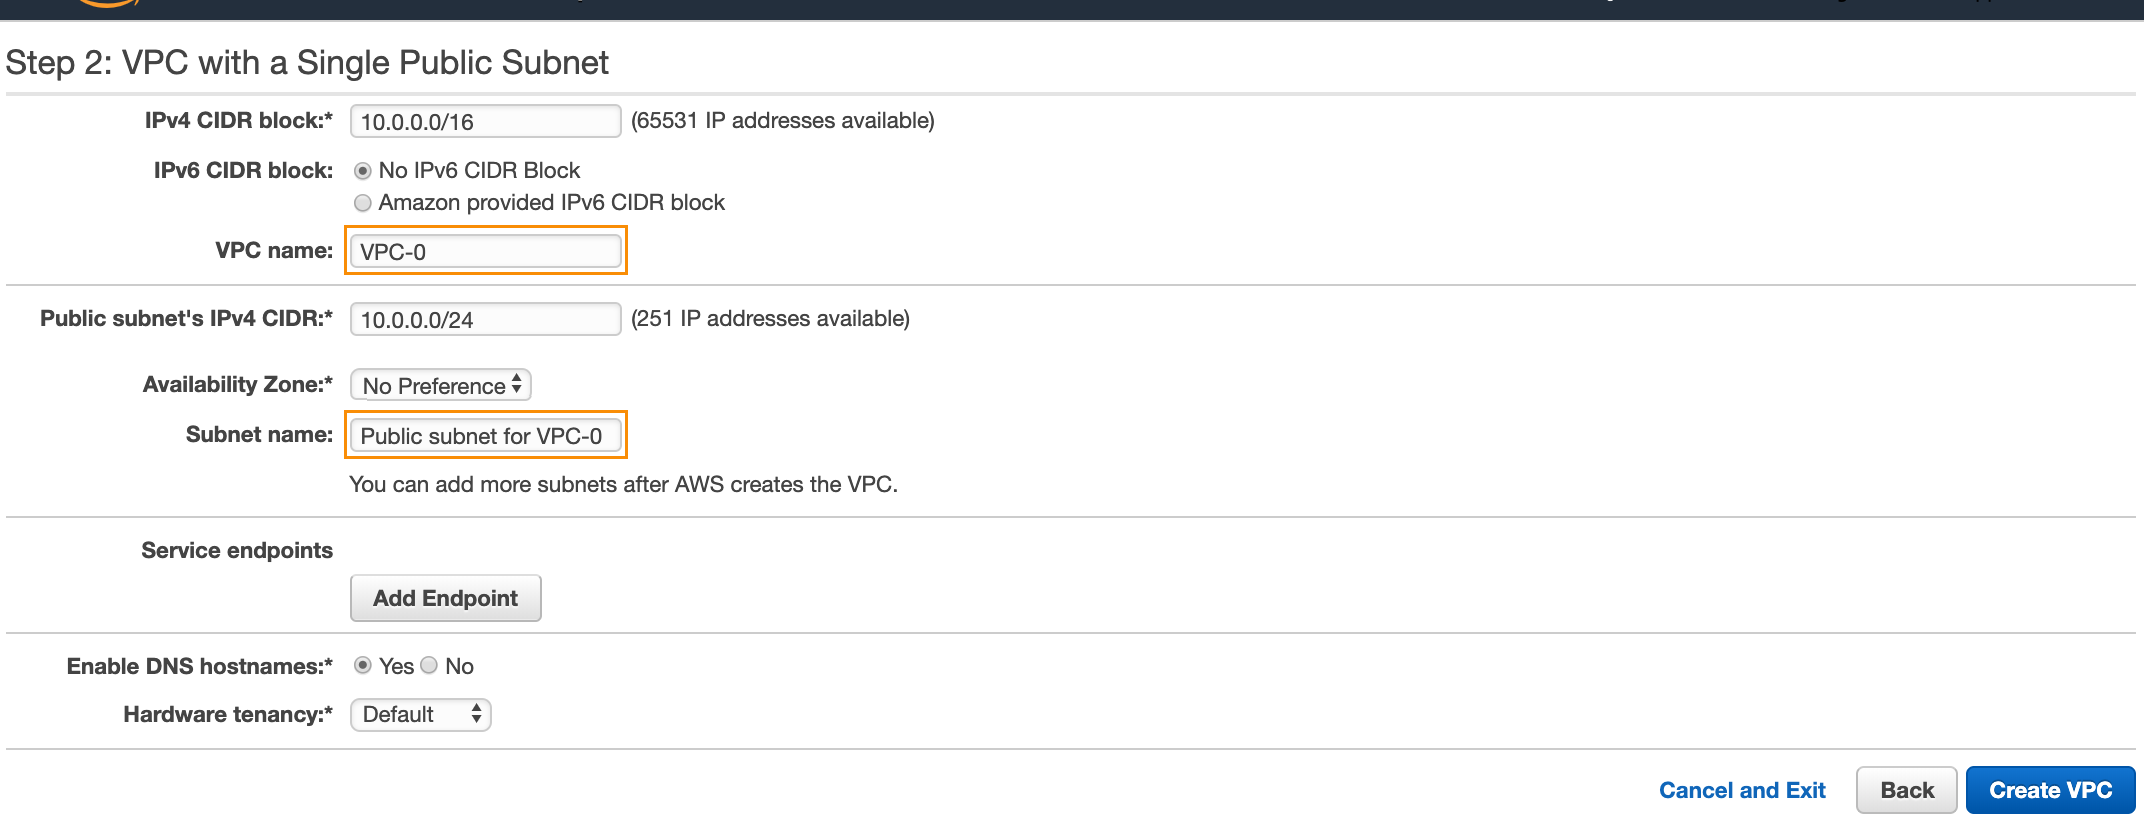
Add the names for the VPC and subnet and click Create VPC to create the VPC and related subcomponents.
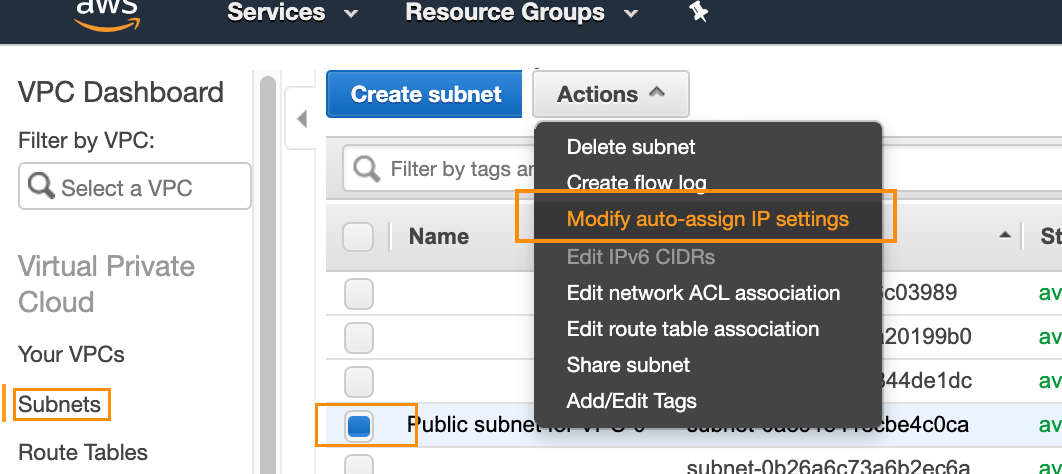
On the AWS VPC Dashboard, click Subnets on the left-hand menu and select the subnet just created. Click the Actions | Modify auto-assign IP settings.
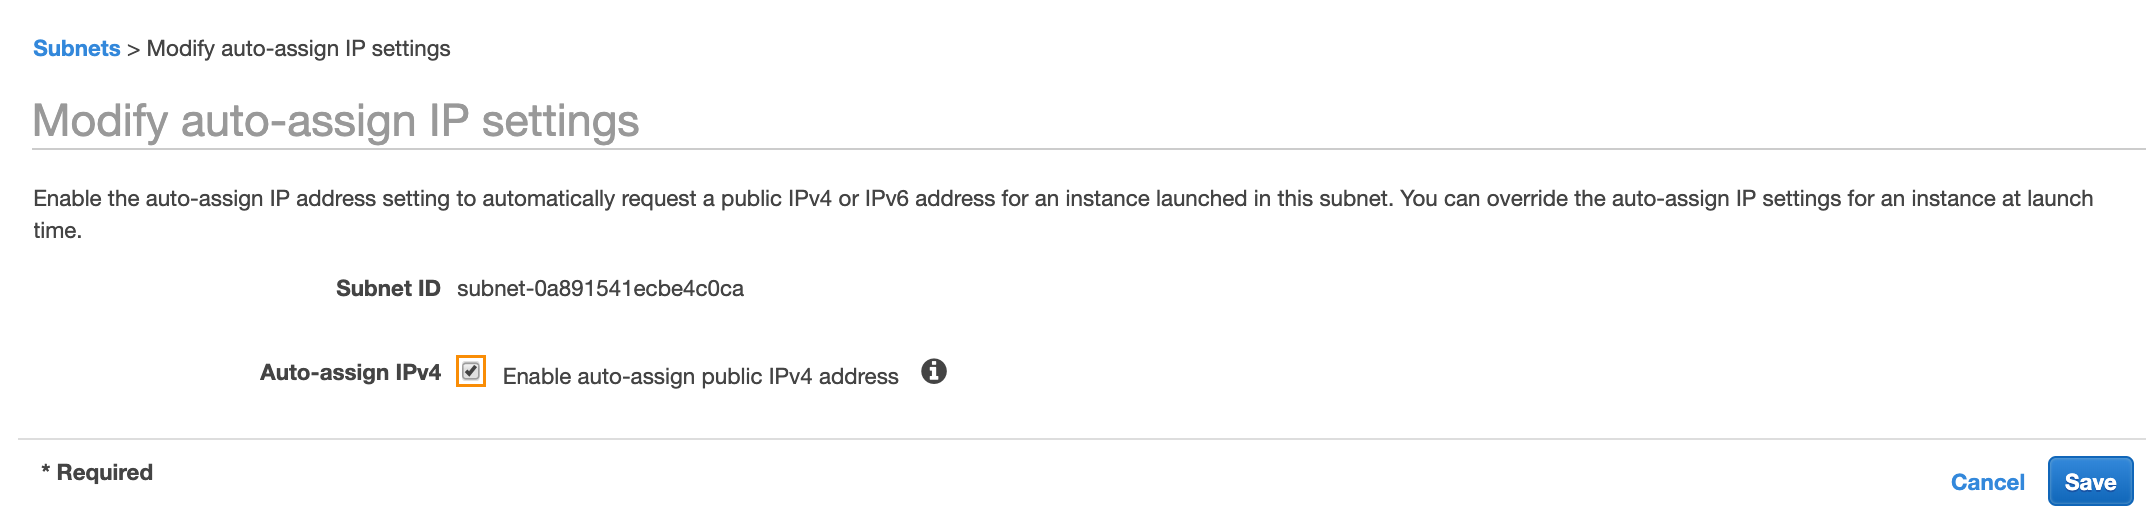
Select the Enable auto-assign public IPv4 address checkbox, and click Save.
Step 1: Launch and set up Unravel Server
Search for Unravel for Amazon EMR in the AWS Marketplace.
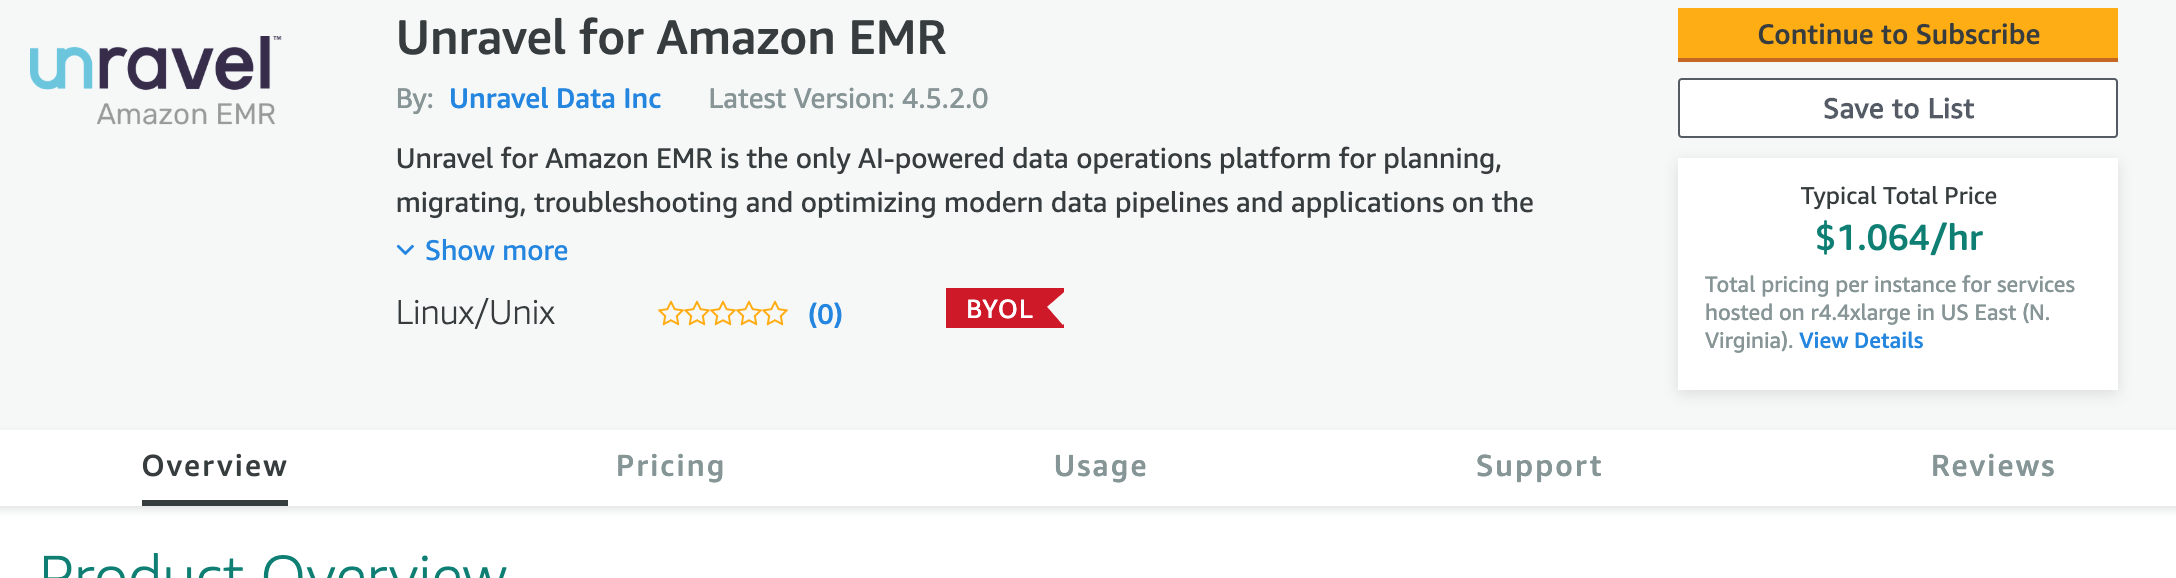
On the listing page, Click Continue to Subscribe.
On the subscription page, click Continue to Configuration.
Choose a version and location:
On the Configure this software page, select the latest software version and the same region where you plan to create EMR clusters (Unravel Server can reside in a different region, but then you'll need to set up VPC peering.
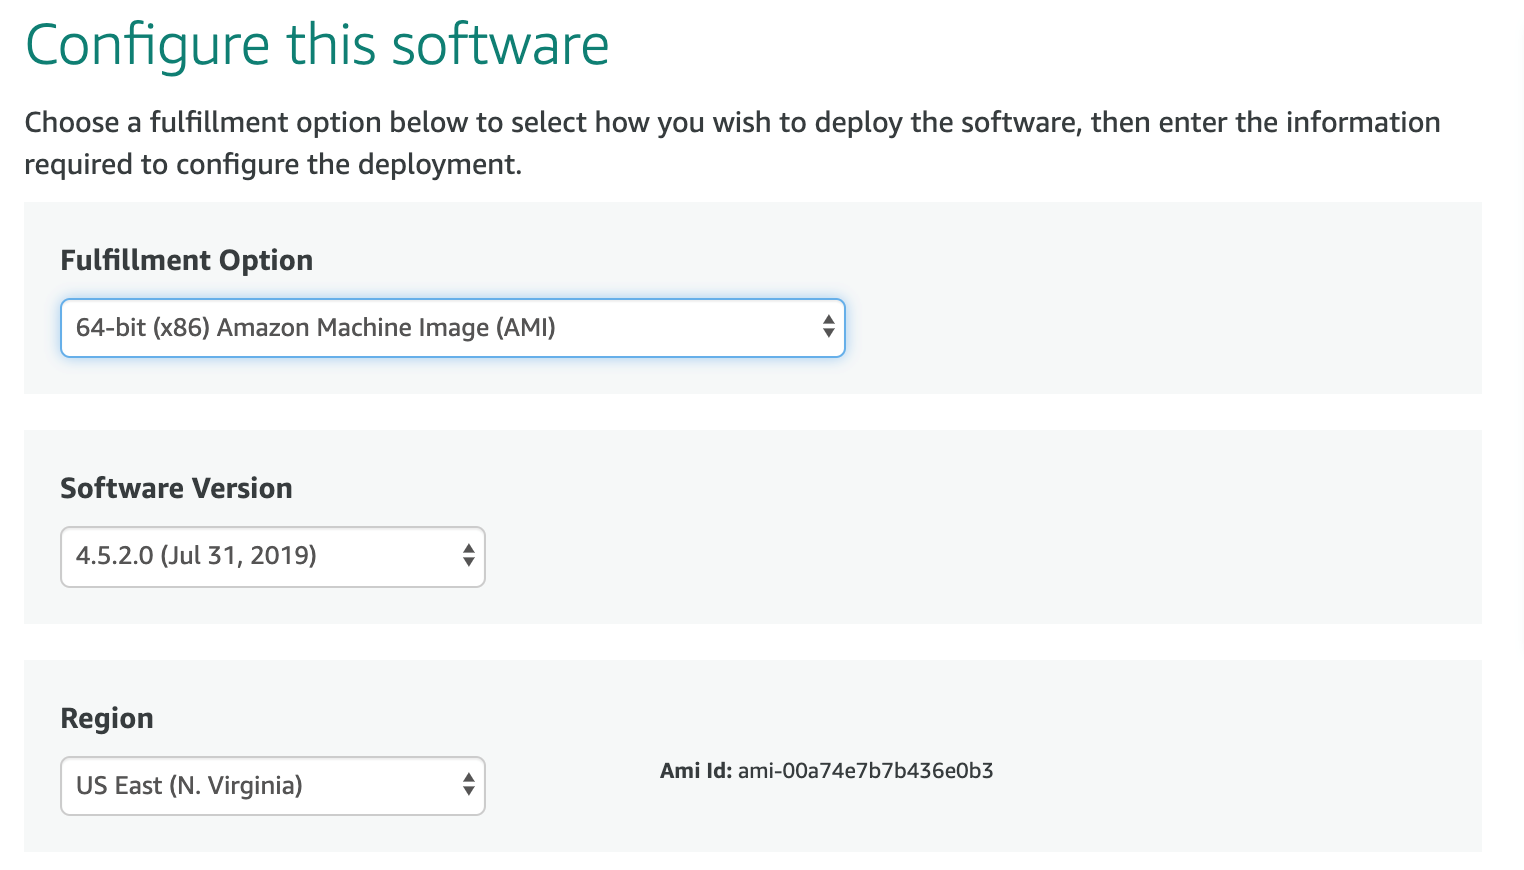
Click Continue to Launch to continue with the setup.
Note that there are several steps to be done next before the instance is actually launched.
Launch the software:
On the Launch this software page, select Launch from Website from the dropdown and then click Launch.

Note
Note that some more steps remain before the instance is actually launched.
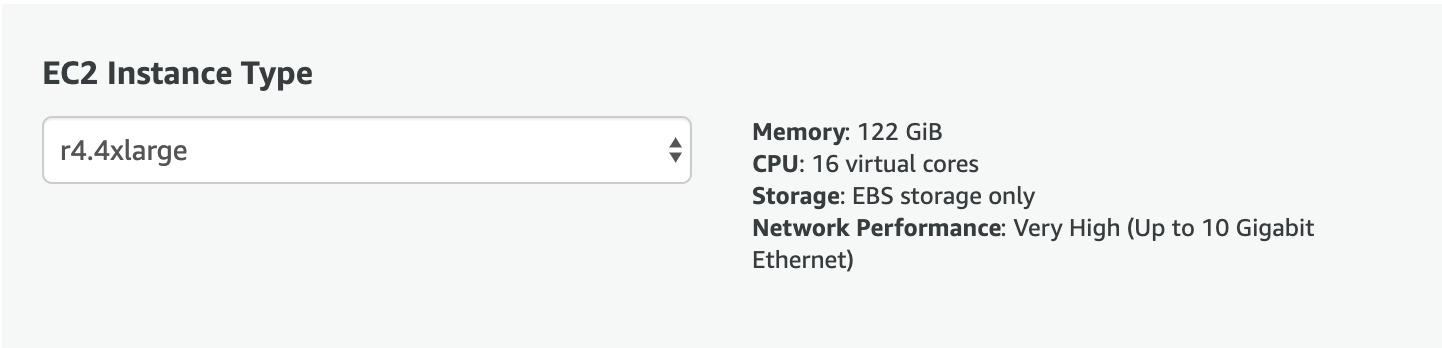
The instance type you choose depends on the number of applications that will be monitored on a daily basis and other factors. You can leave the default value as is.
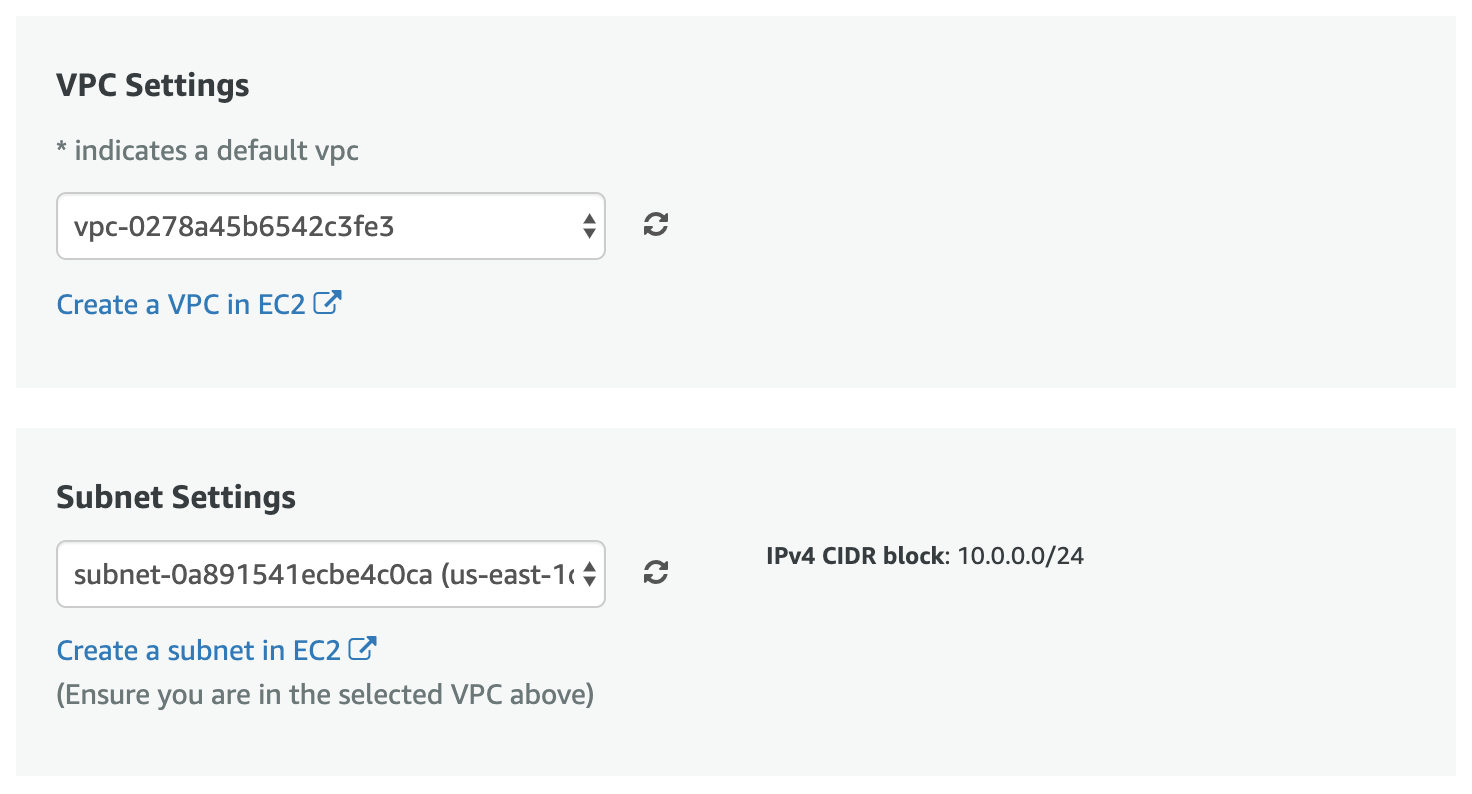
Choose the VPC and Subnet that you created or a suitable one as discussed in Background.
Click Create New Based On Seller Settings.
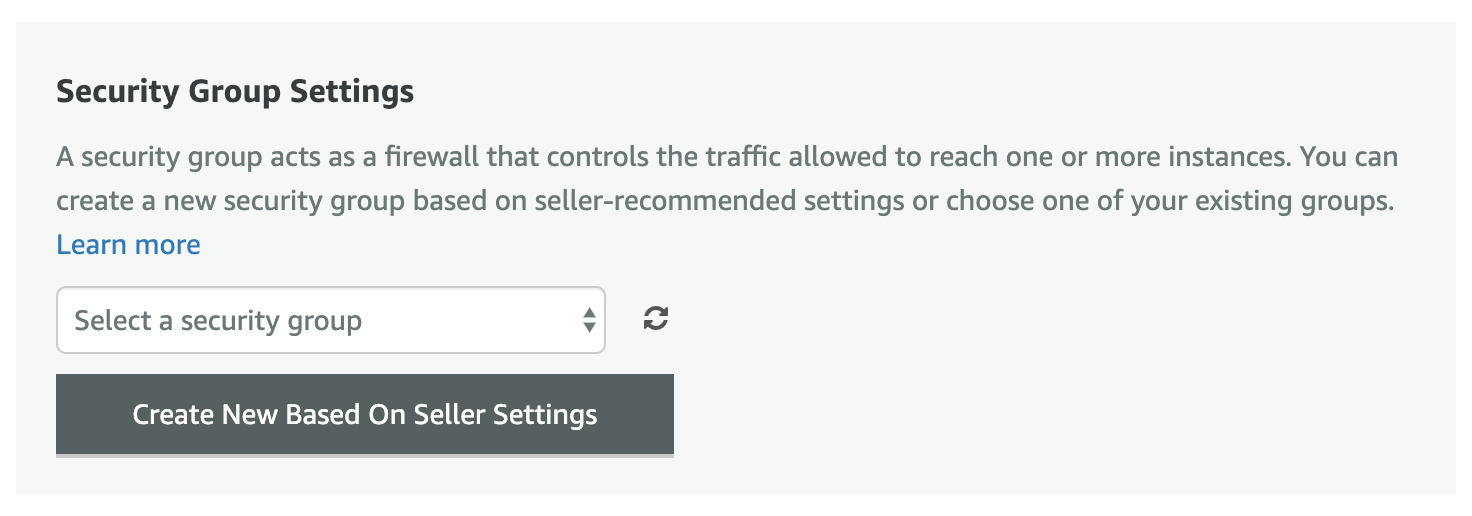
Name the security group anything you like and make a note of its name.
Note: Unravel recommends limiting access to only known IP addresses.
For example,
Unravel for Amazon EMR-1. Enter any description you like.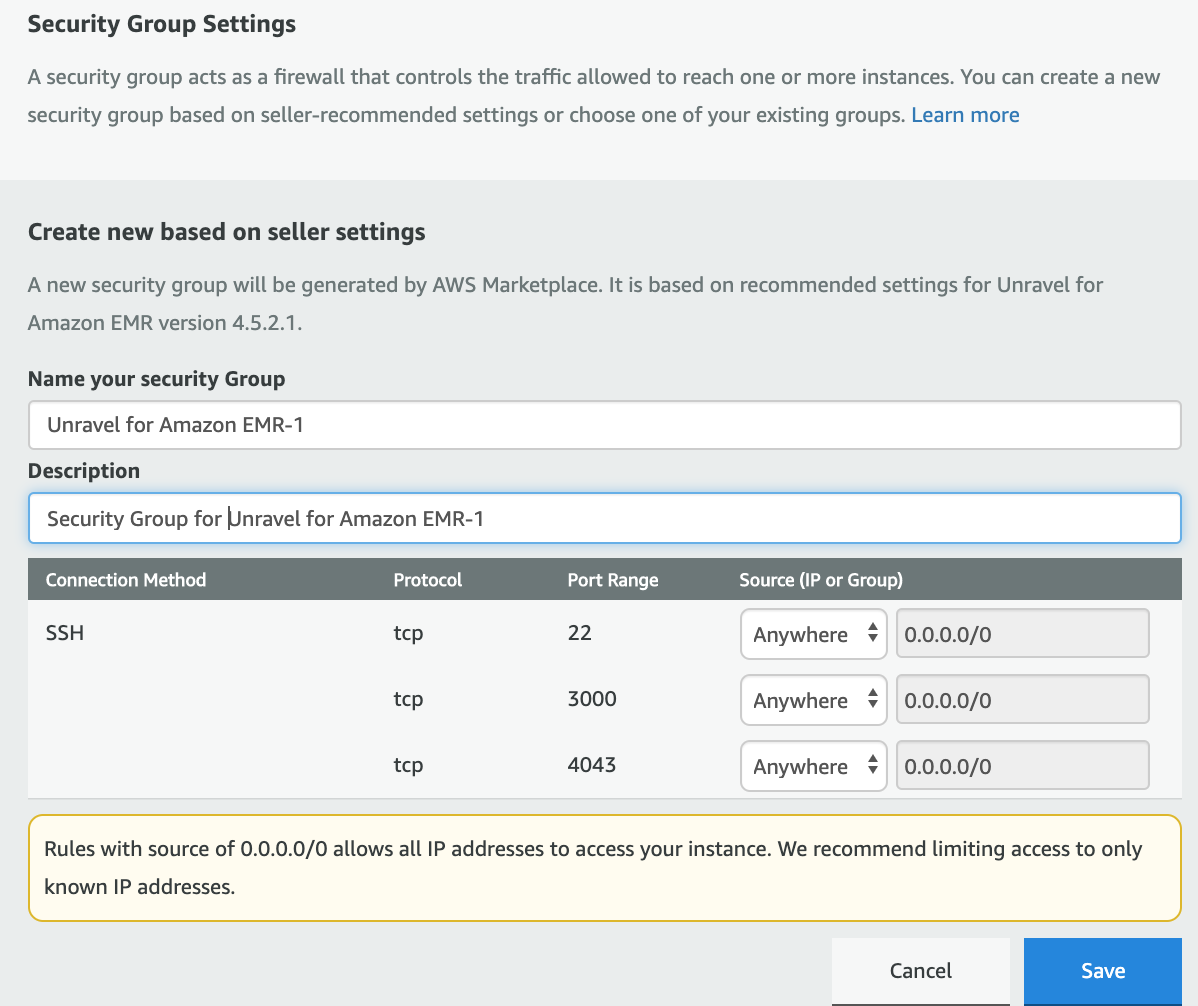
Click Save.
Note
For enhanced security, you can change the rules above based on your setup and Unravel's requirements.
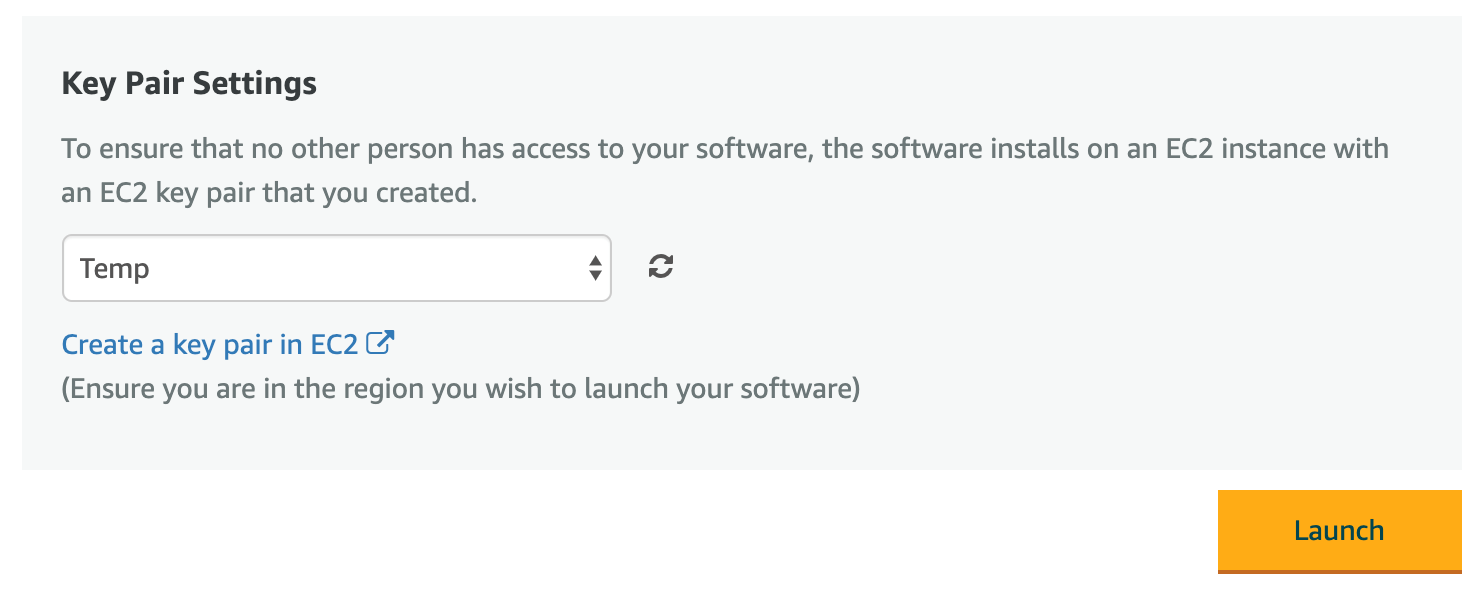
Choose an existing key pair that connects to this instance or create a new one, and then click Launch.
Once the AMI has instantiated and Unravel is installed, which can take 10-15 minutes, log into Unravel UI.
Get the hostname or IP of the instance from the AWS Console:
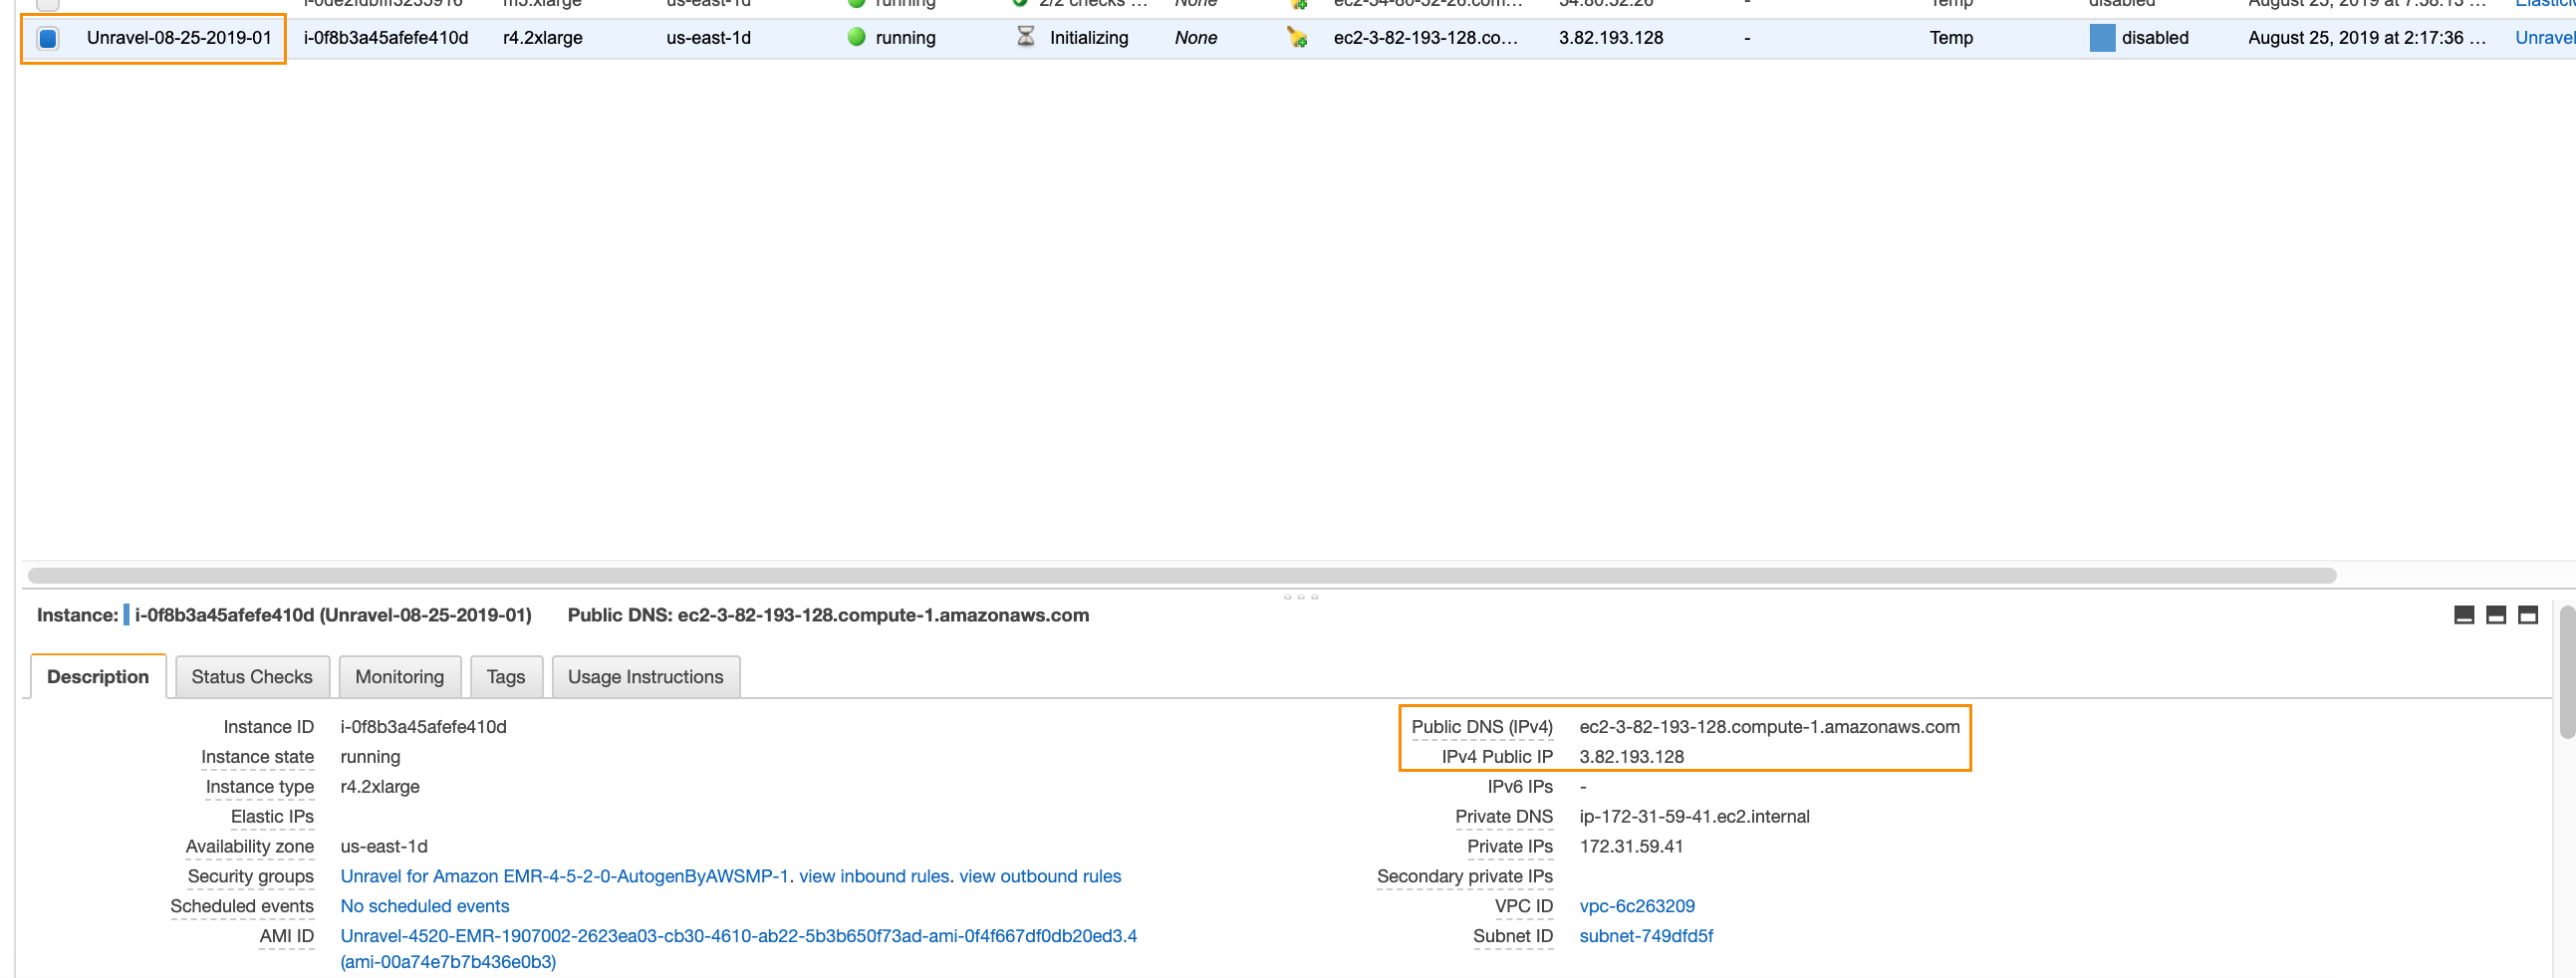
Navigate to
http://with a web browser.hostname-or-ip-address-of-the-instance:3000Log in with username
adminand passwordunraveldata.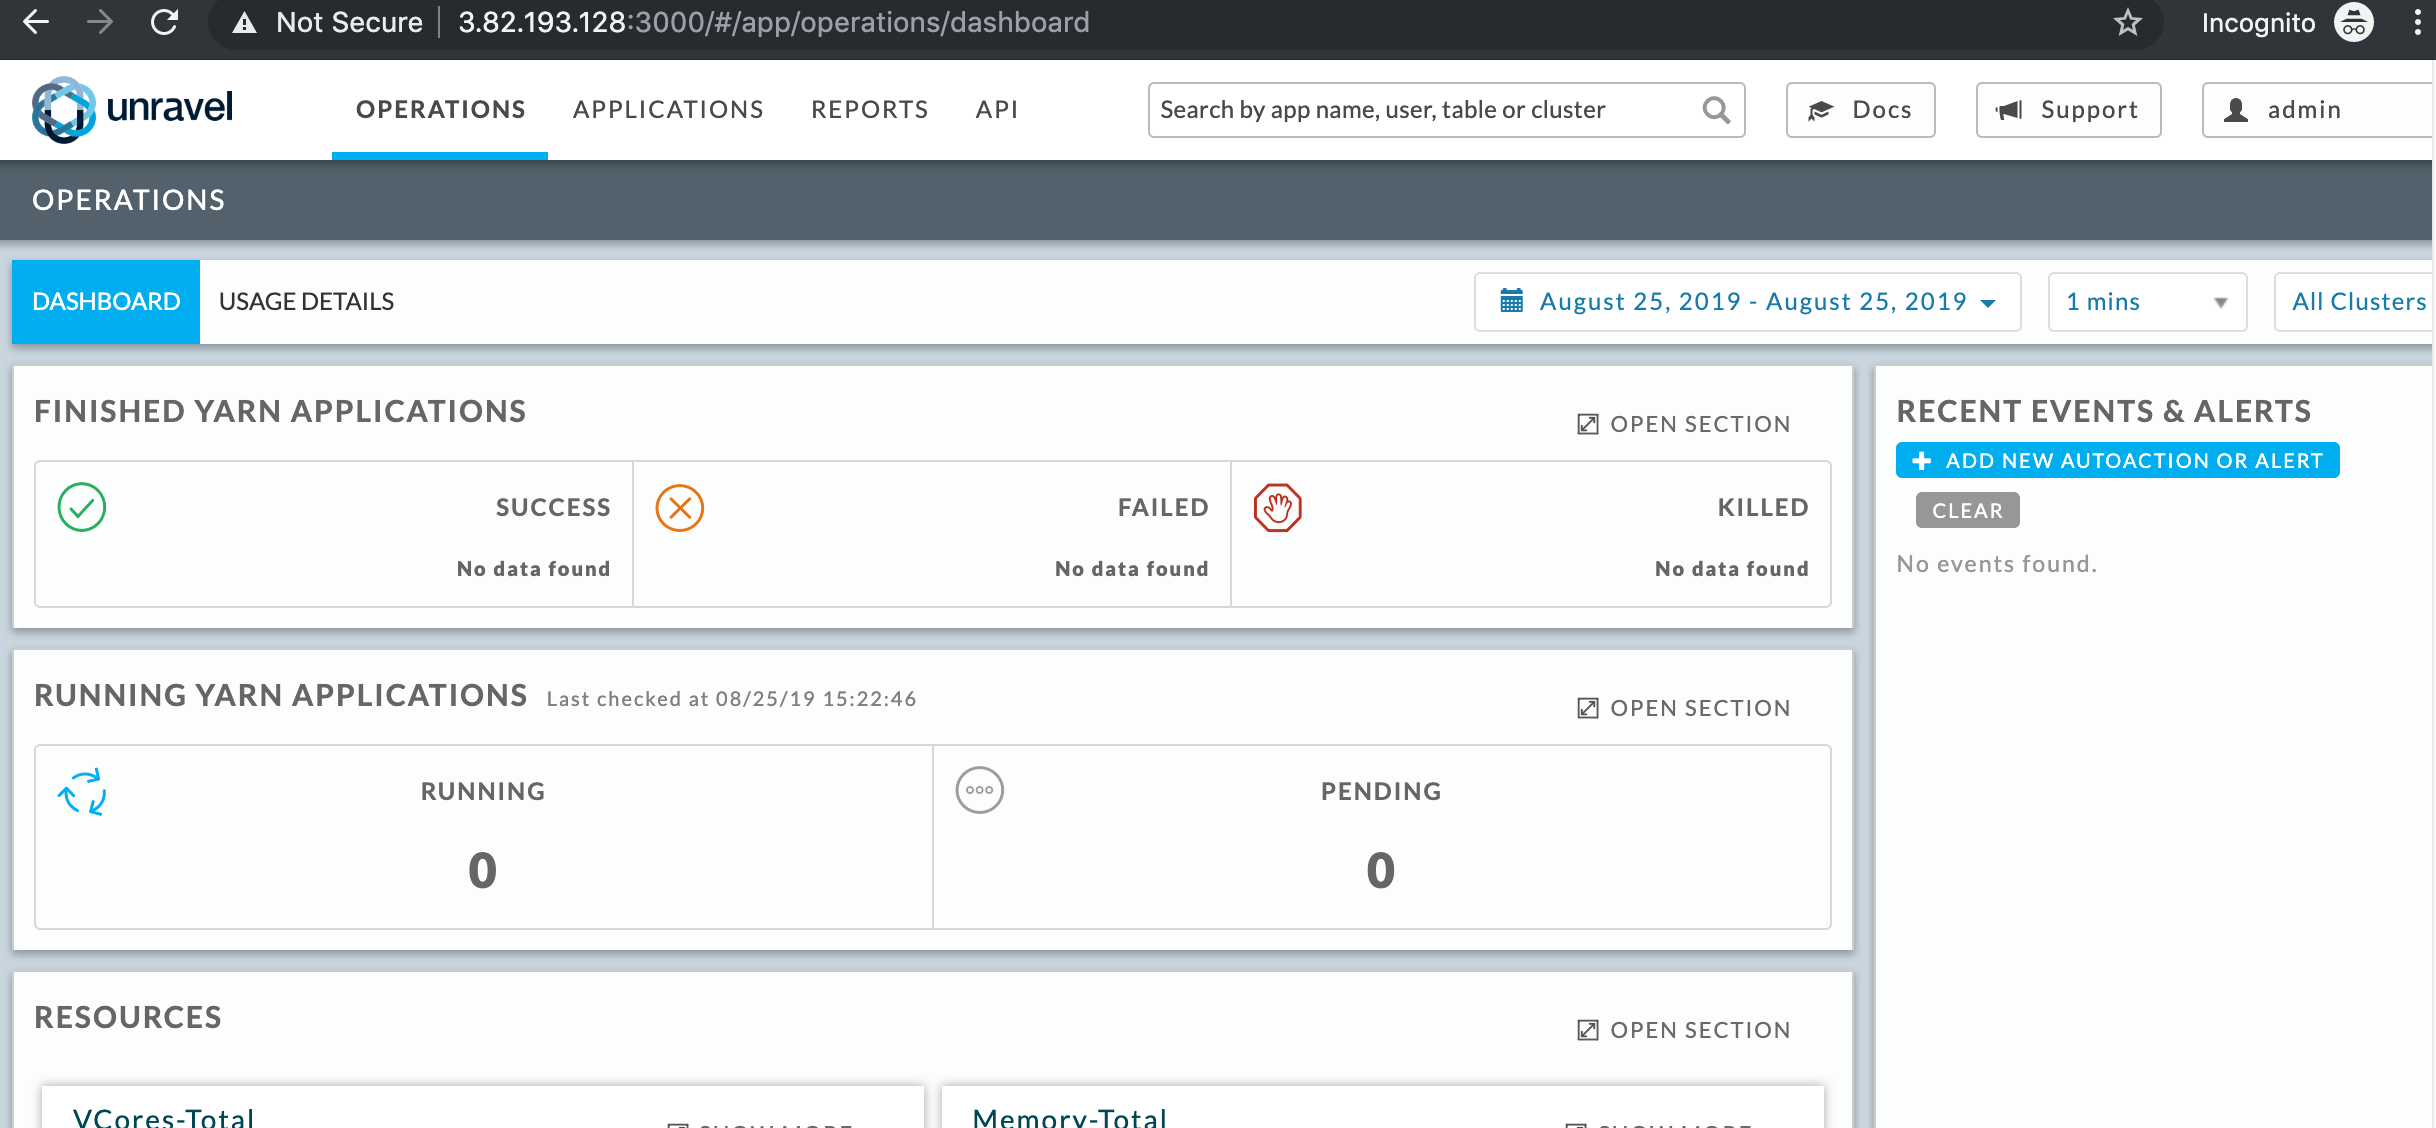
Next, let’s connect a new EMR cluster to Unravel Server.
Step 2: Connect a new EMR cluster to Unravel Server
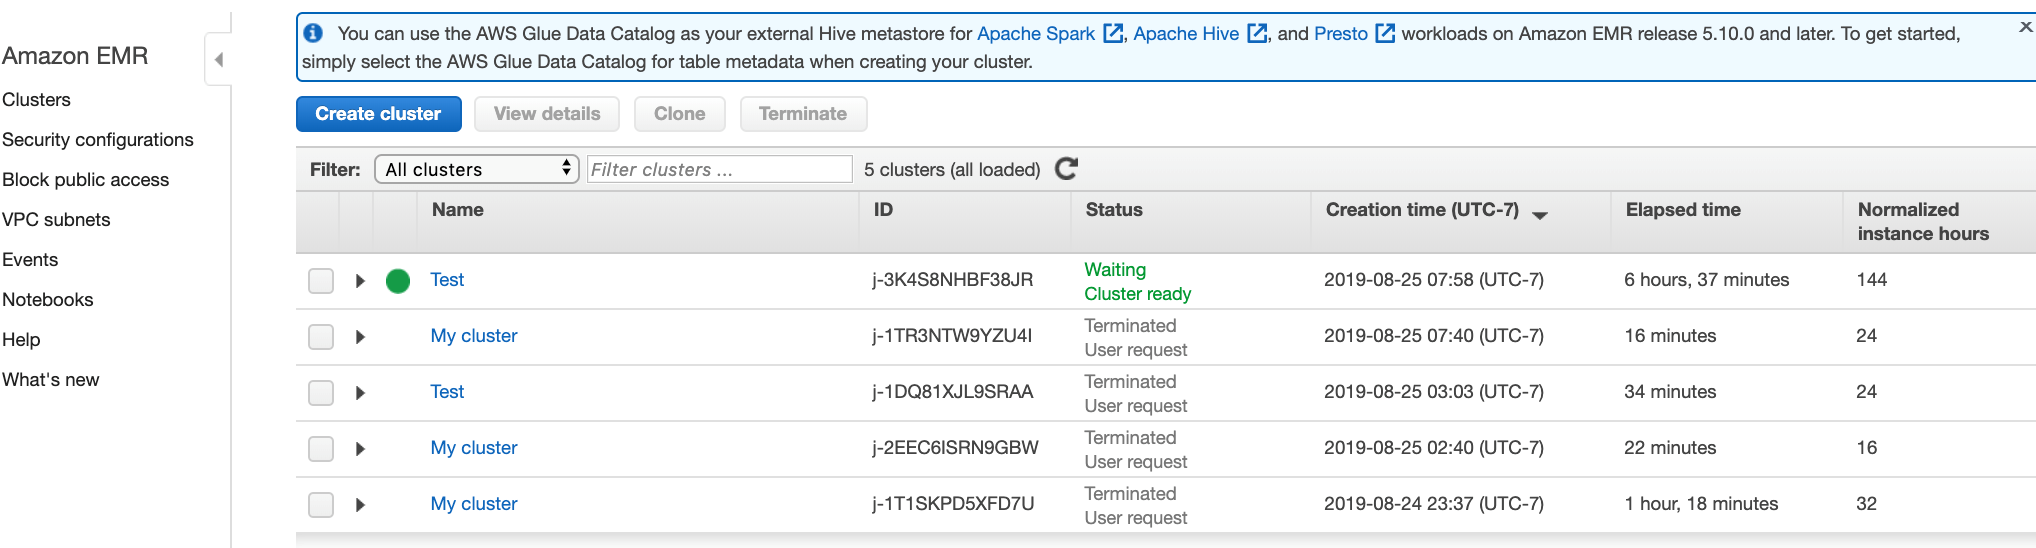
Go to AWS EMR Dashboard and click Create Cluster.
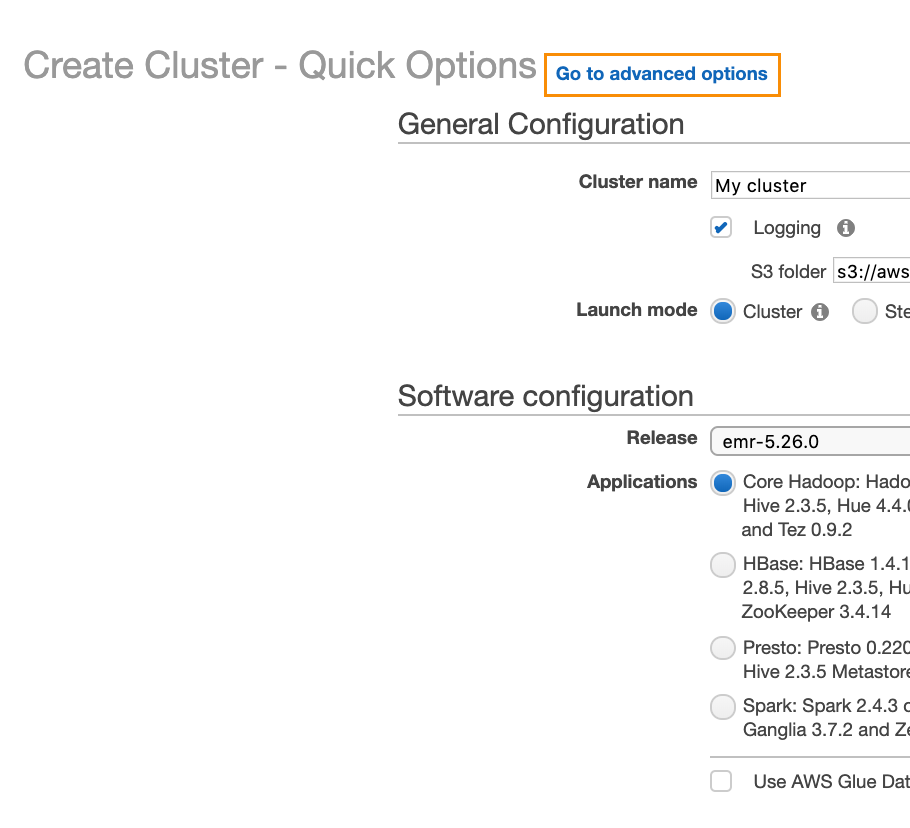
Click Go to advanced options.
Select the release and the services you want to install.
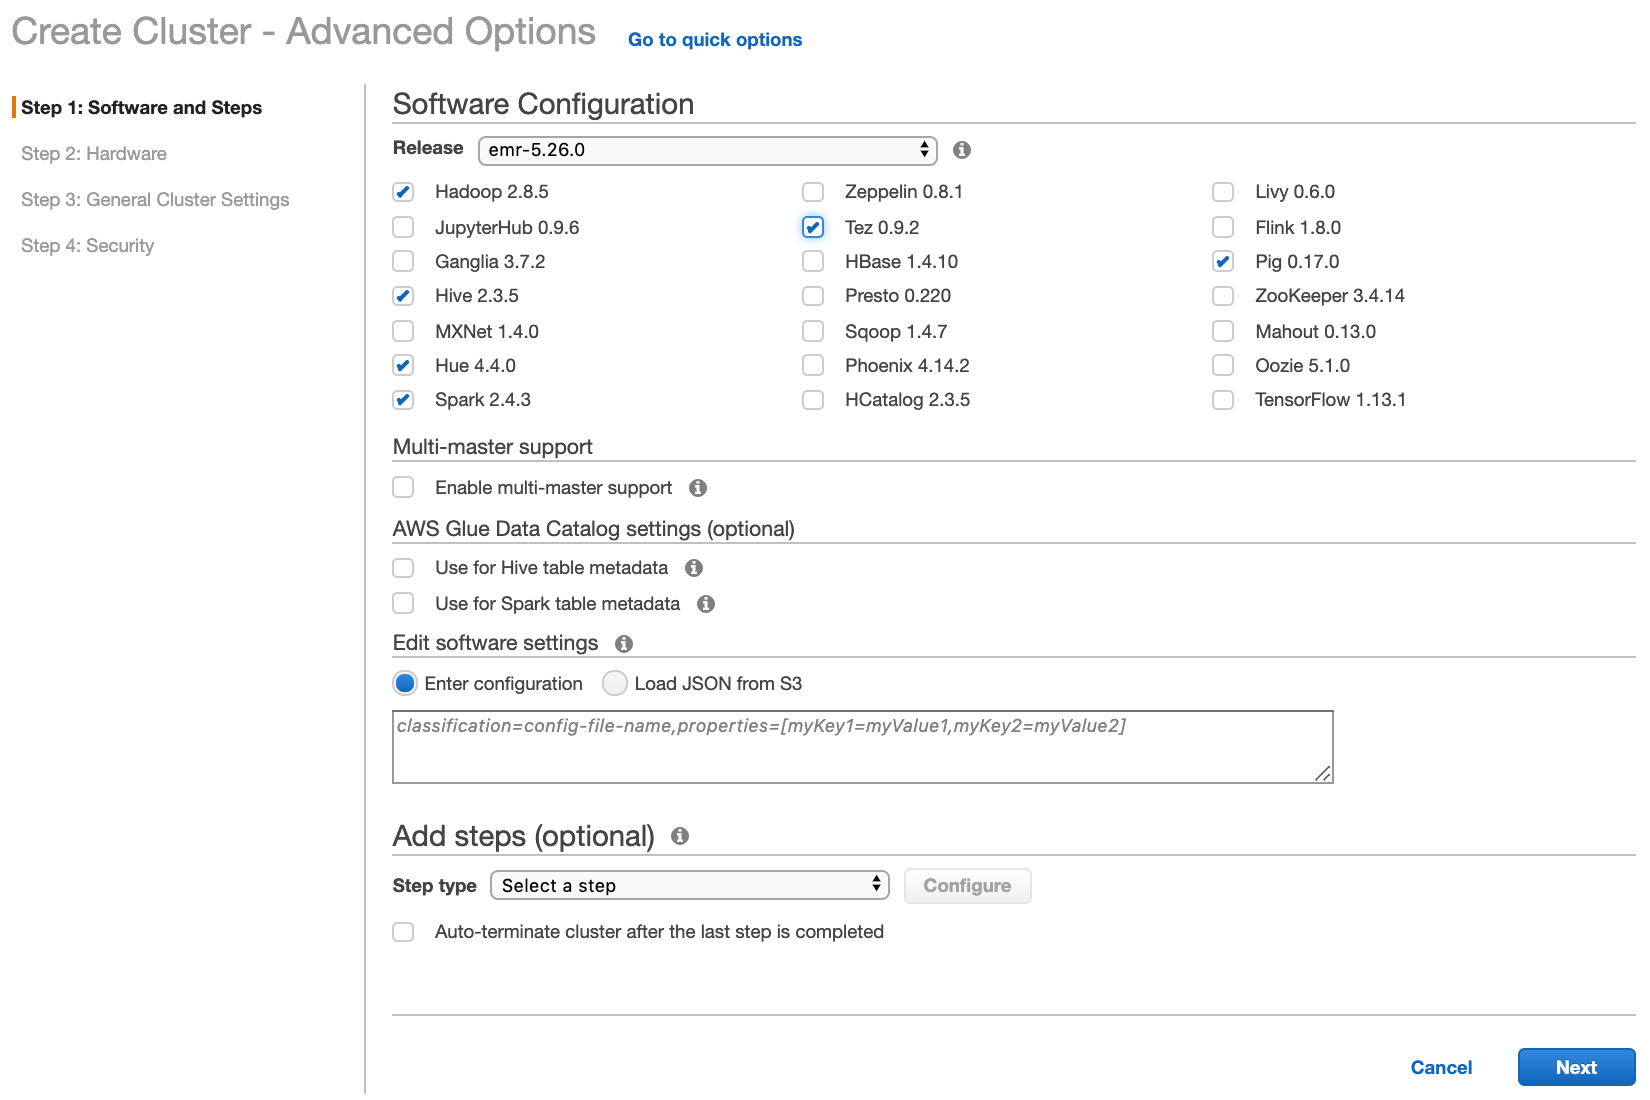
Click Next.
Select the same VPC and subnet as the one chosen for Unravel Server (Unravel Server can reside in a different VPC, but then you would need to set up VPC peering).
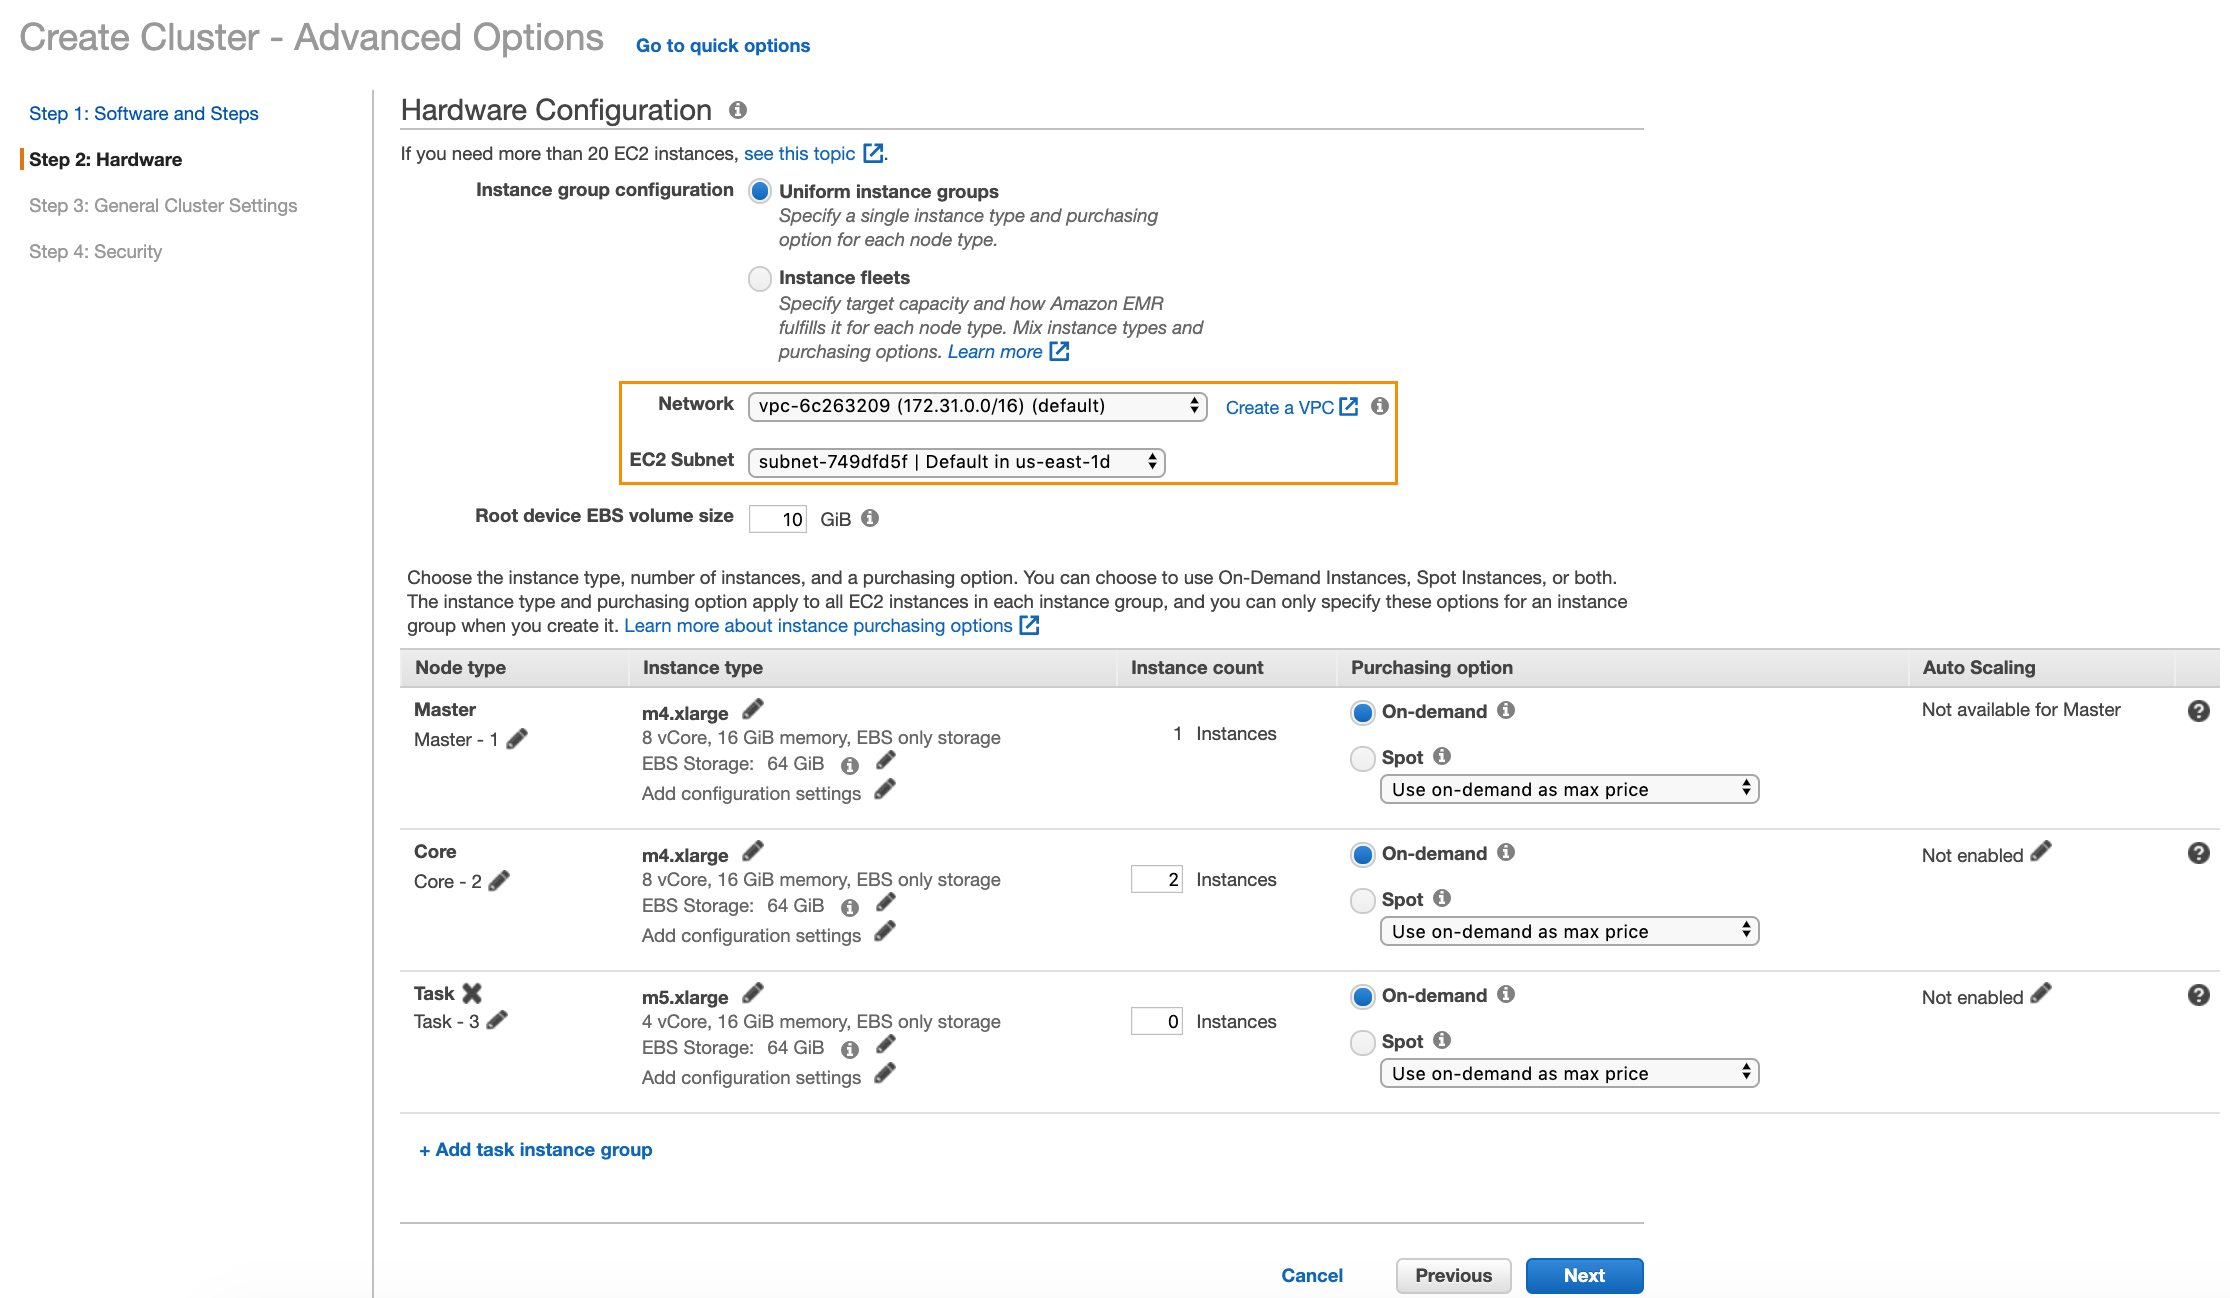
Click Next.
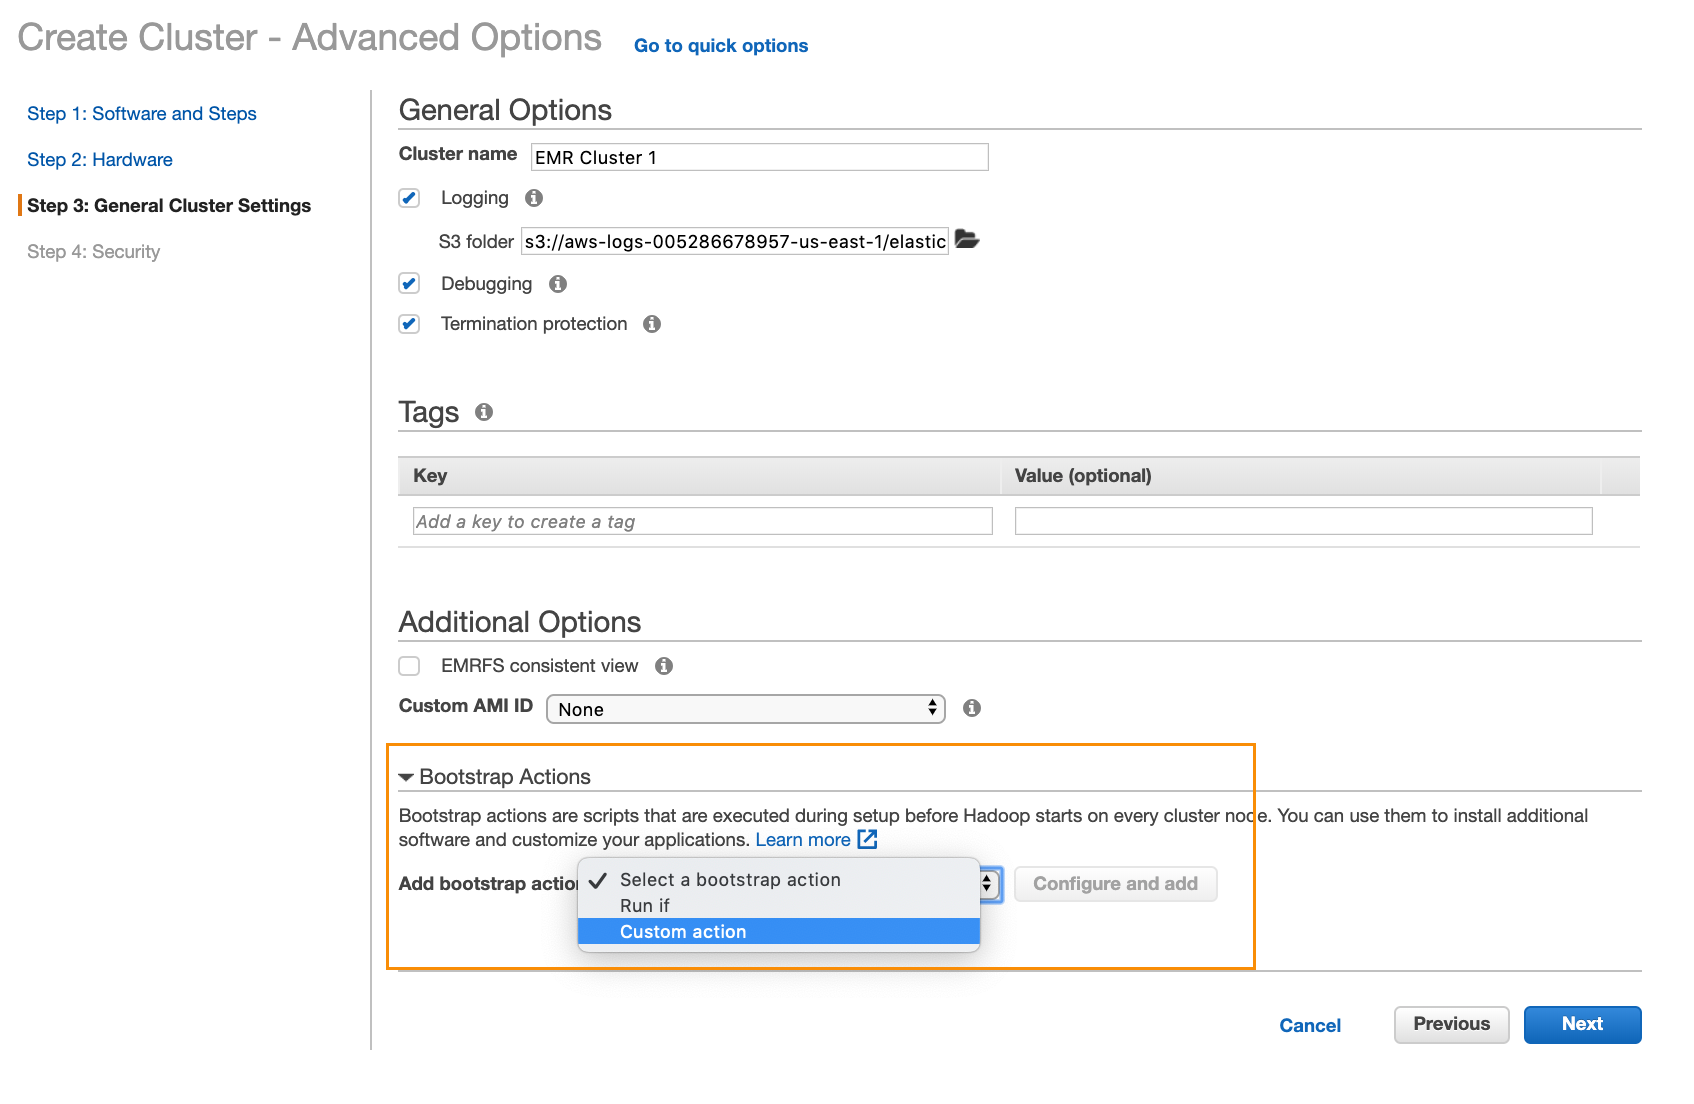
Add a bootstrap action.
In this section, go the Bootstrap Actions section, select Custom Actions, and click Configure and Add.
That brings up a dialog box like this:
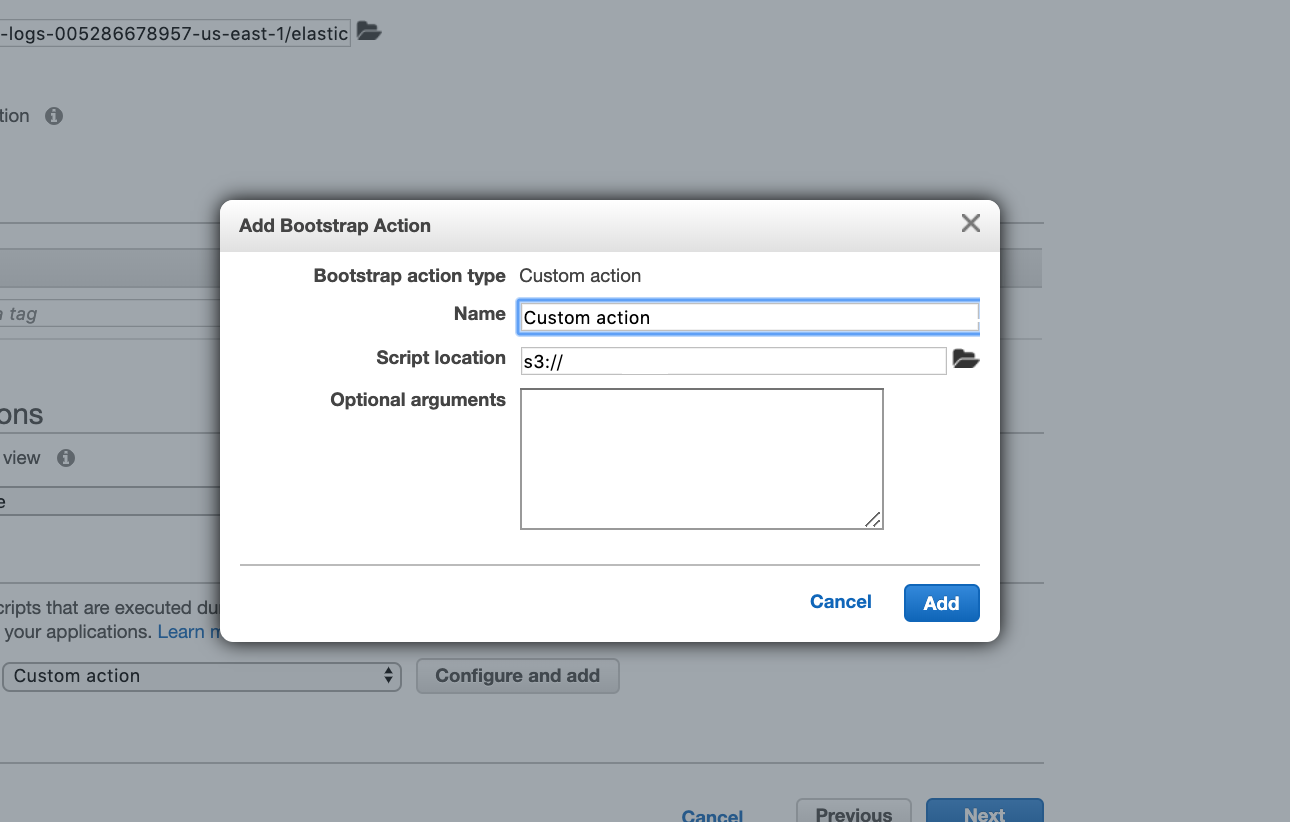
In the Script location text box, enter
s3://unraveldatarepo/unravel_emr_bootstrap.pyIn the Optional Arguments text box, do the following:
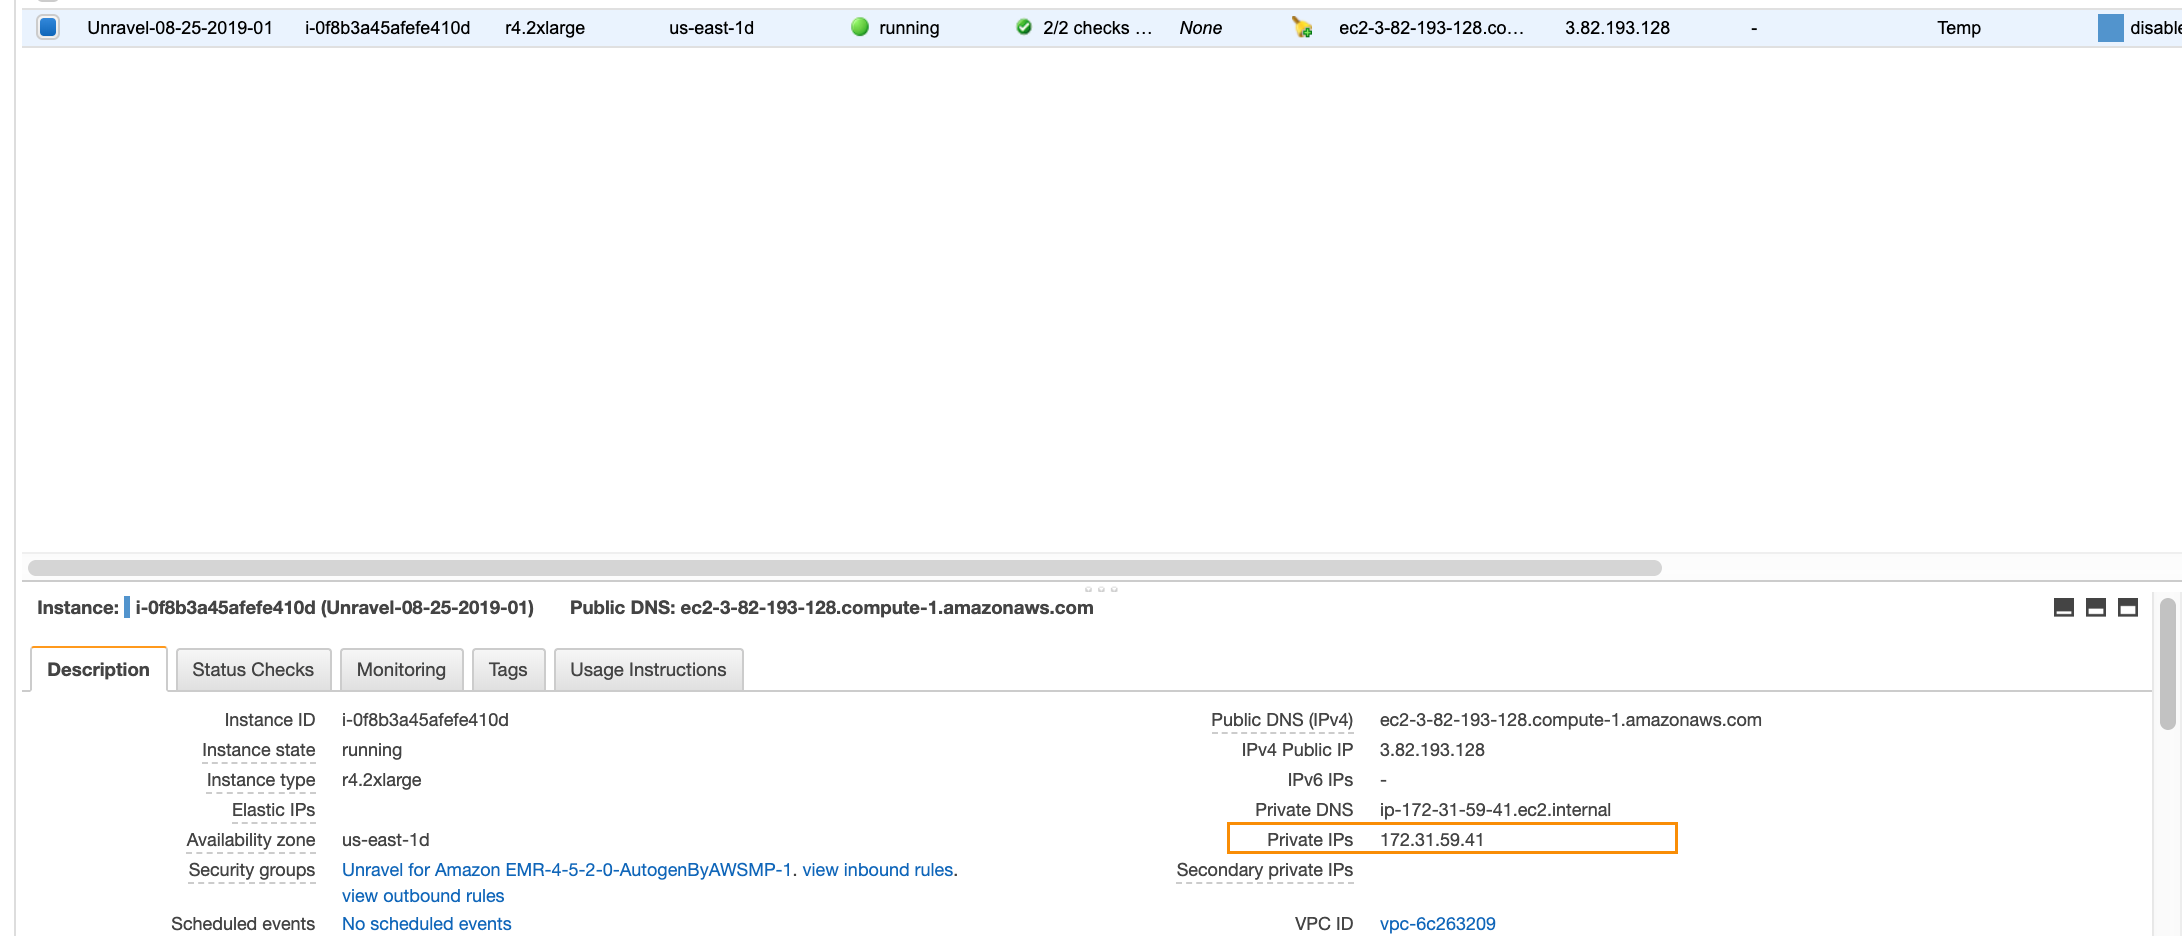
Make a note of the private IP from your Unravel instance:
Add
--unravel-serverunravel-ec2-private-ip-address--bootstrap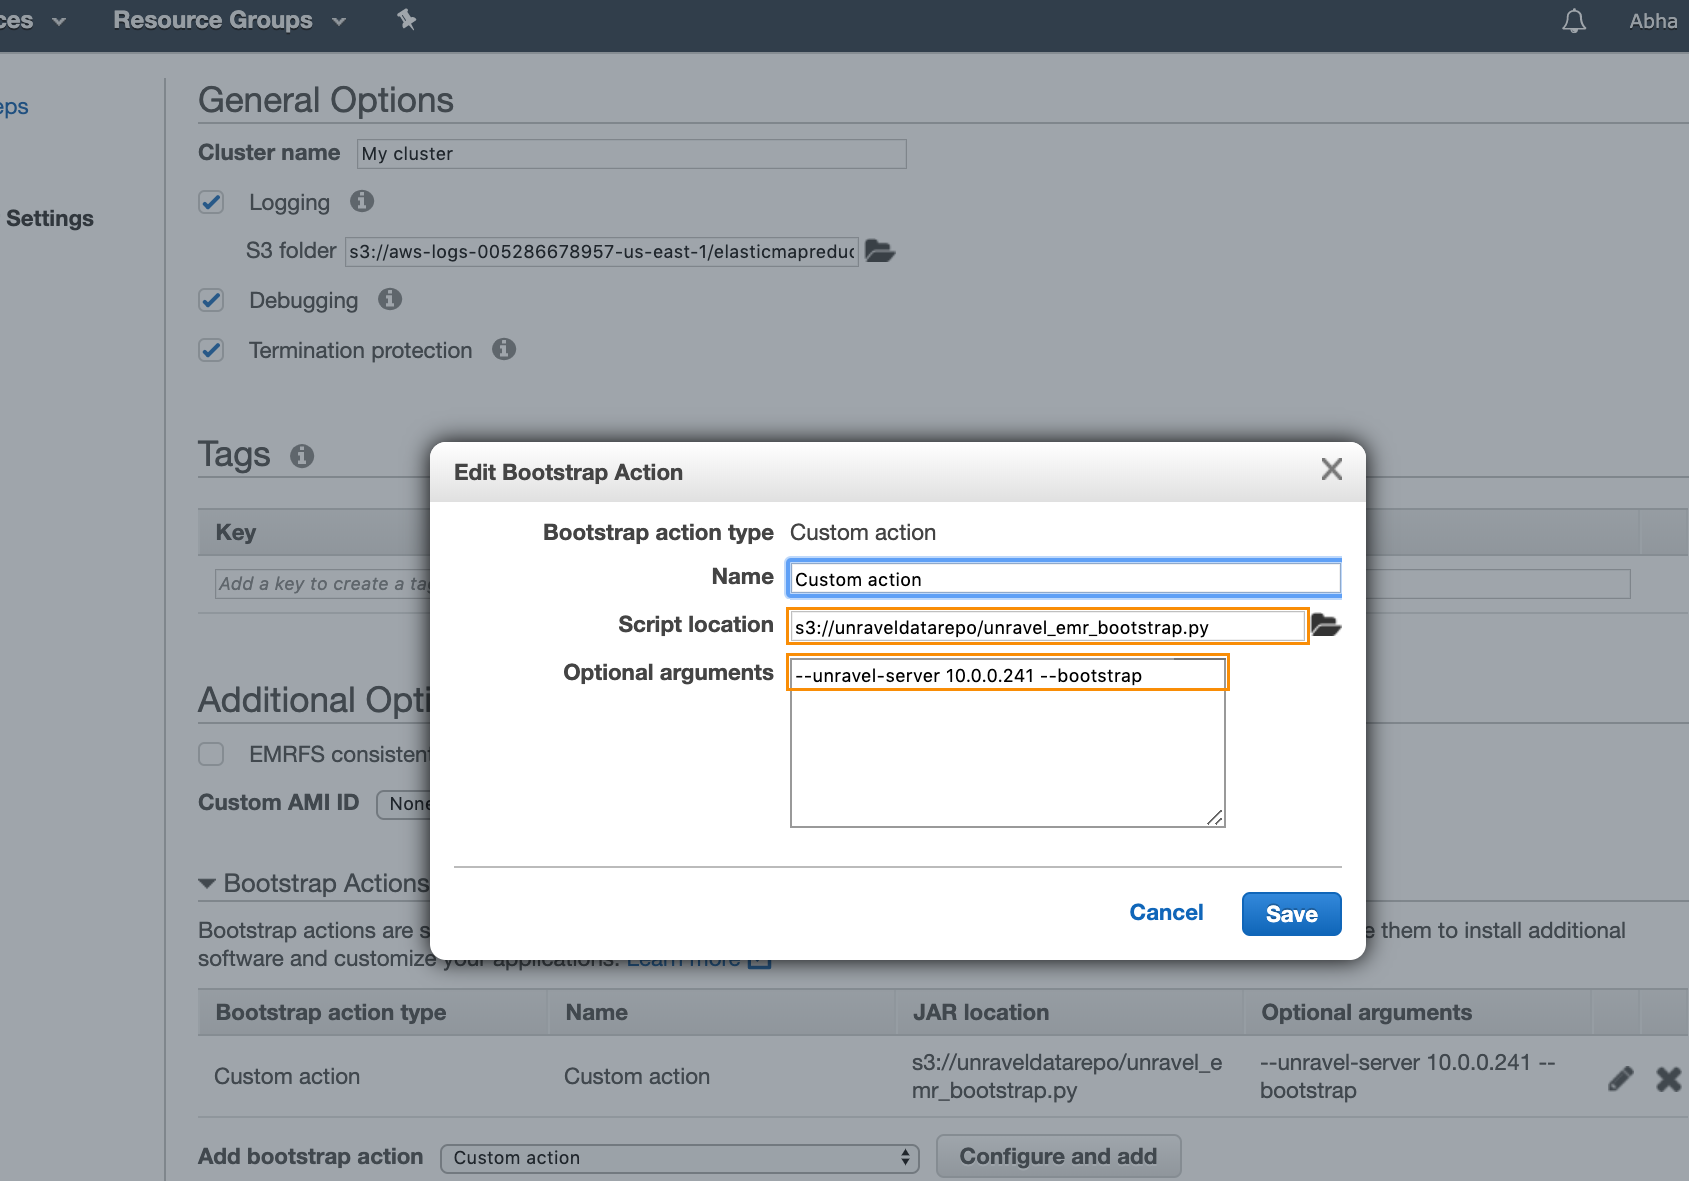
Click Save in the dialog box, and then click Next.
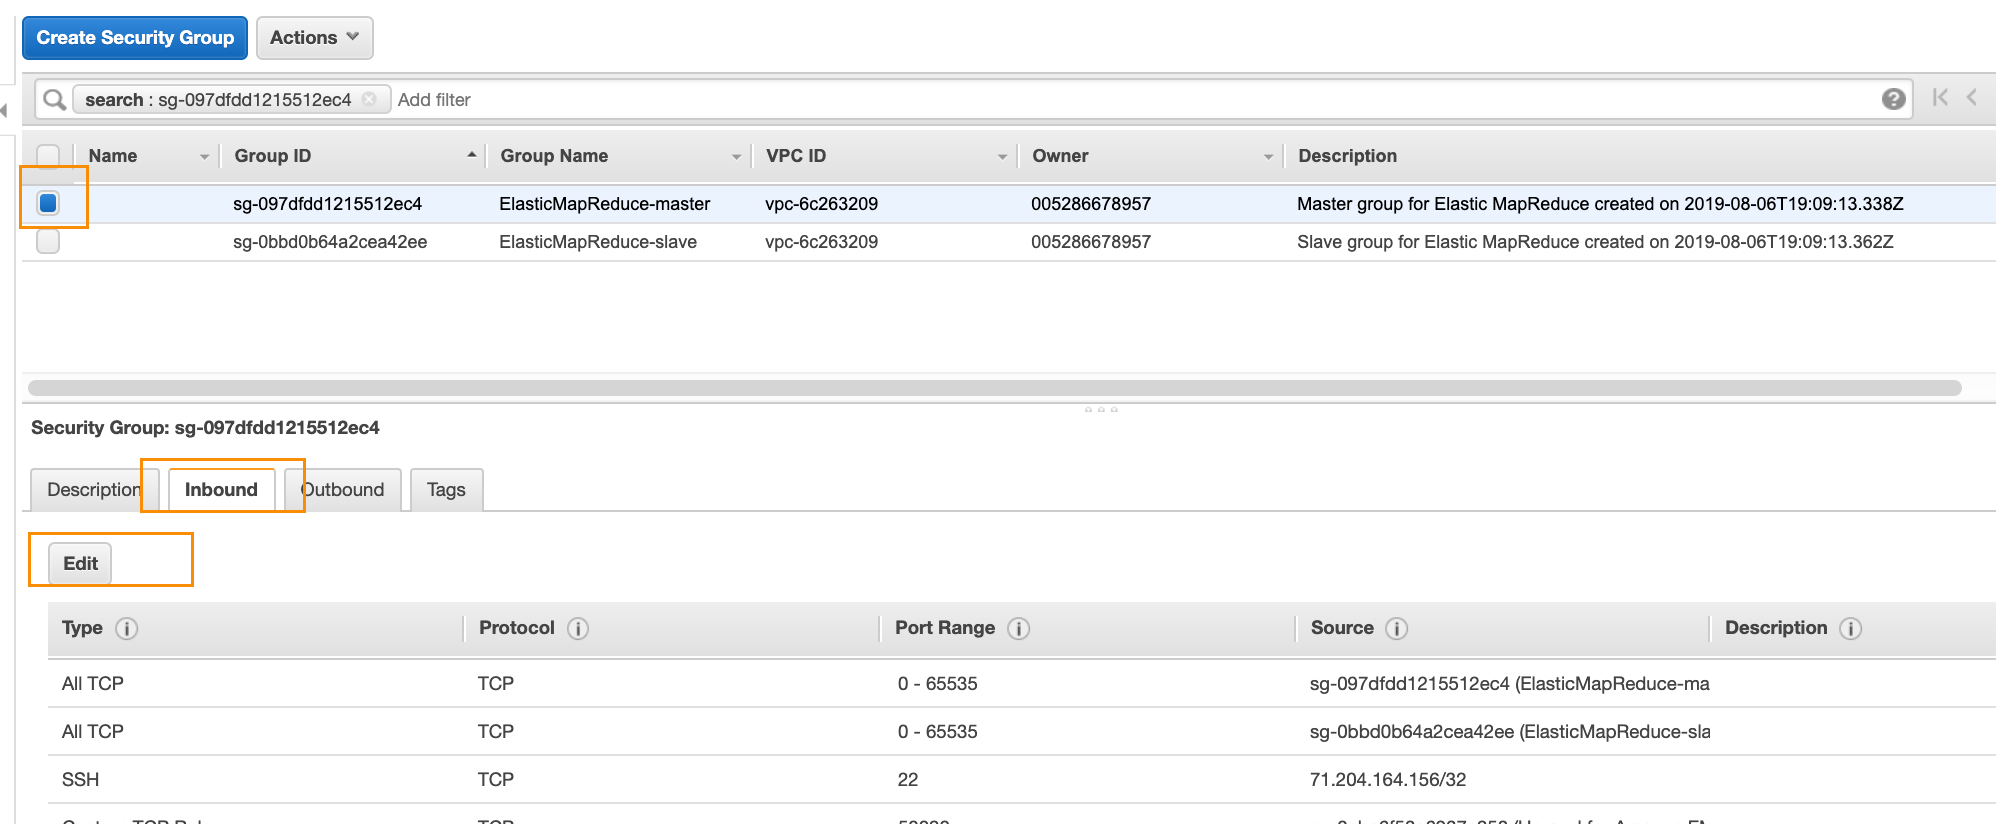
In the next screen, as shown below, select a key pair to be able to connect to the EC2 nodes and also make a note of the names of the security groups encircled below, as you will modify them.
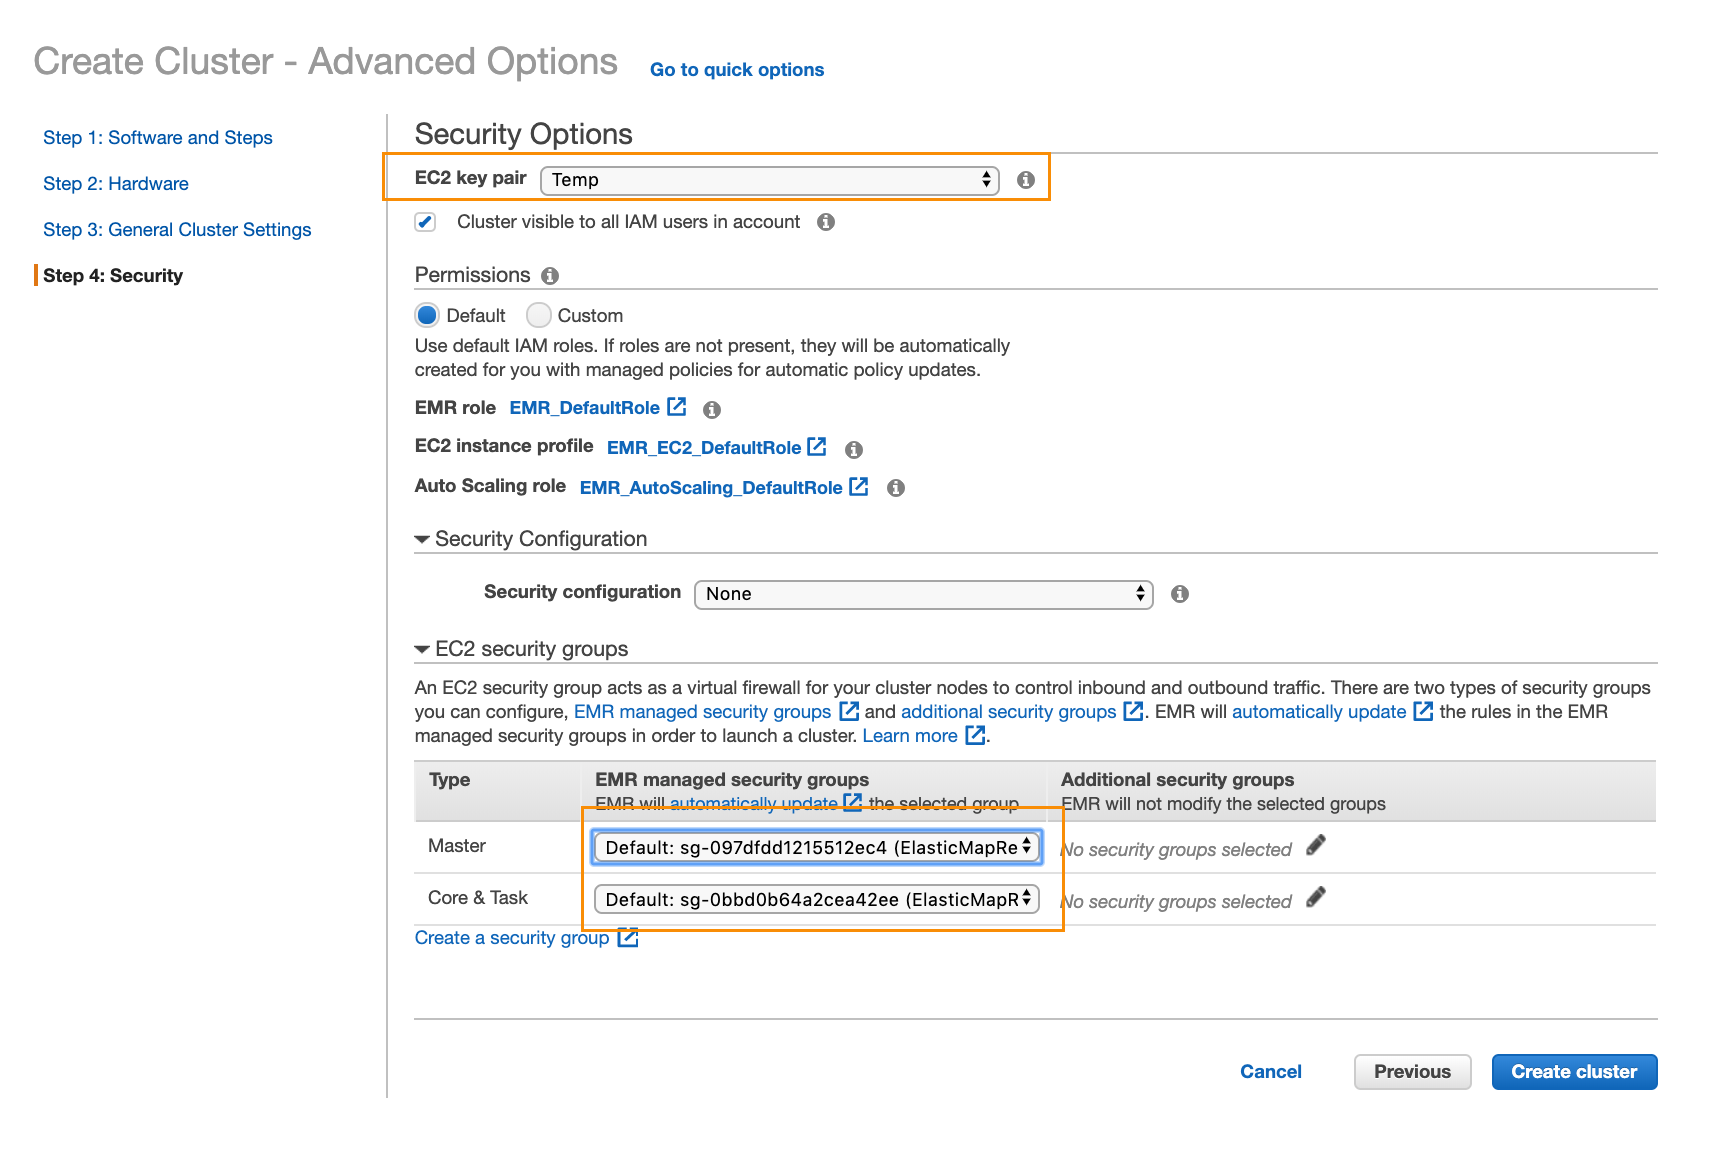
Click Create Cluster.
To find the security group ID of the security group named Unravel for Amazon EMR-1, navigate to Security Groups from the left panel in your AWS console and search for Unravel for Amazon EMR-1.
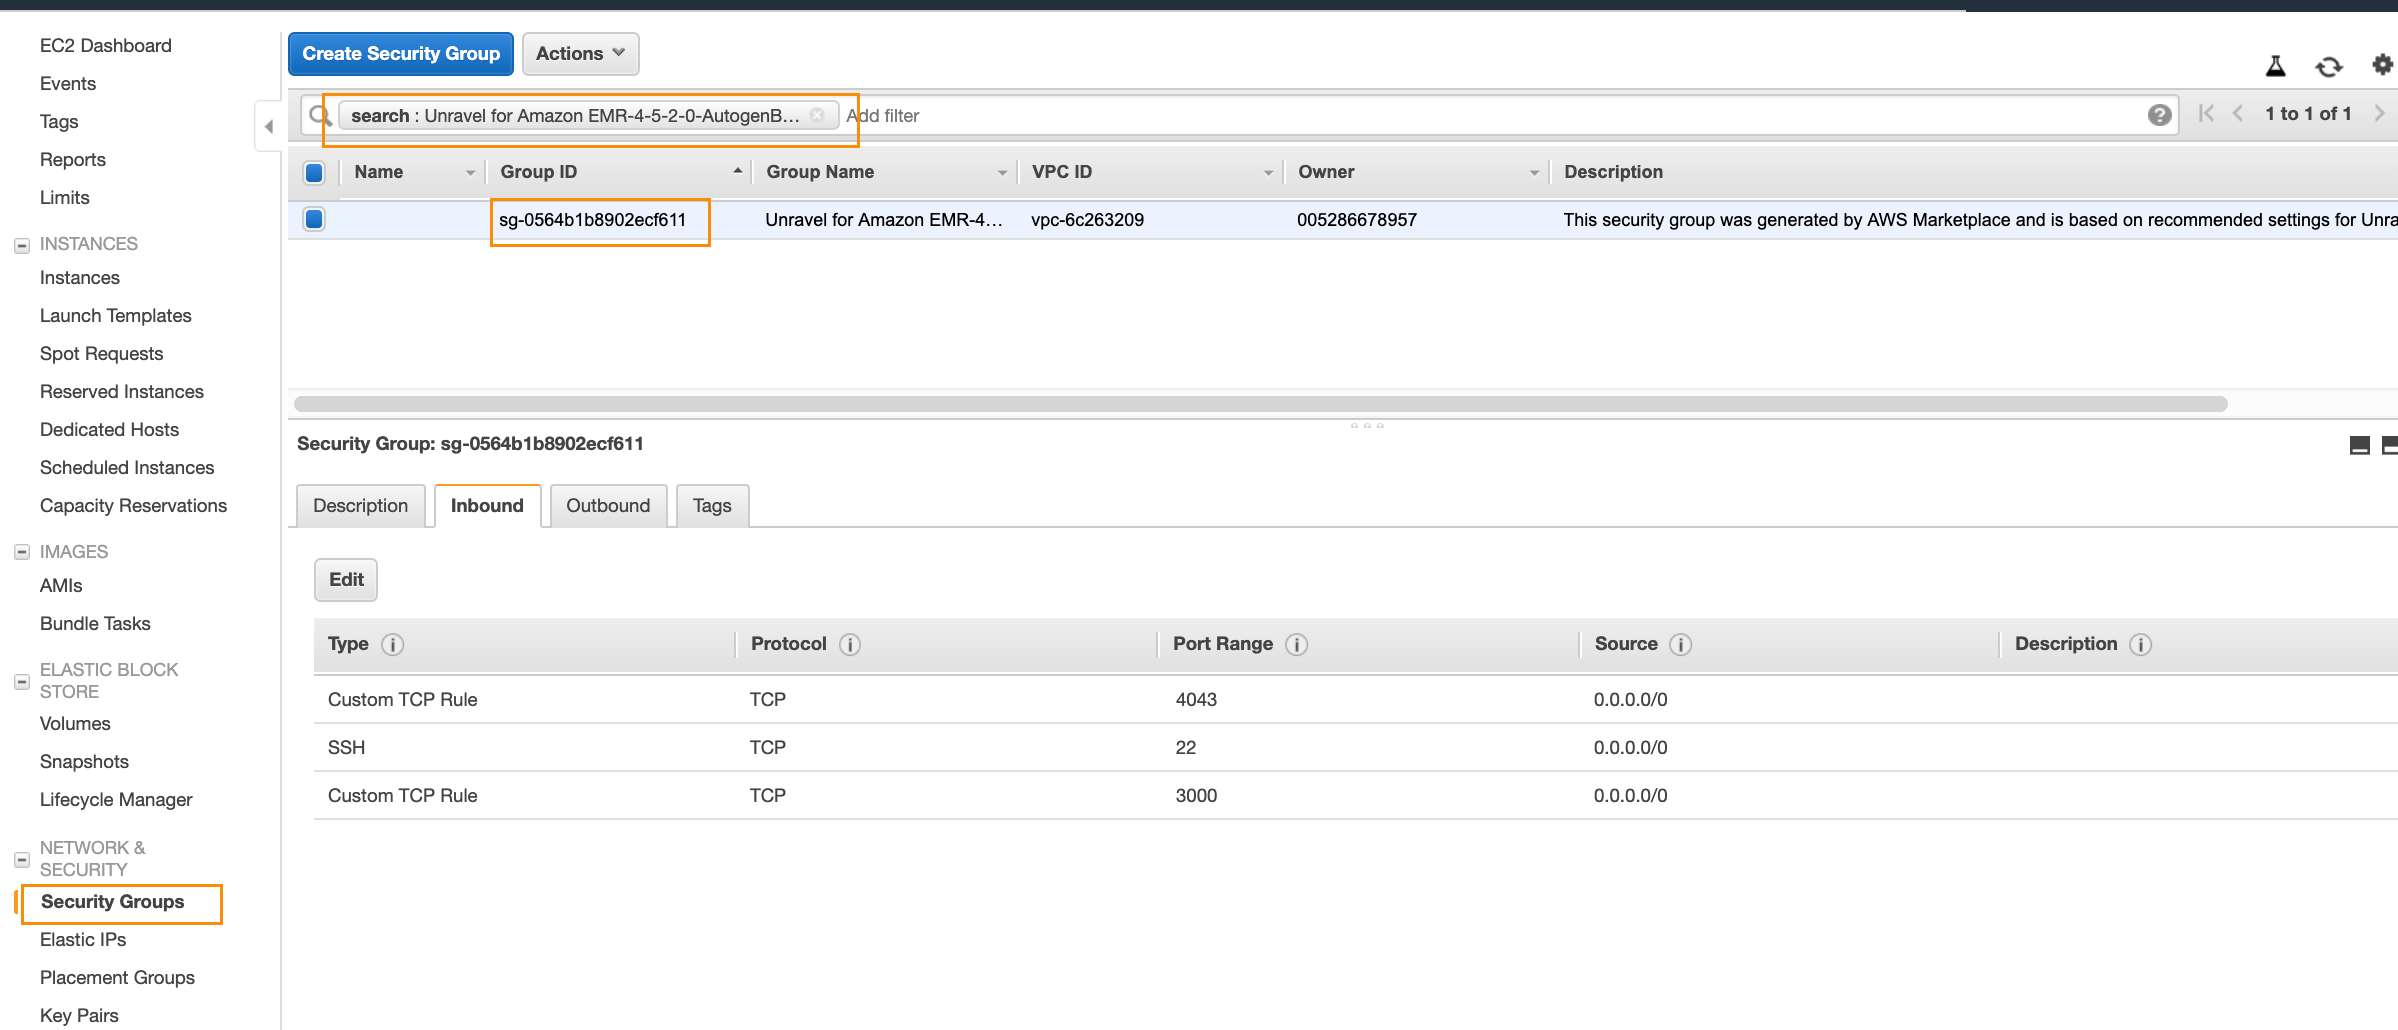
Make a note of the group ID.
For example, in the screenshot above, the group ID is
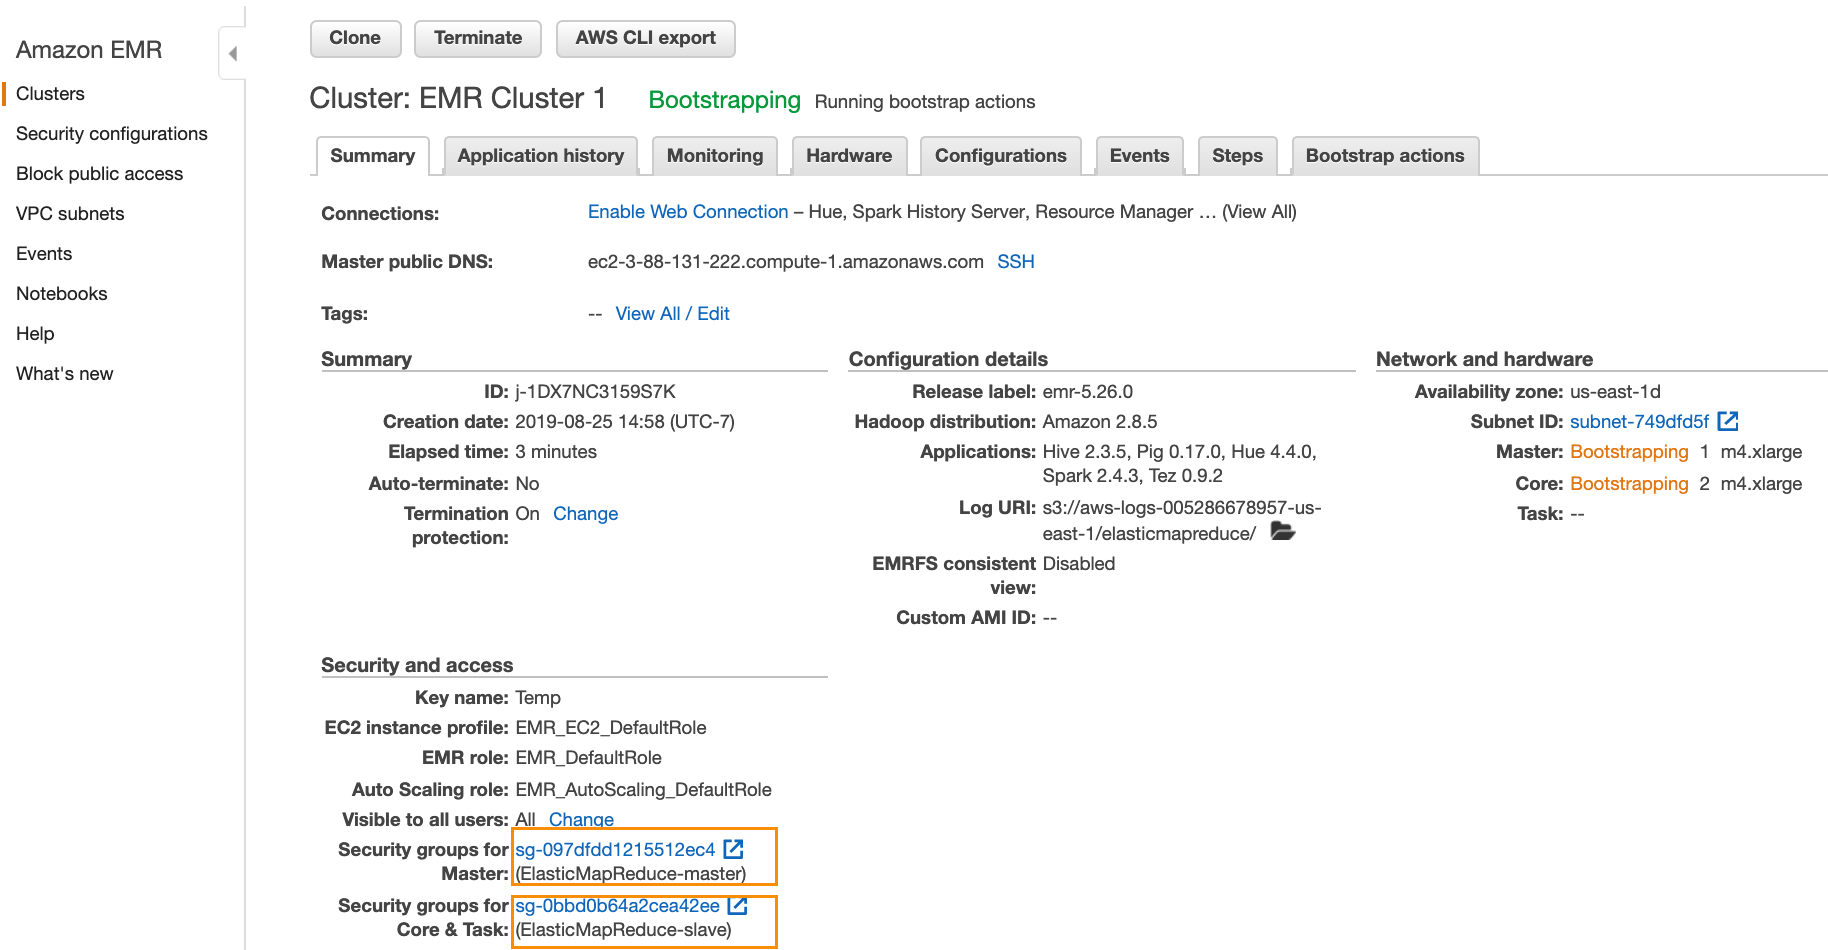
sg-0564b1b8902ecf611.From the EMR cluster’s screen (where it shows its status in the creation process), navigate to each of the two security groups highlighted in the screenshot below.
Note
You only need to change these security groups once.
Click the group, select one, click the Inbound tab, and click Edit.
Click Add Rule.

Add three rules as follows and then Save (as shown in the screenshot below):
Type =
Custom TCP, Protocol =TCP, Port Range =8020, Source =security-group-ID-of-Unravel-Server’s-security-groupType =
Custom TCP, Protocol =TCP, Port Range =50010, Source =security-group-ID-of-Unravel-Server’s-security-groupType =
Custom TCP, Protocol =TCP, Port Range =50020, Source =security-group-ID-of-Unravel-Server’s-security-group
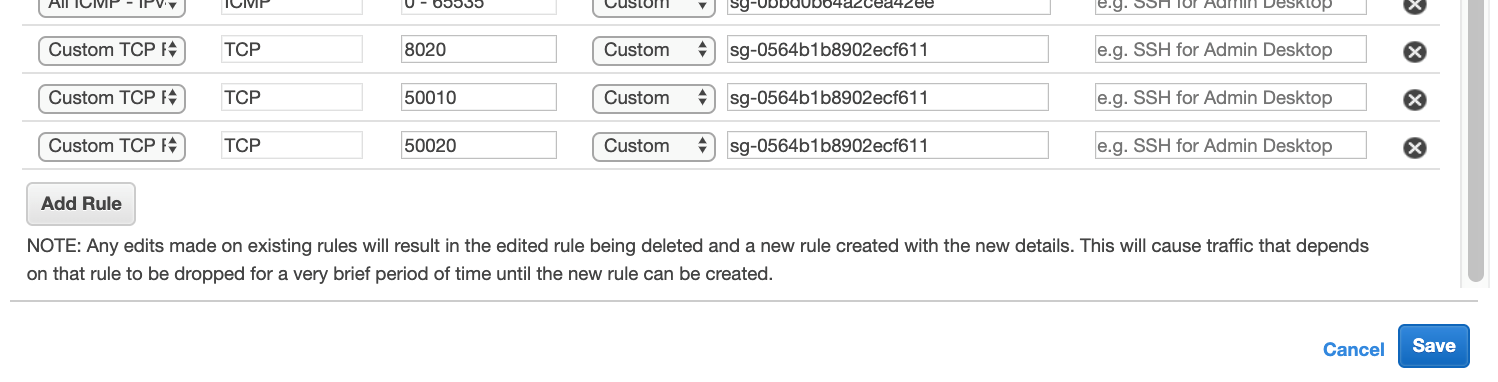
Make the above changes to both the security groups corresponding to the EMR cluster.
In order to connect to an existing EMR cluster (instead of a new one) and/or for more advanced options, see Connecting Unravel Server to a new or existing EMR cluster.
Step 3: Check out the Unravel UI with your EMR cluster connected
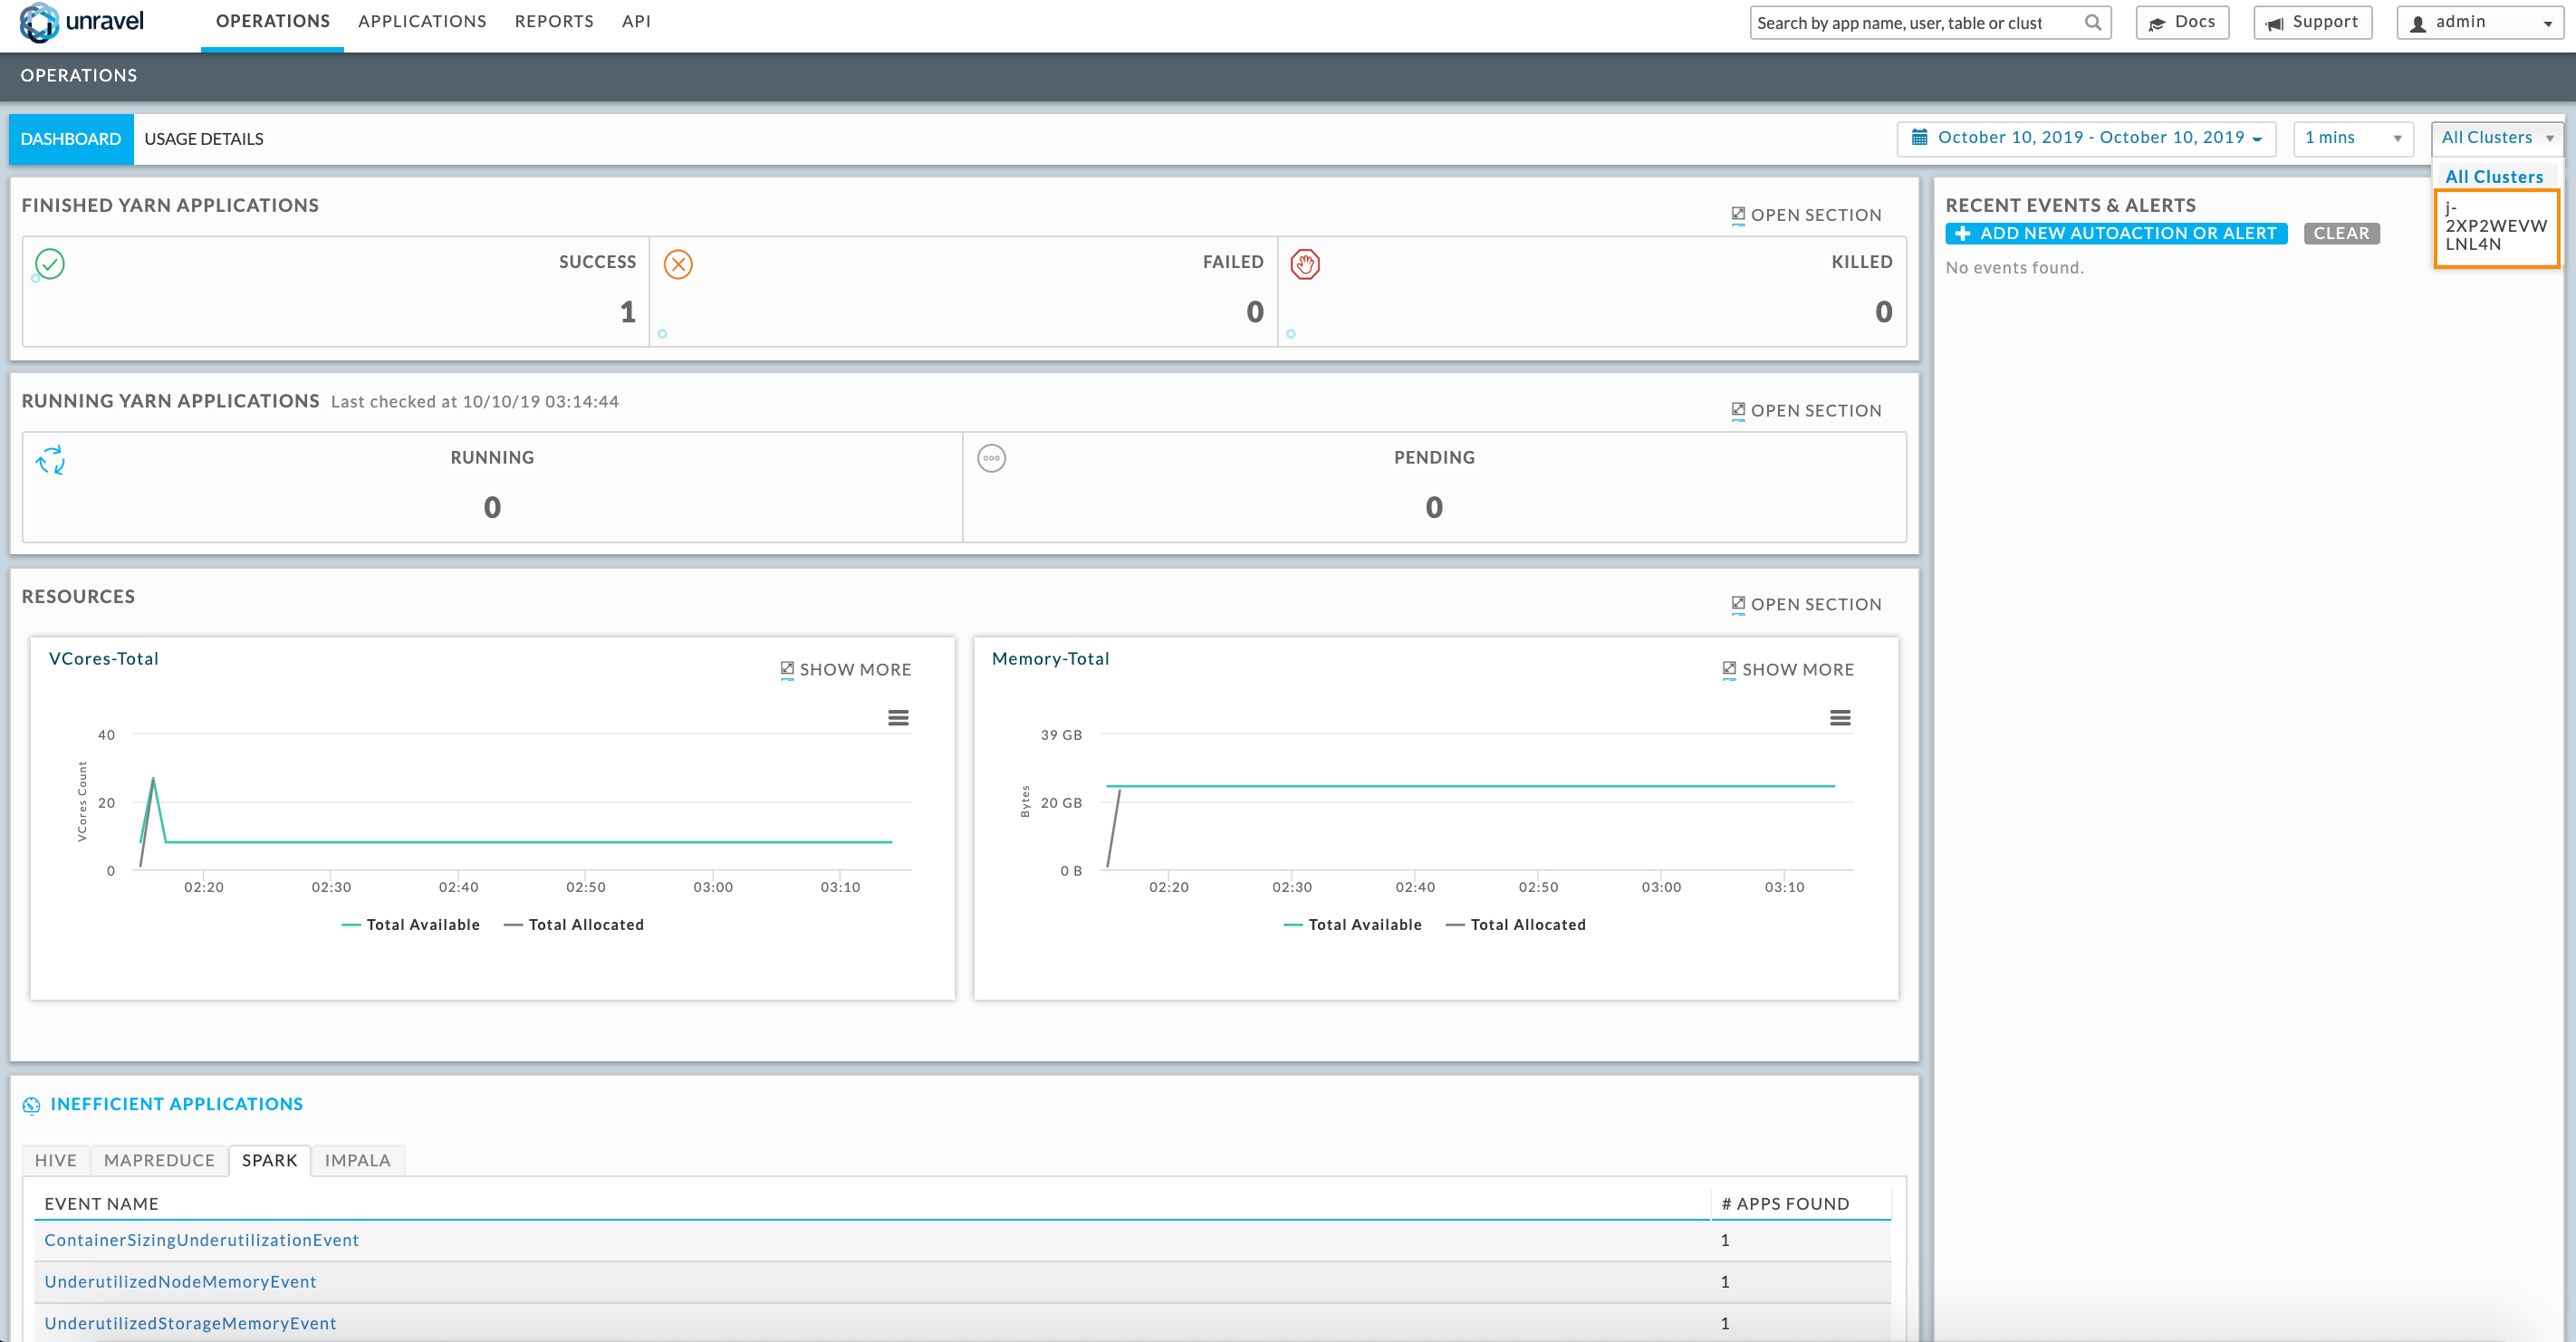
Once the cluster is created, and you go back to the Unravel UI (http://), within a few seconds, you should see the cluster ID in the main dashboard dropdown on the right and some data in various charts.hostname-or-ip-address-of-the-instance:3000
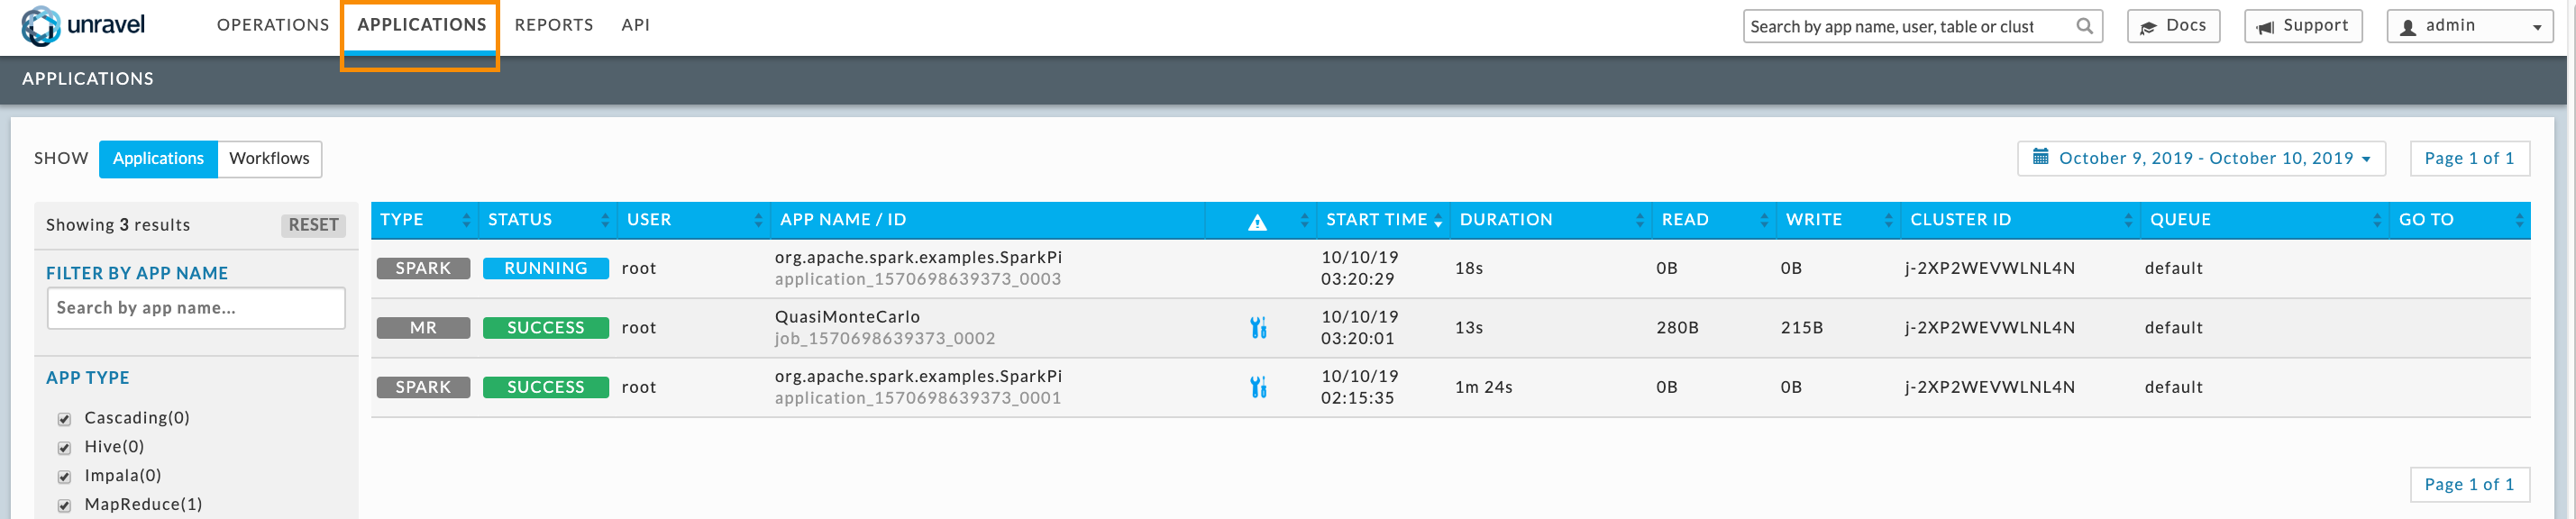
You can now run applications in your cluster and use Unravel to optimize them. Applications you run will show up in the Applications tab.
For details on using Unravel UI, see User guide.