Create Azure VM
Sign in to the Azure portal.
Select Virtual Machines > Add.
In the Basics tab (default) enter the following.

Project Details
Subscription: Choose the applicable subscription.
Resource group: Create a new group or choose an existing one.

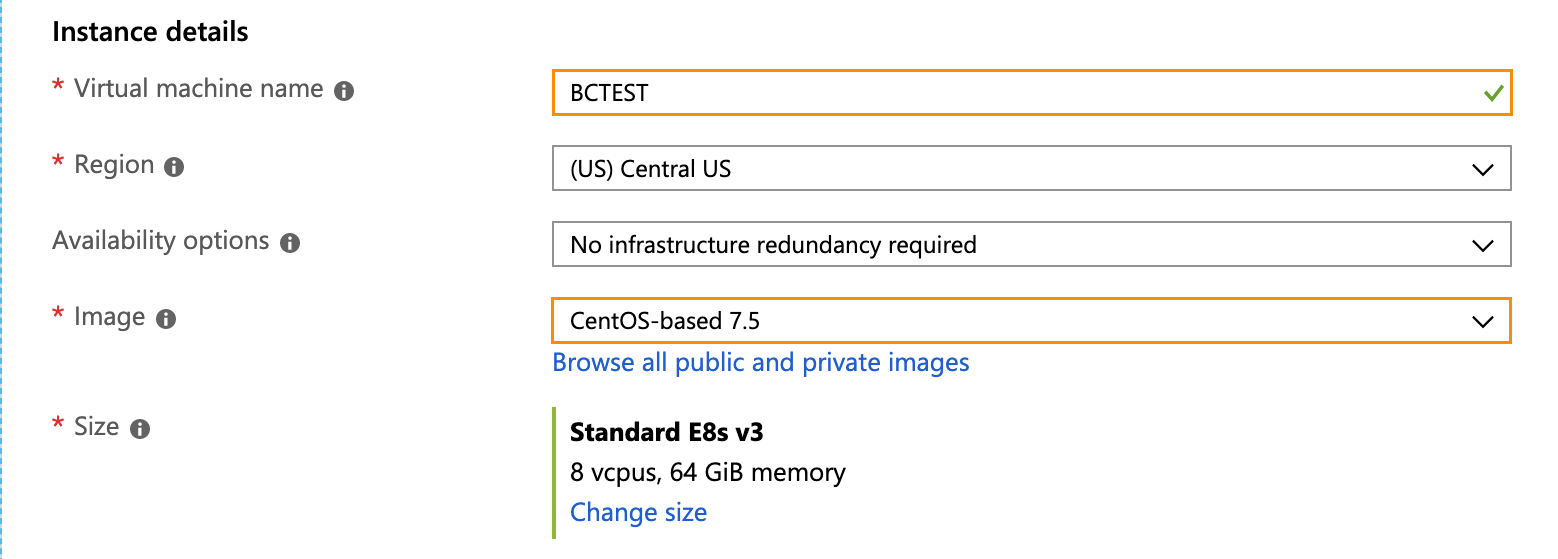
Instance Details
Virtual Machine Name: The MySQL server name.
Region: Select the Azure region.
Availability Options: Select
No infrastructure is redundancy required.Image: Select the appropriate image. Both
Centos-based 7.x+ andRed Hat Enterprise Linux 7.x+ are supported.Size: Click Change Size. In the modal select Memory optimized image with at least
128 GB memoryandPremium Disk support, for example, E16s_v3 in East US 2)

Administrator account
Authentication type: Select
passwordorSSH Key.Username and Password: Enter your VM login information.

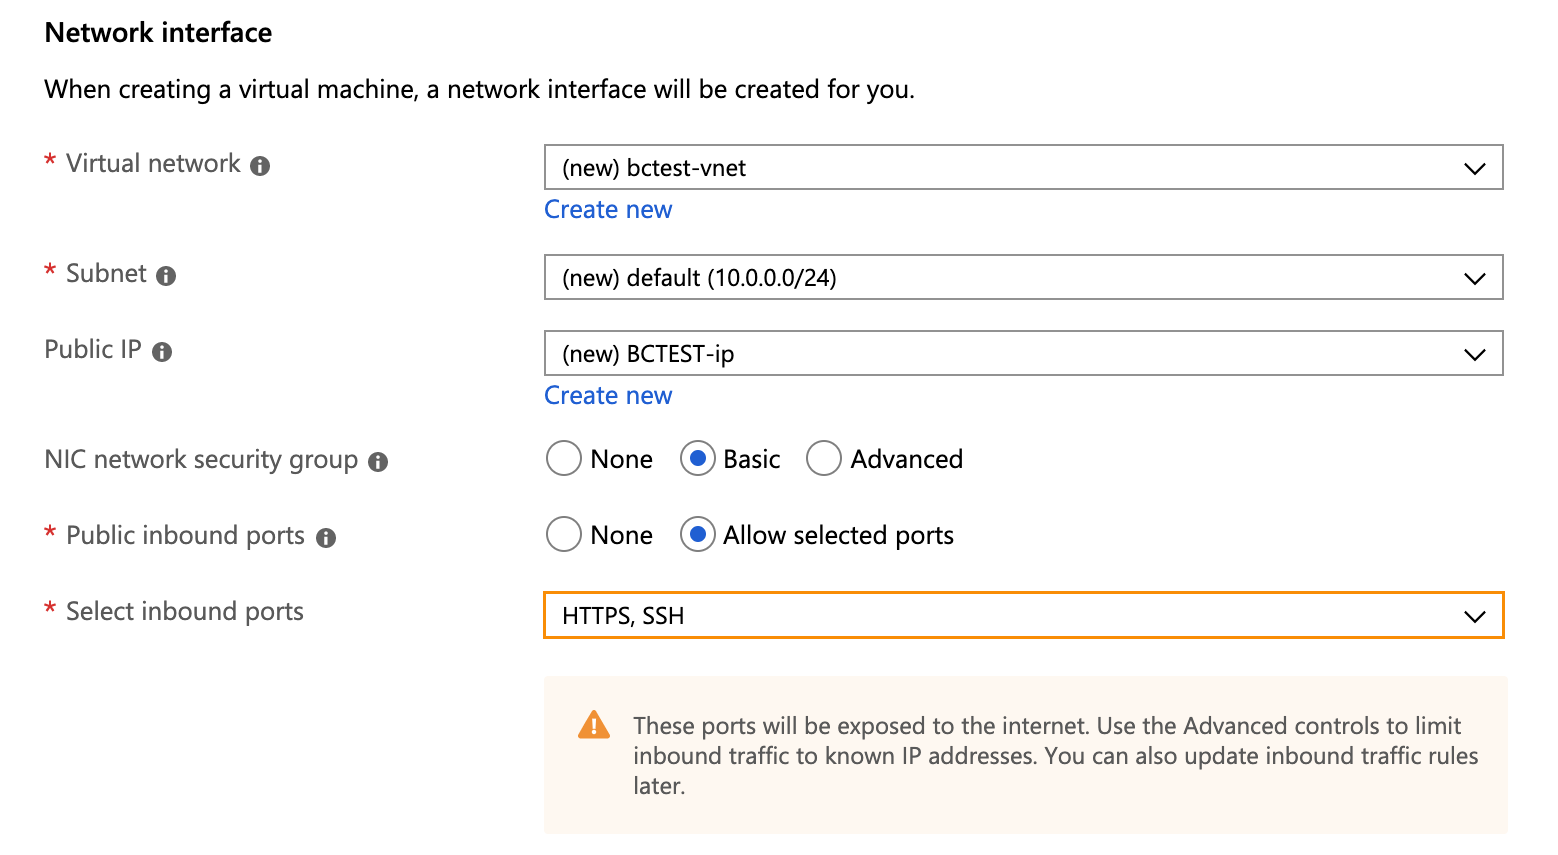
Inbound Port Rules
Public inbound ports: Select Allow selected ports.
Selected Inbound ports: Select both
HTTPSandSSH.

Click Next: Disks >.

In the Disks tab enter the following information:

Disk Options
OS disk type: Select
Premium SSD.

Data Disk
Click Create and attach a new disk.
Note: This disk is formatted so don't choose Attach an existing disk.
Enter a Name.
Select Source type
None (empty disk).Set Size to at least 512 GiB.
Disk type: Select
premium SSD.

Click Next: Networking >

In the Networking tab enter the following information.:
Virtual network: Create new or choose an existing one.
Subnet: Create new or choose an existing one.
Public IP: Create new or choose an existing one.
Select Inbound ports: Select
HTTPSandSSH.

Click Review + create.

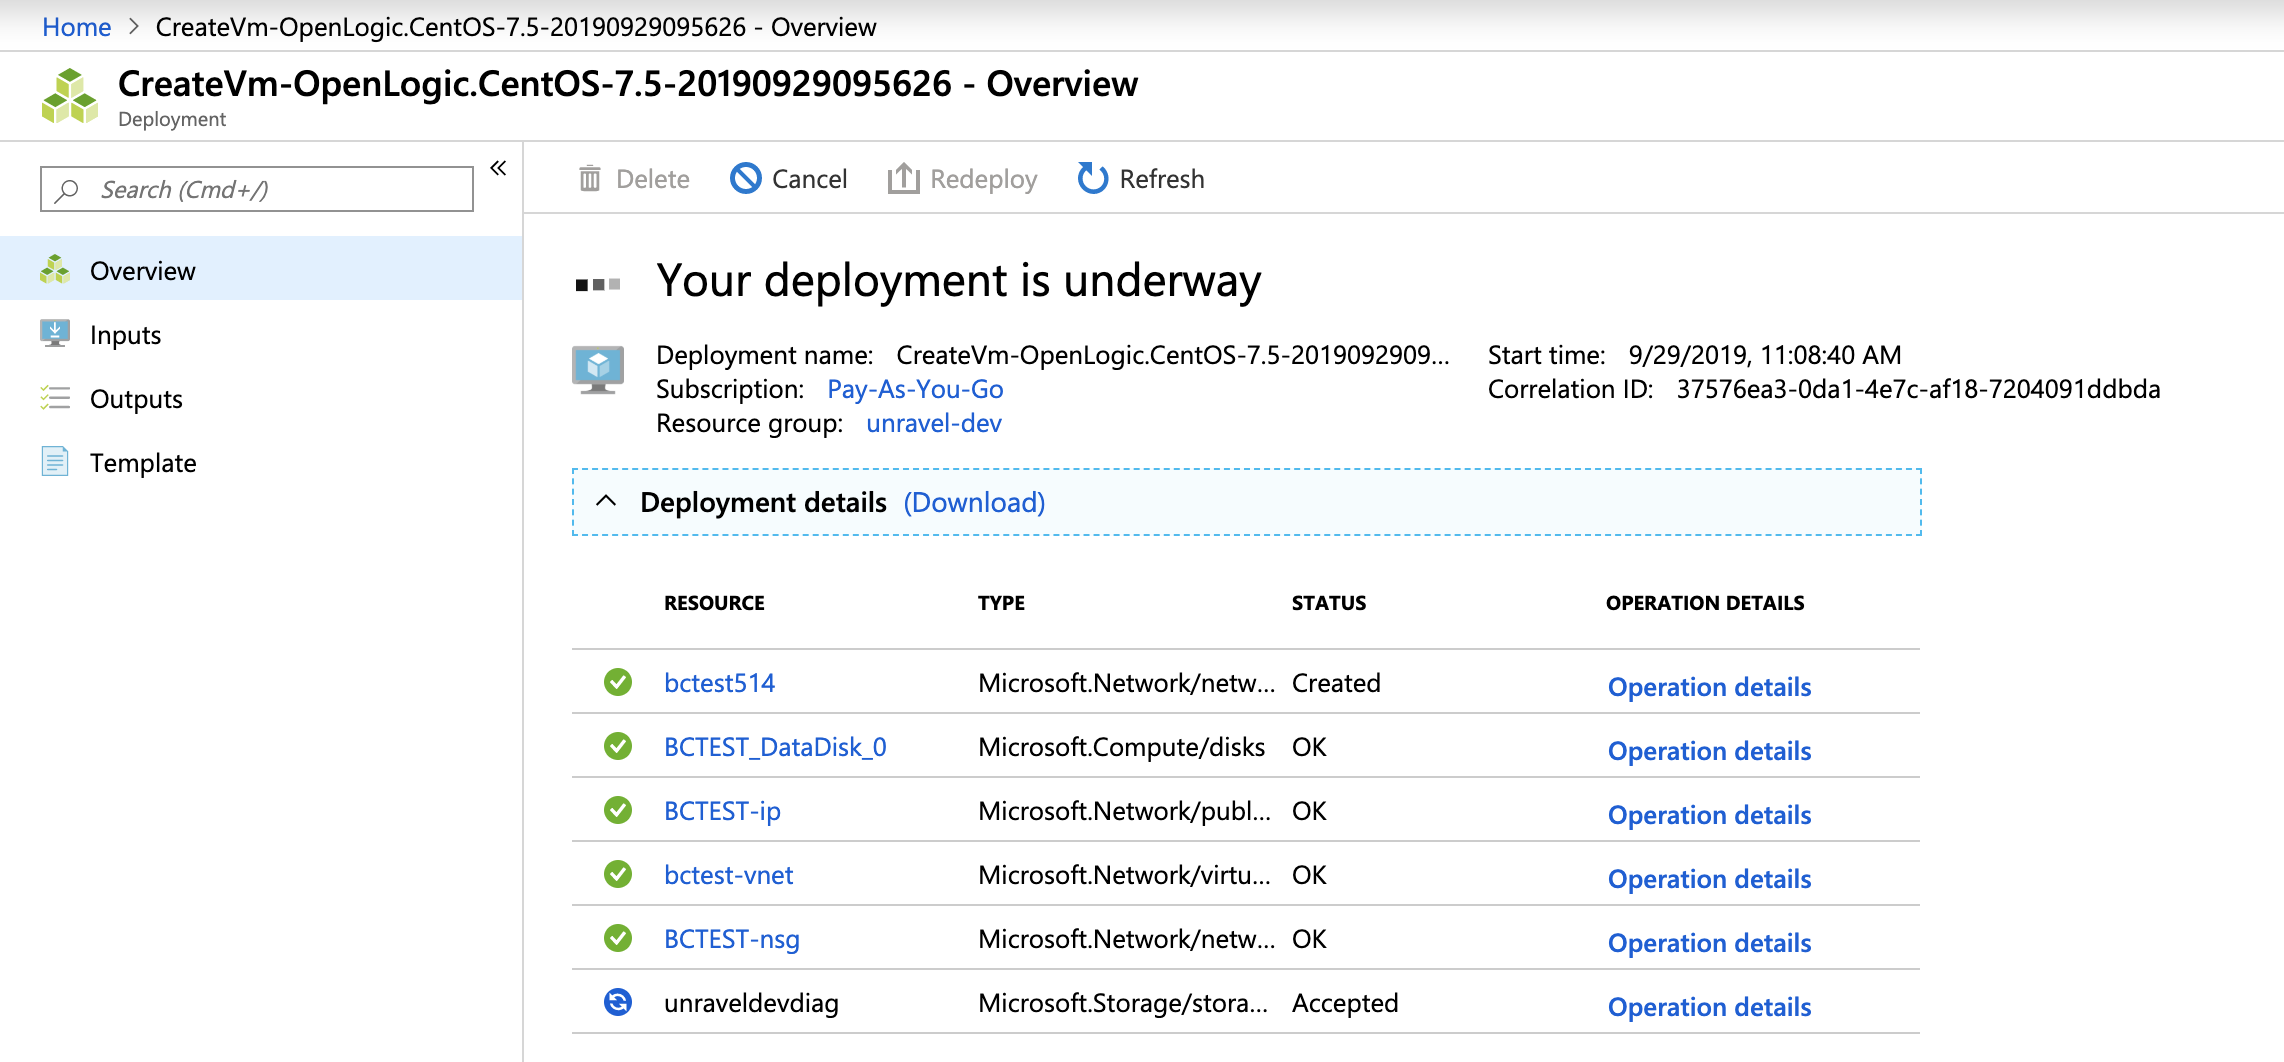
Your deployment is now created.

Click Operation Details for the disk you created, in this case,
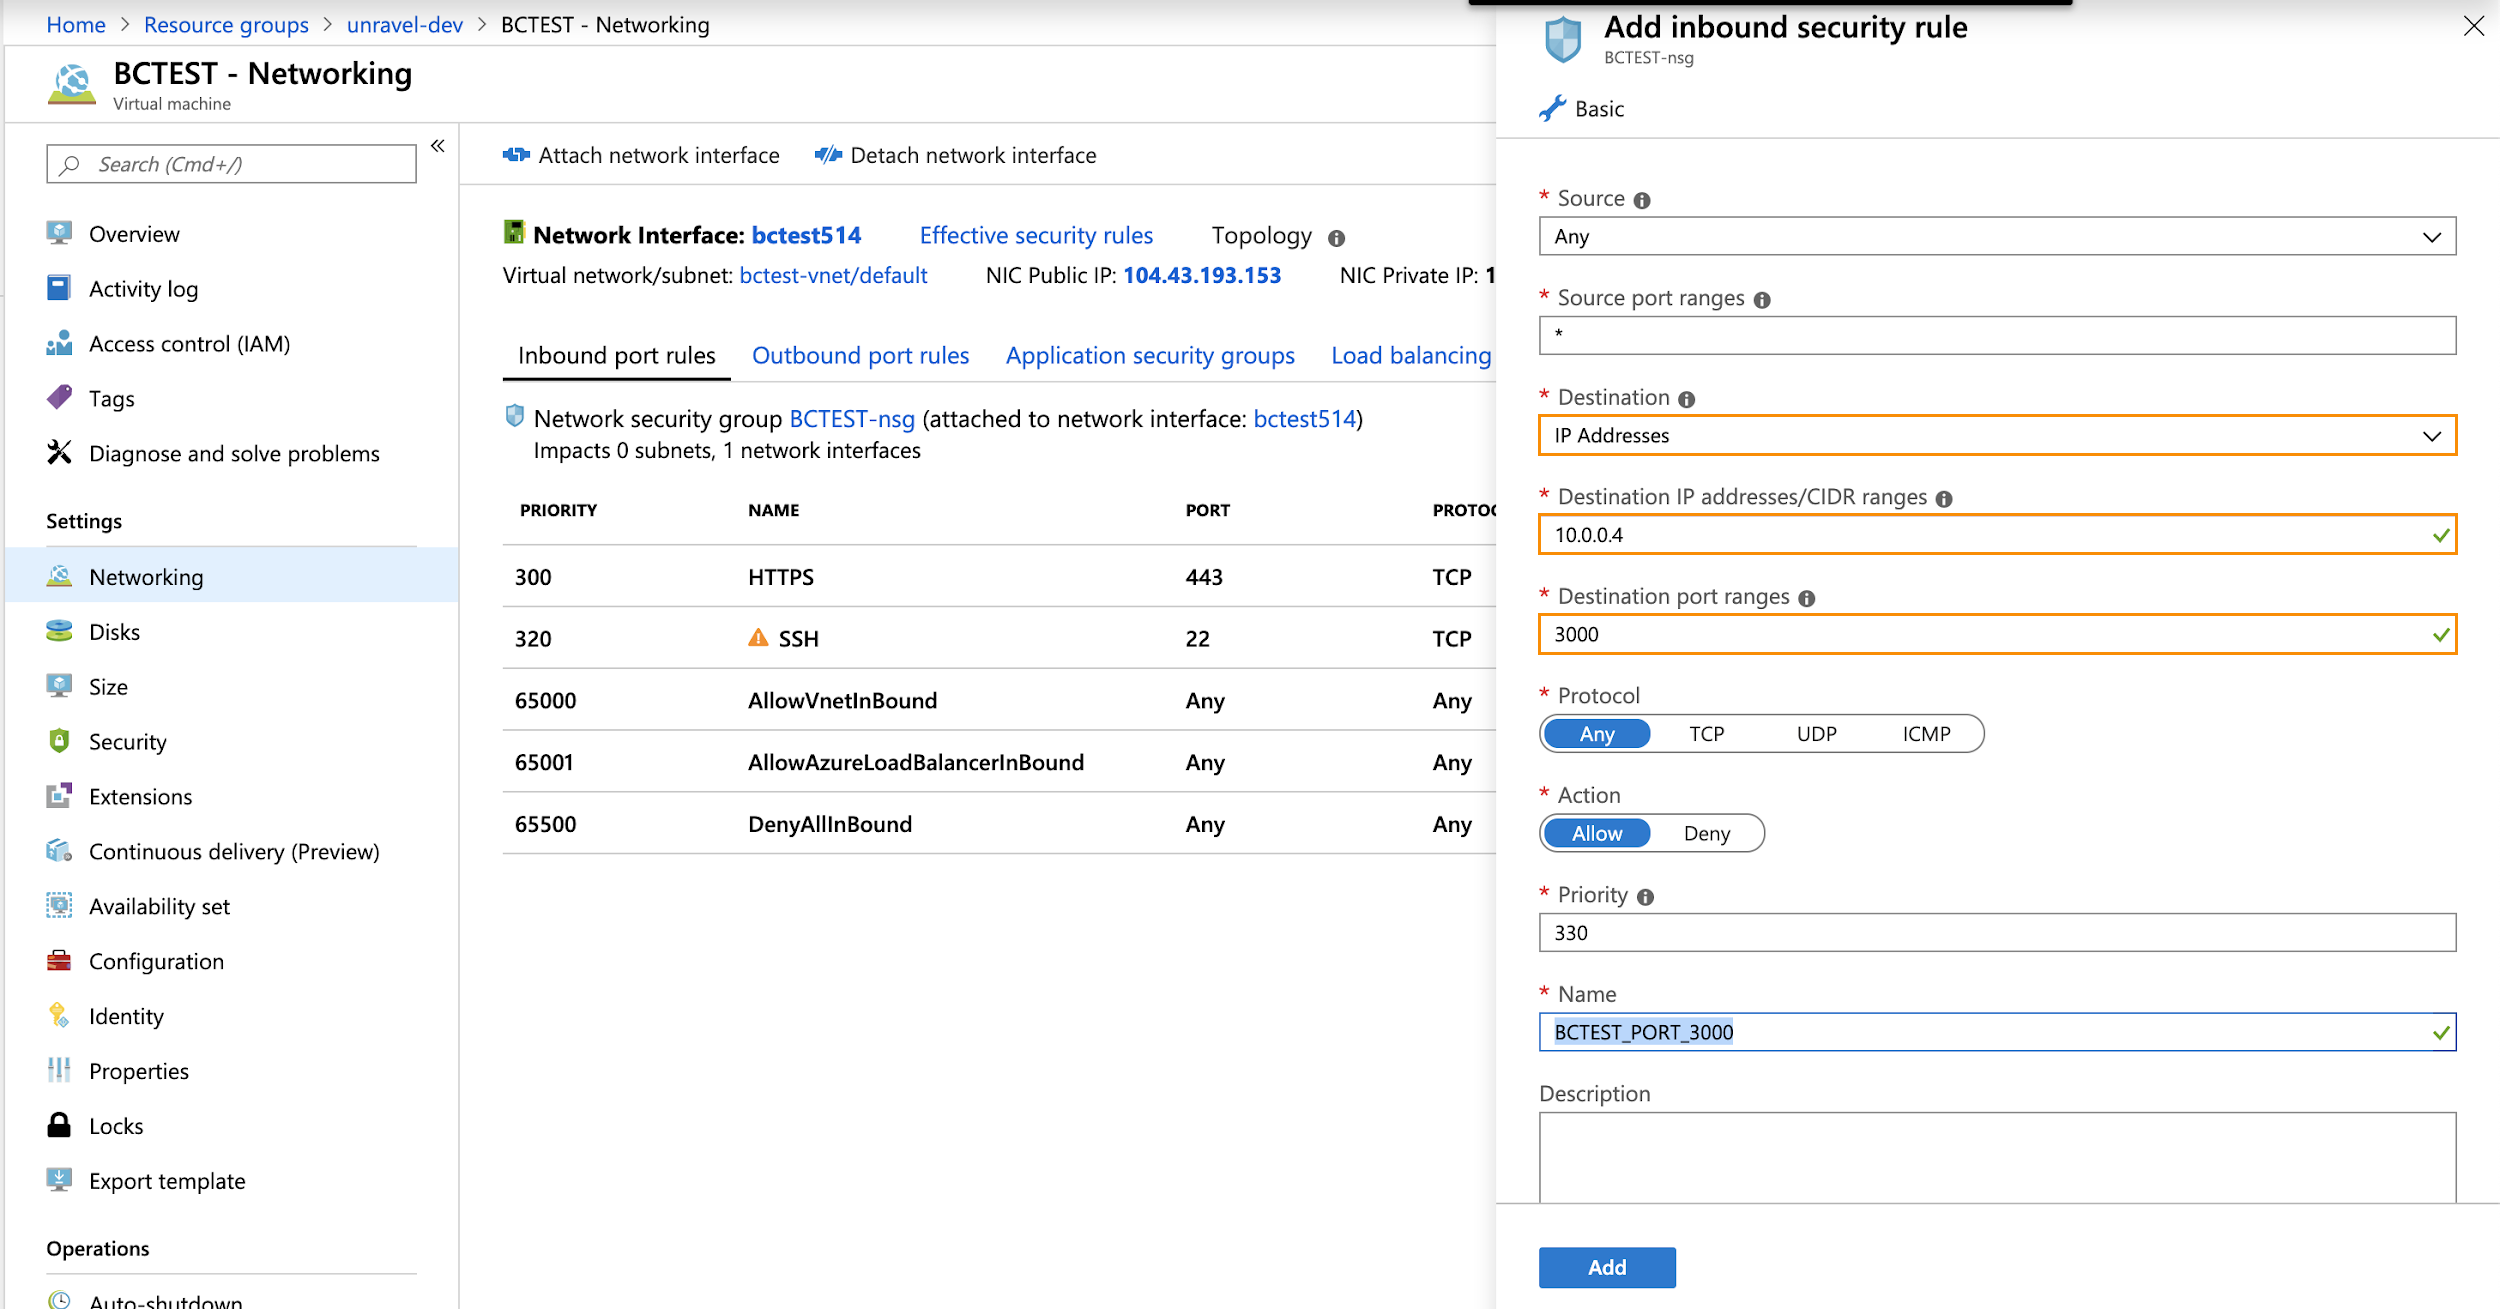
BCTEST_DatDisk_0. (See Step 5 above for the name.)Select Go to Resource > Networking > Inbound port rules > Add. In the Add Inbound Security Rule modal complete the following, including the port number.
Rule Name: Enter rule name, for example,
DiskName_PORT_3000.Destination:
IP Addresses.Destination IP Address: Enter
NIC Private IP.Port: Enter
3000.

Click OK.