Step 2: Connect a new EMR cluster to Unravel Server
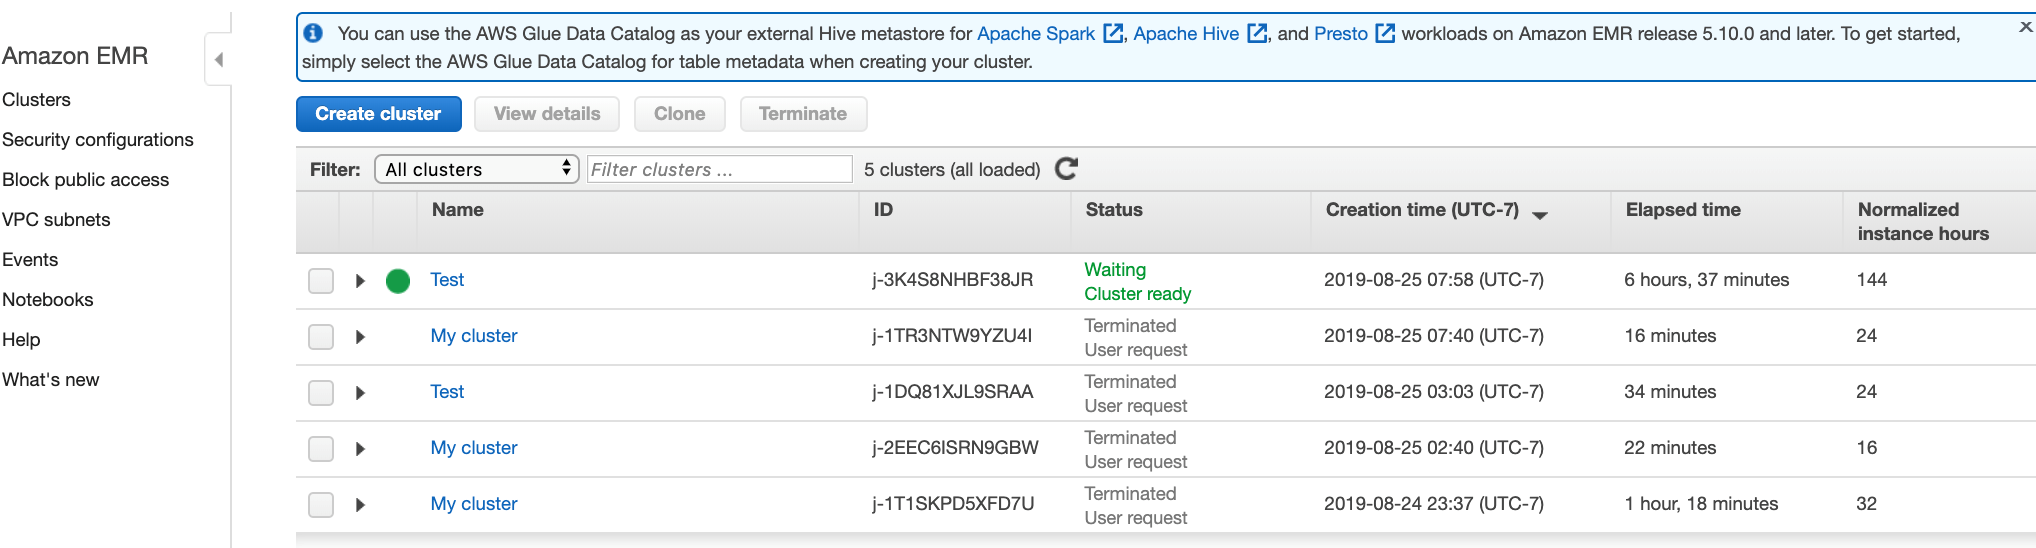
Go to https://console.aws.amazon.com/elasticmapreduce/ and click Create Cluster.
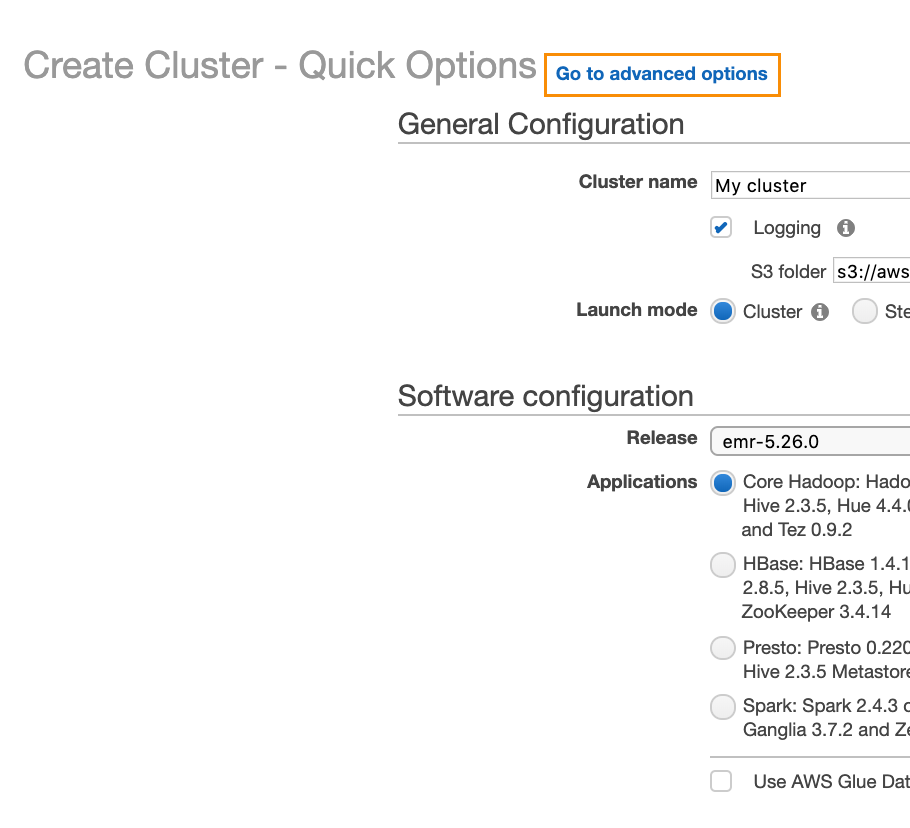
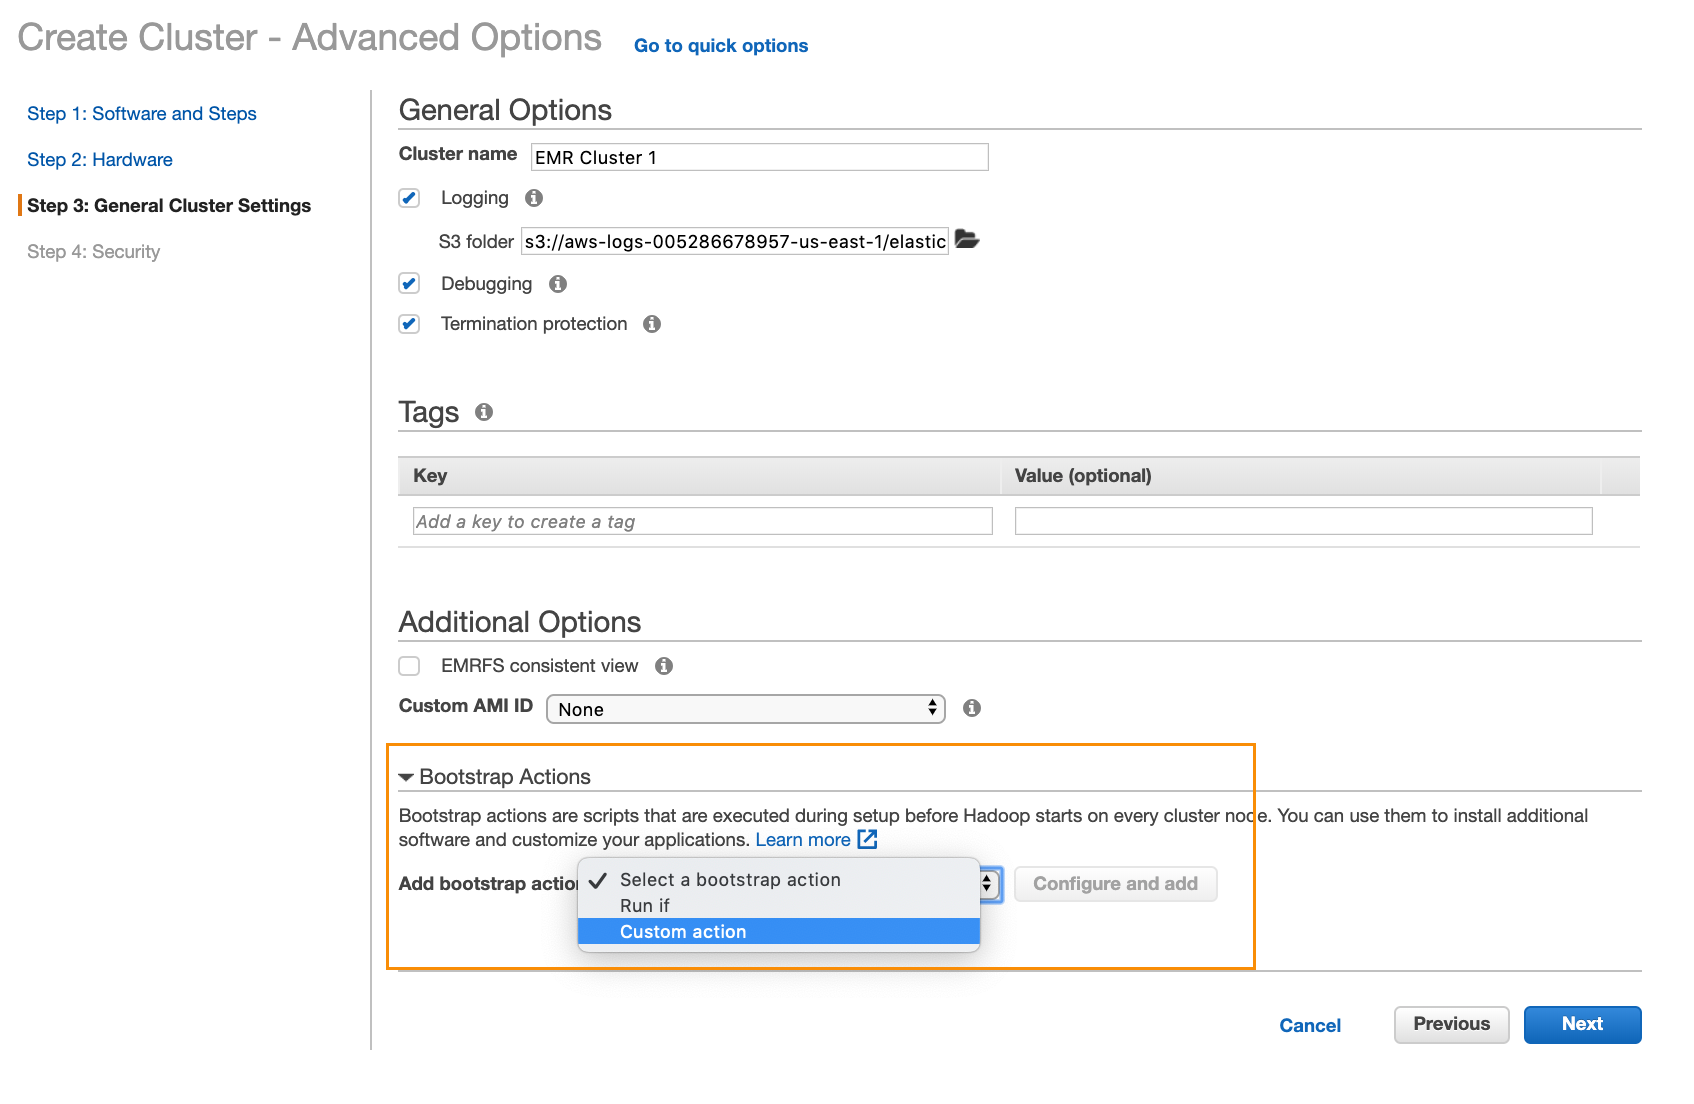
Click Go to advanced options.
Select the release and the services you want to install.
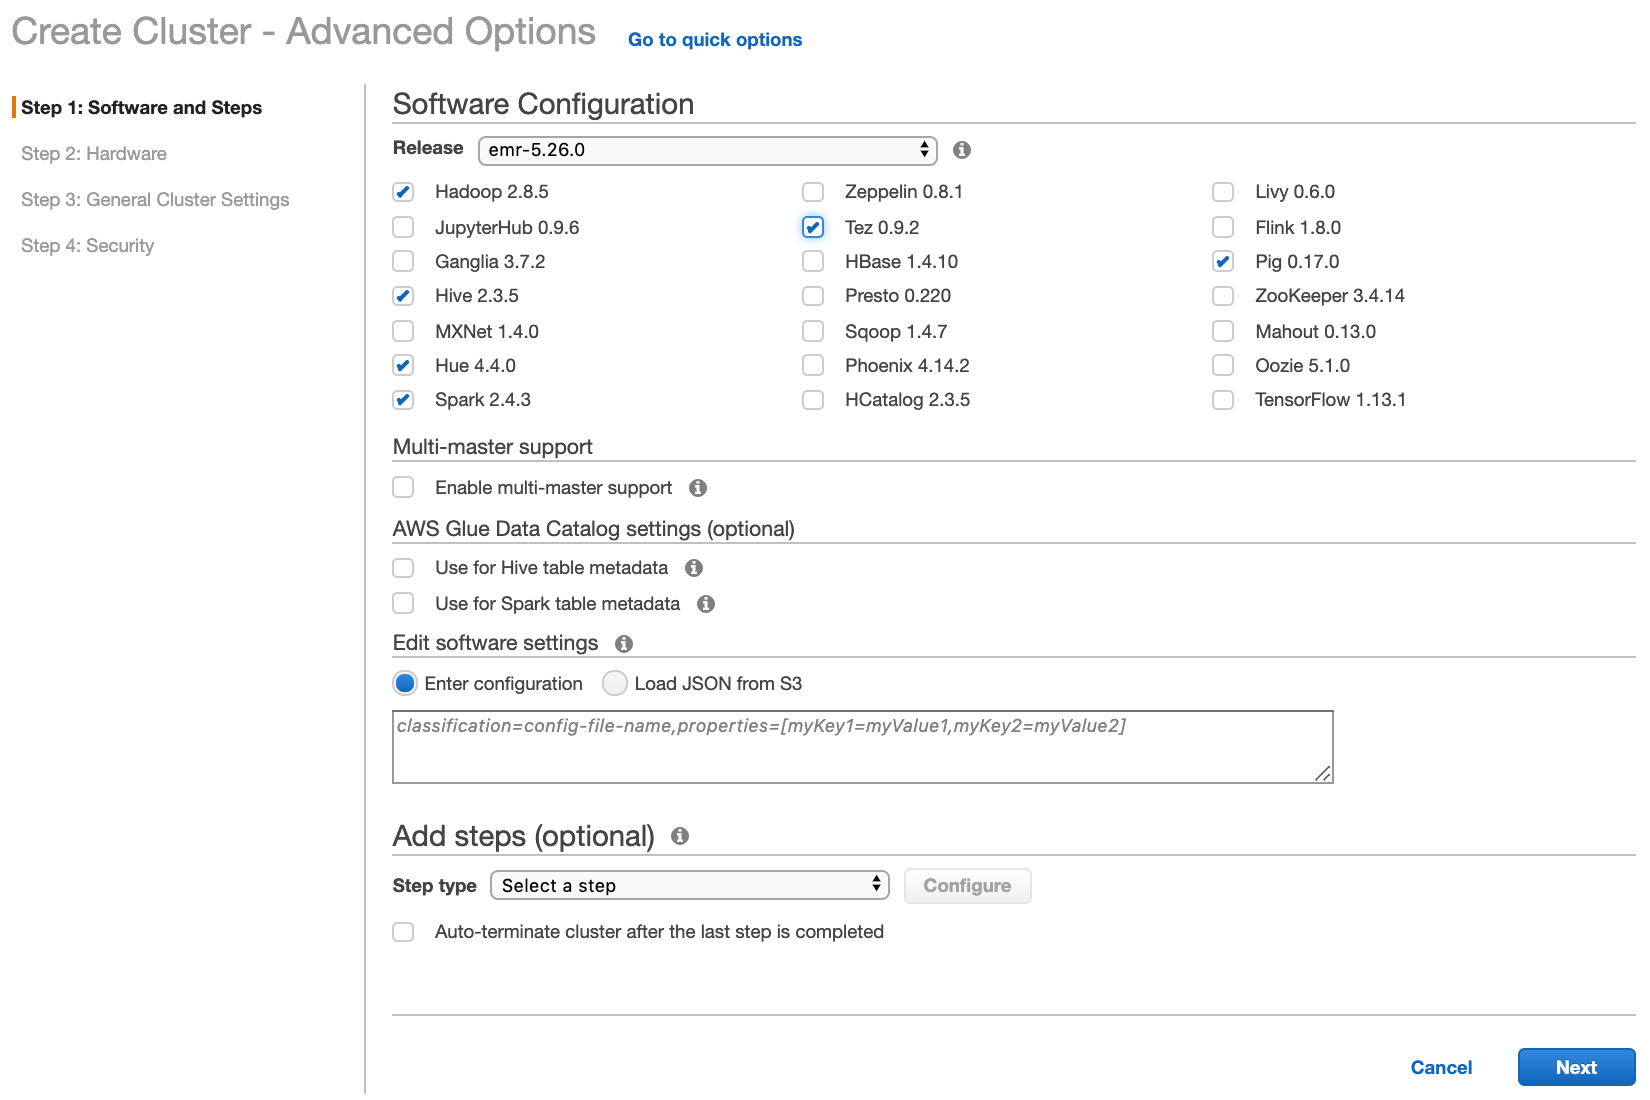
Click Next.
Select the same VPC and subnet as the one chosen for Unravel Server (Unravel Server can reside in a different VPC, but then you would need to set up VPC peering).
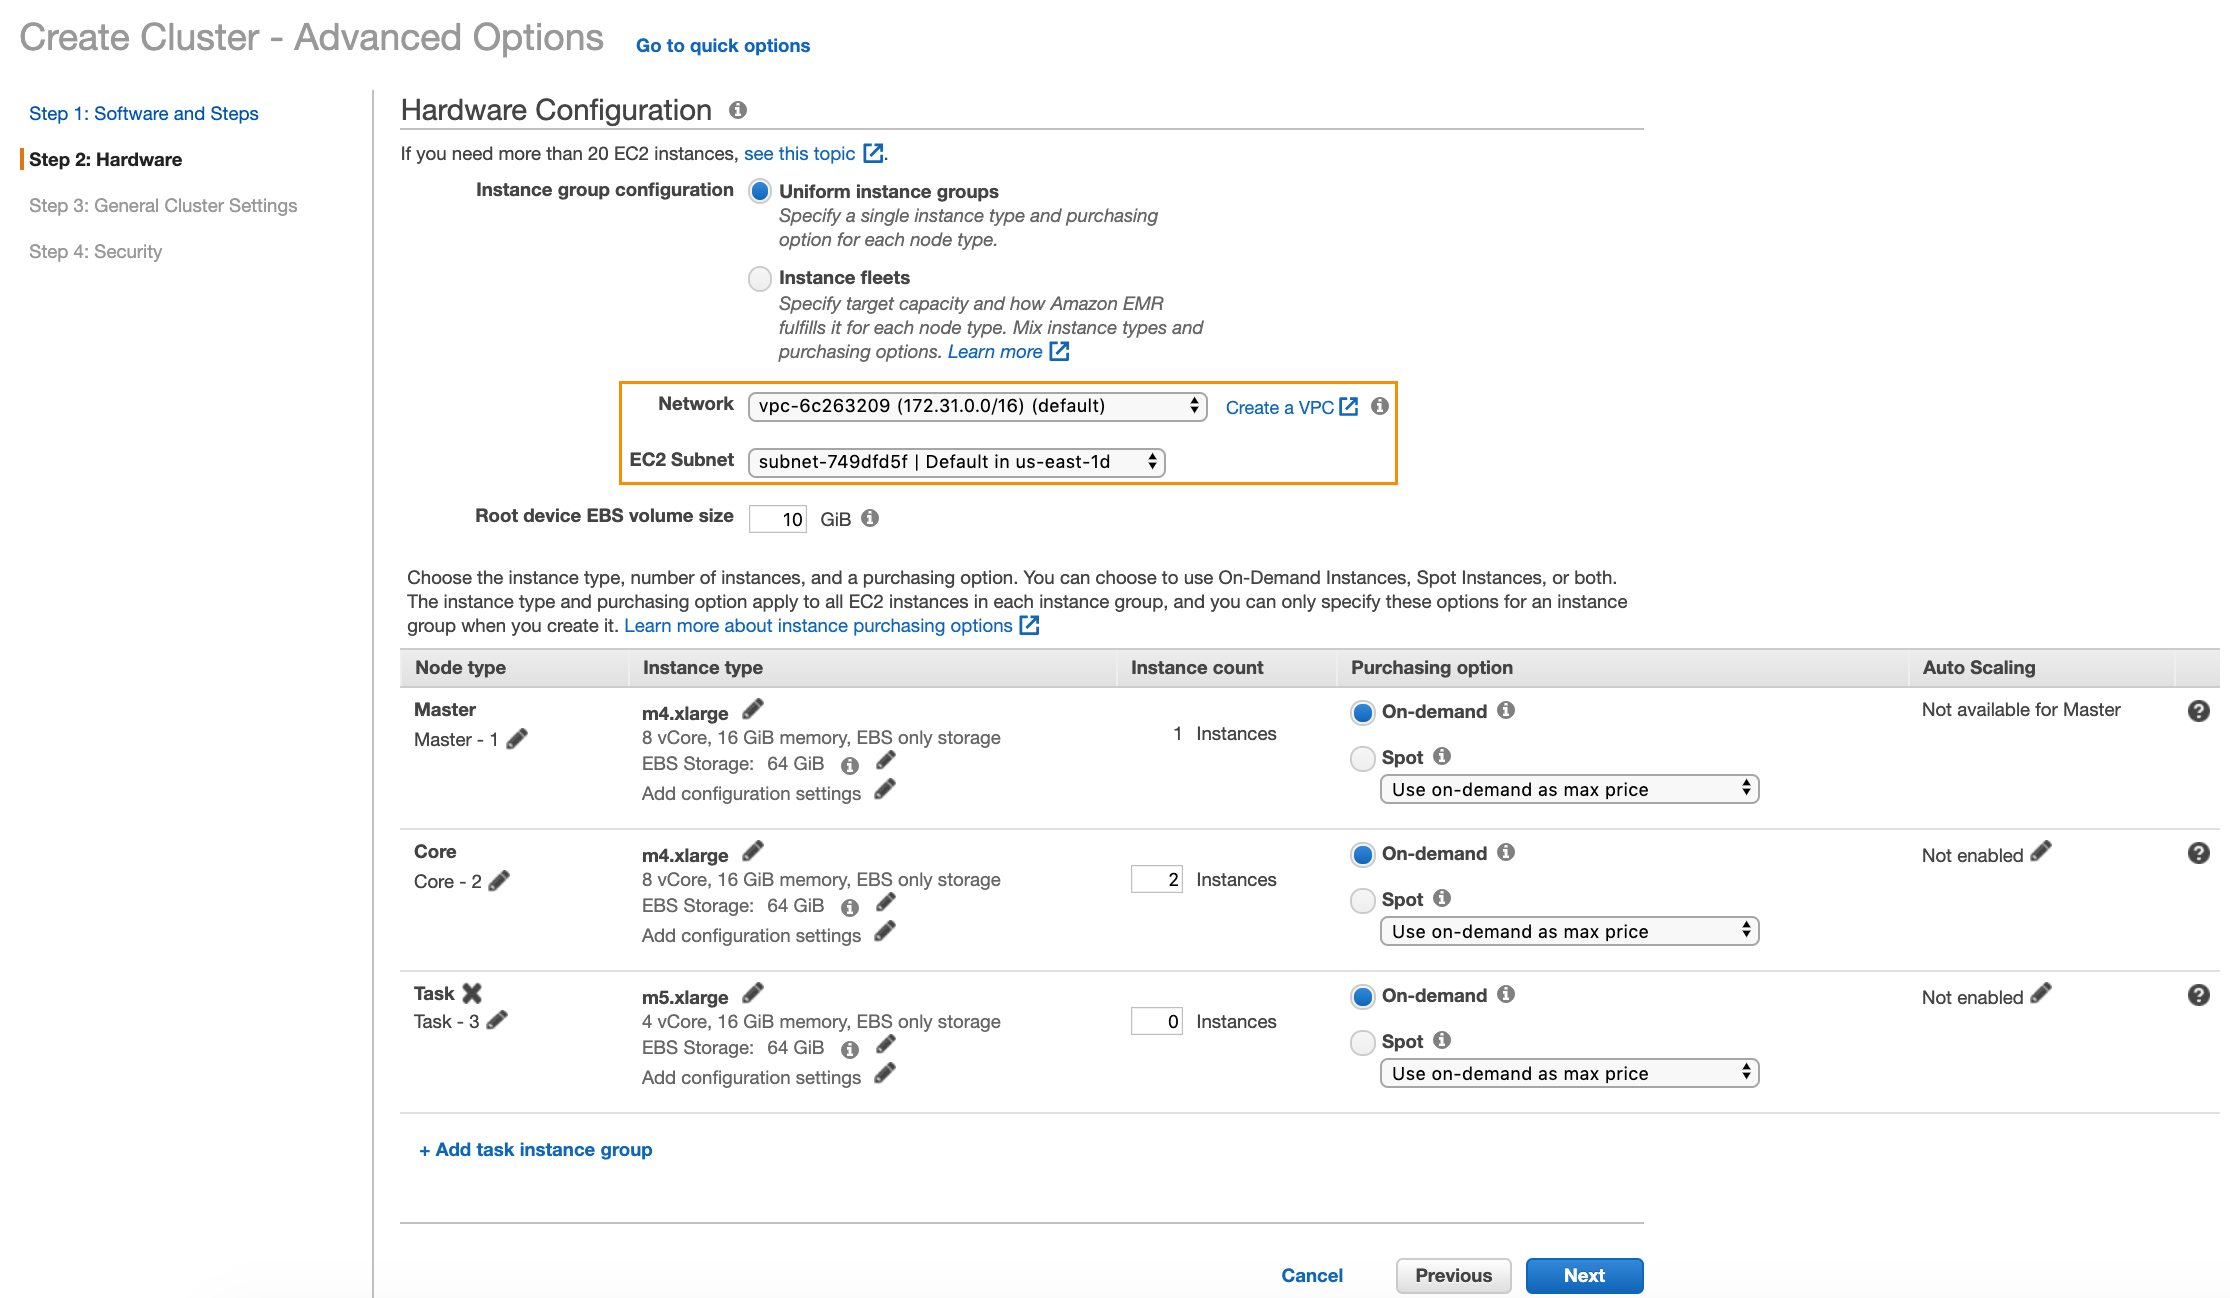
Click Next.
Add Bootstrap Action
In this section, go the Bootstrap Actions section, select Custom Actions, and click Configure and Add.
That brings up a dialog box like this:
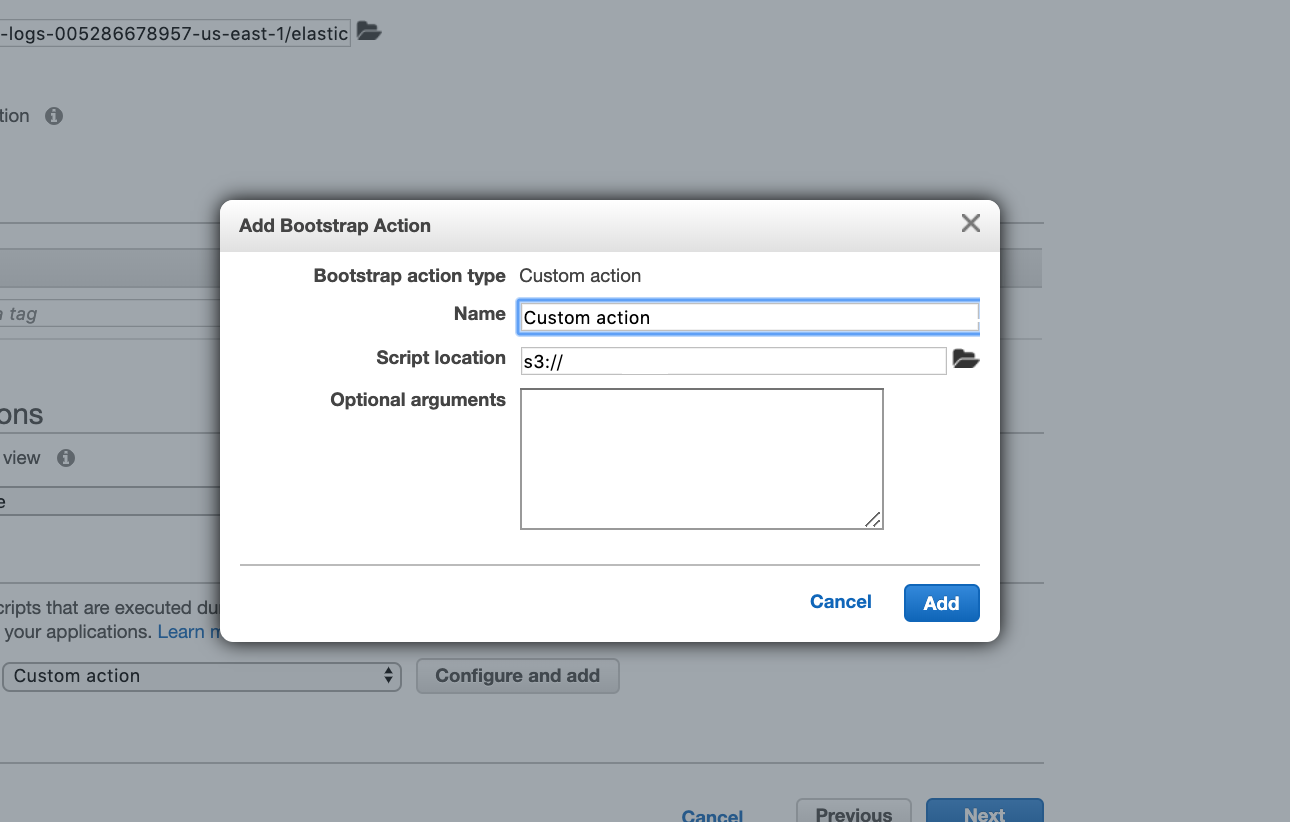
In the Script location text box, enter
s3://unraveldatarepo/unravel_emr_bootstrap.pyIn the Optional Arguments text box, do the following:
Make a note of the private IP from your Unravel instance:
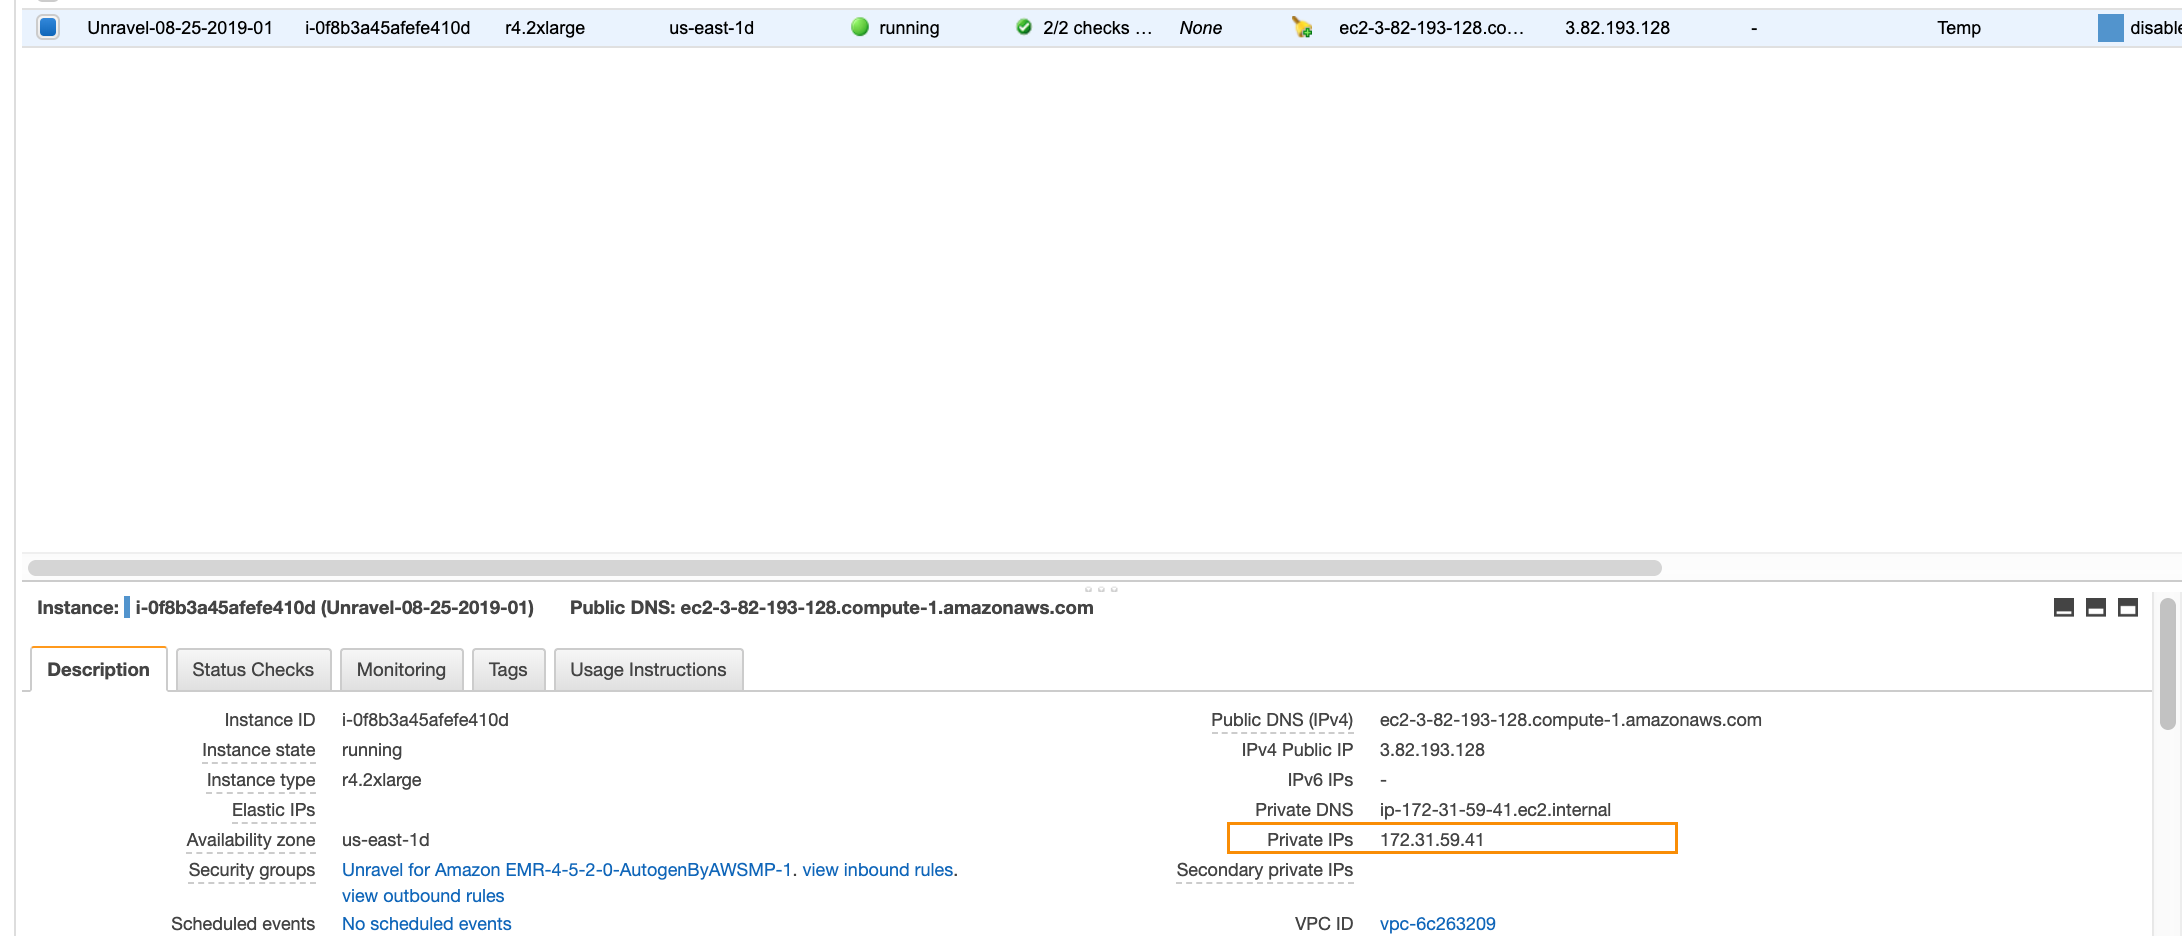
Add
--unravel-serverunravel-ec2-private-ip-address--bootstrap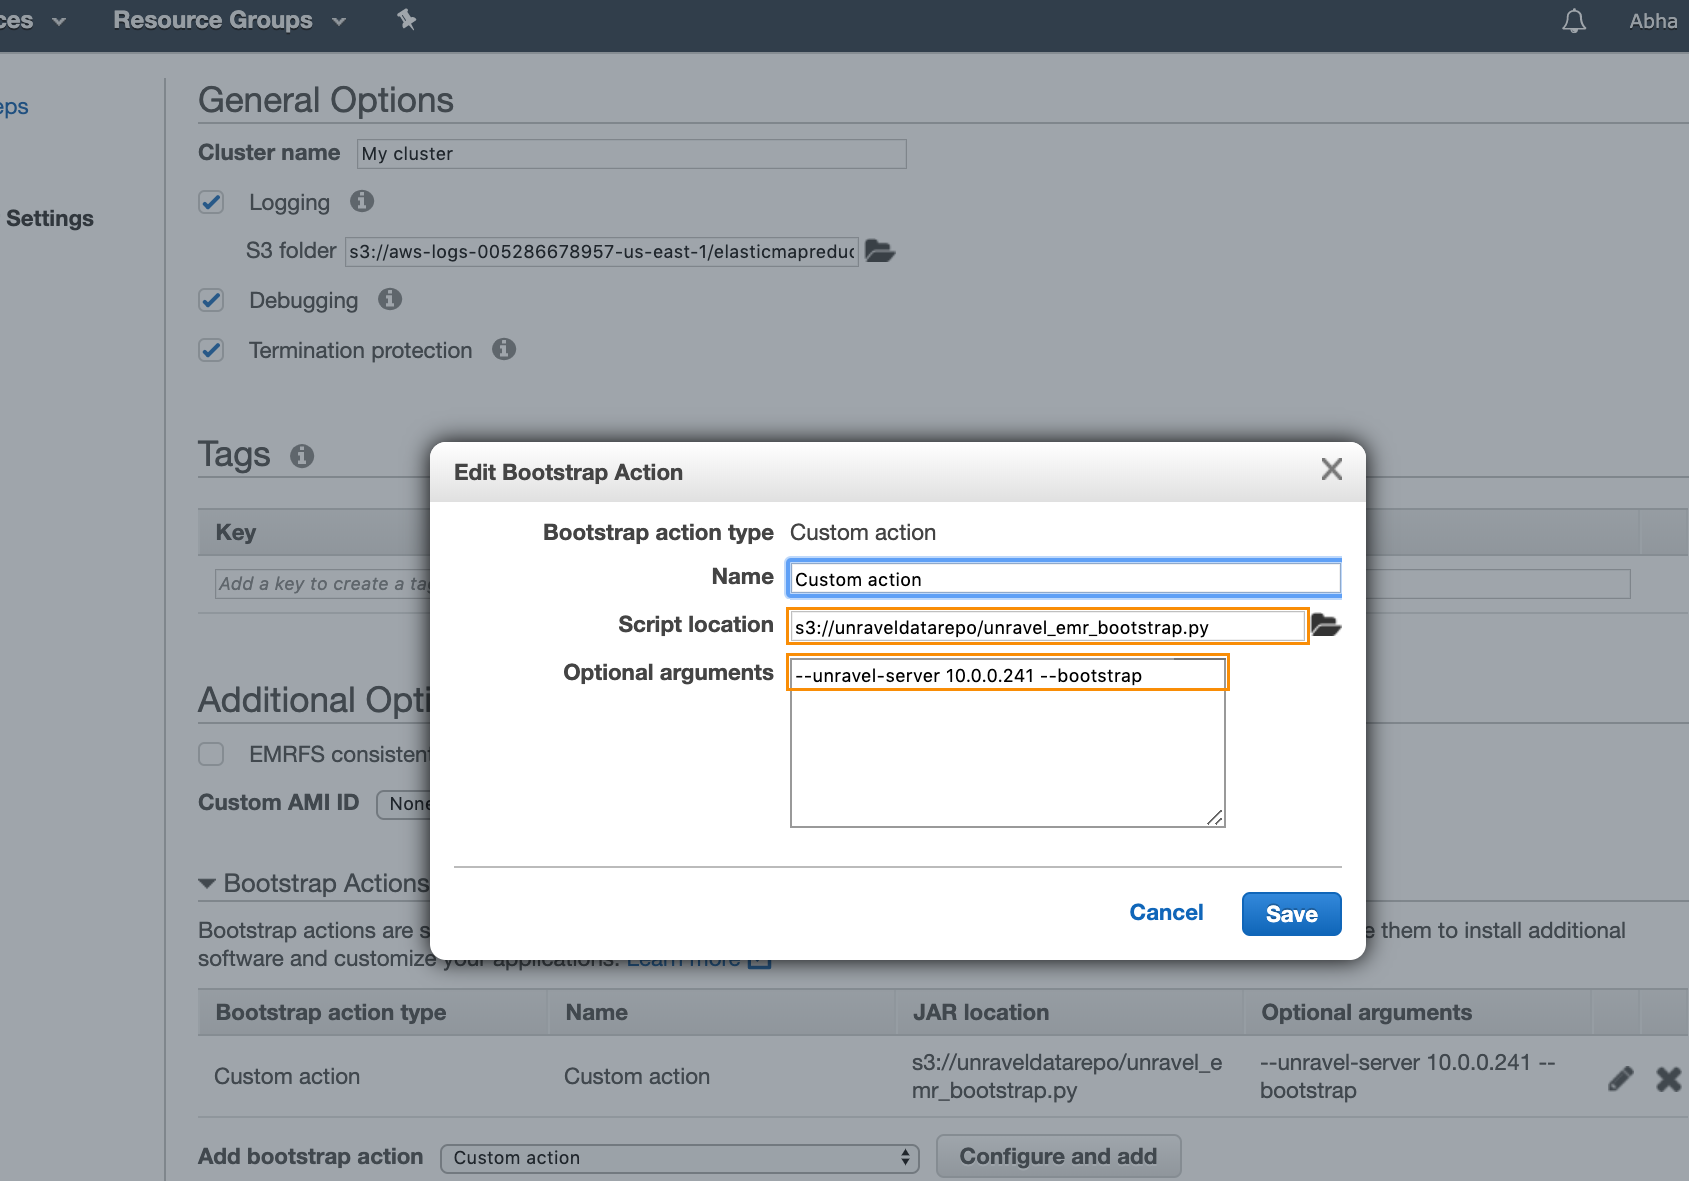
Click Save in the dialog box, and then click Next.
In the next screen, as shown below, select a key pair to be able to connect to the EC2 nodes and also make a note of the names of the security groups encircled below, as you will modify them.
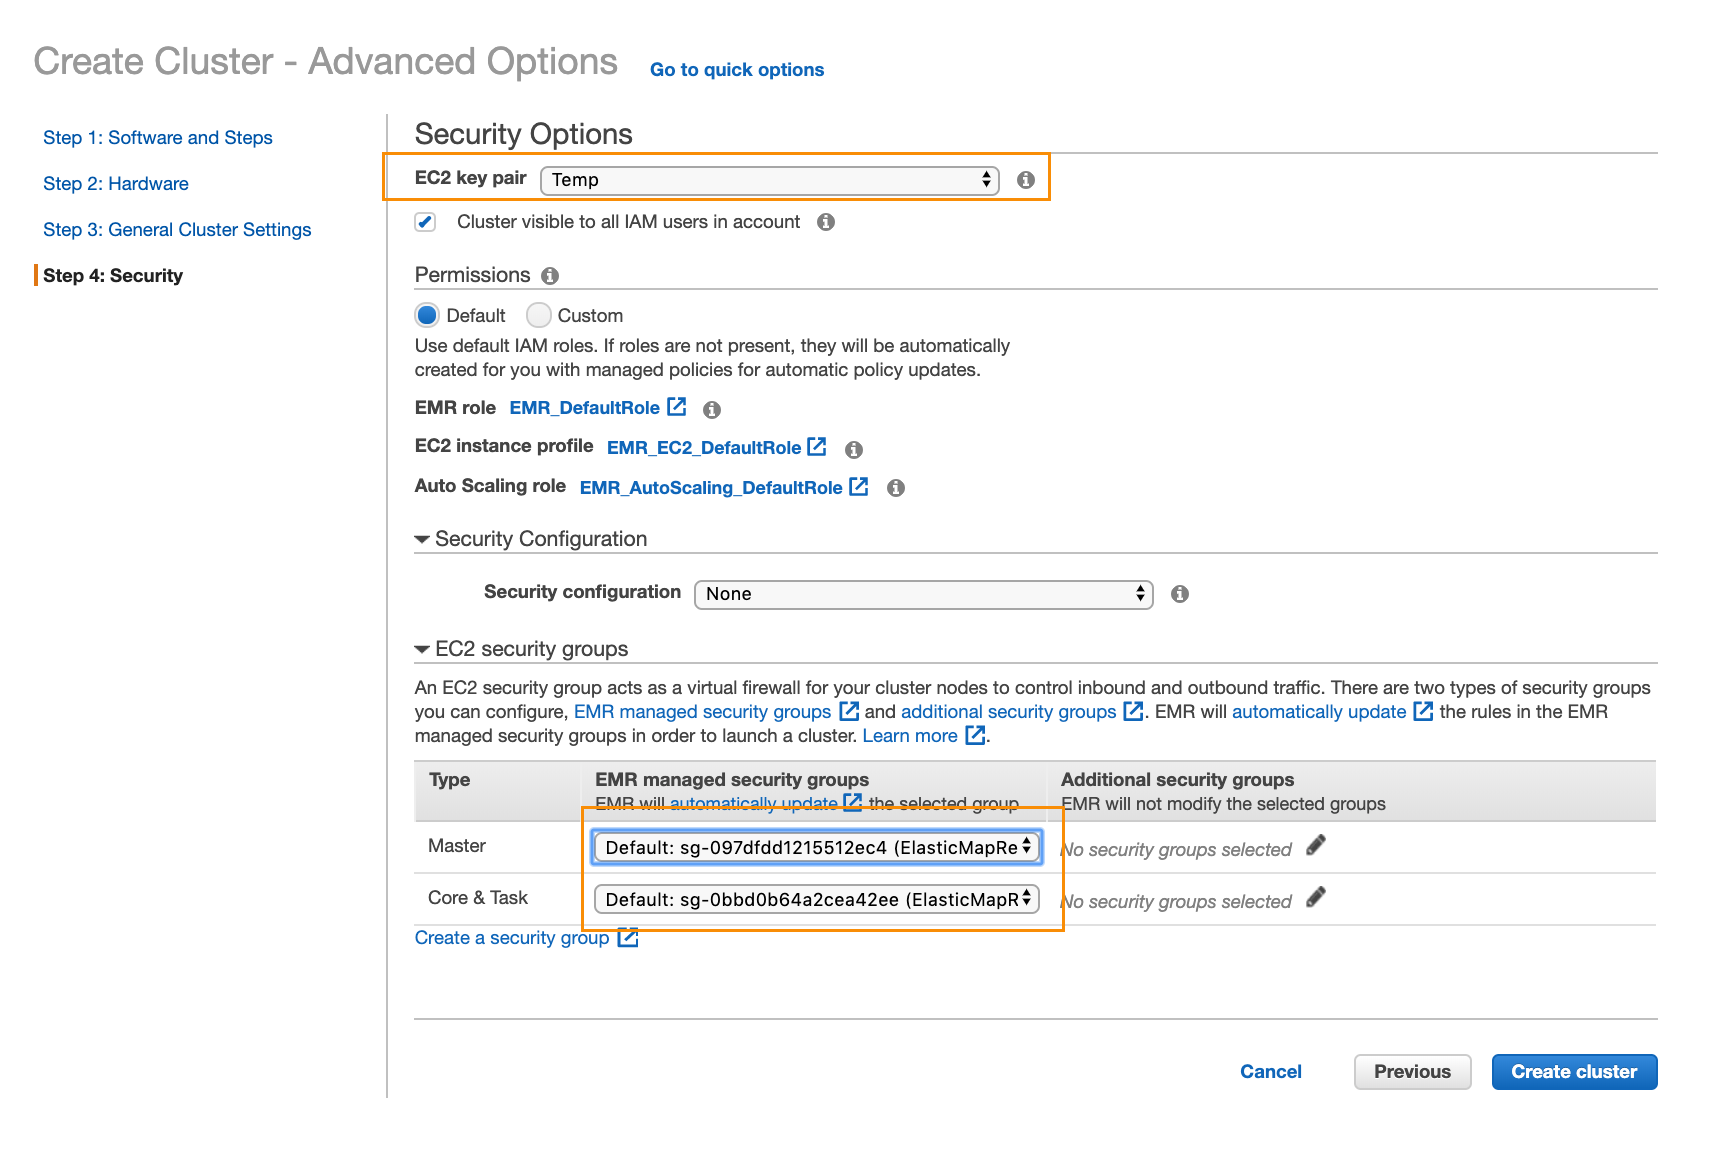
Click Create Cluster.
To find the security group ID of the security group named Unravel for Amazon EMR-1, navigate to Security Groups from the left panel in your AWS console and search for Unravel for Amazon EMR-1.
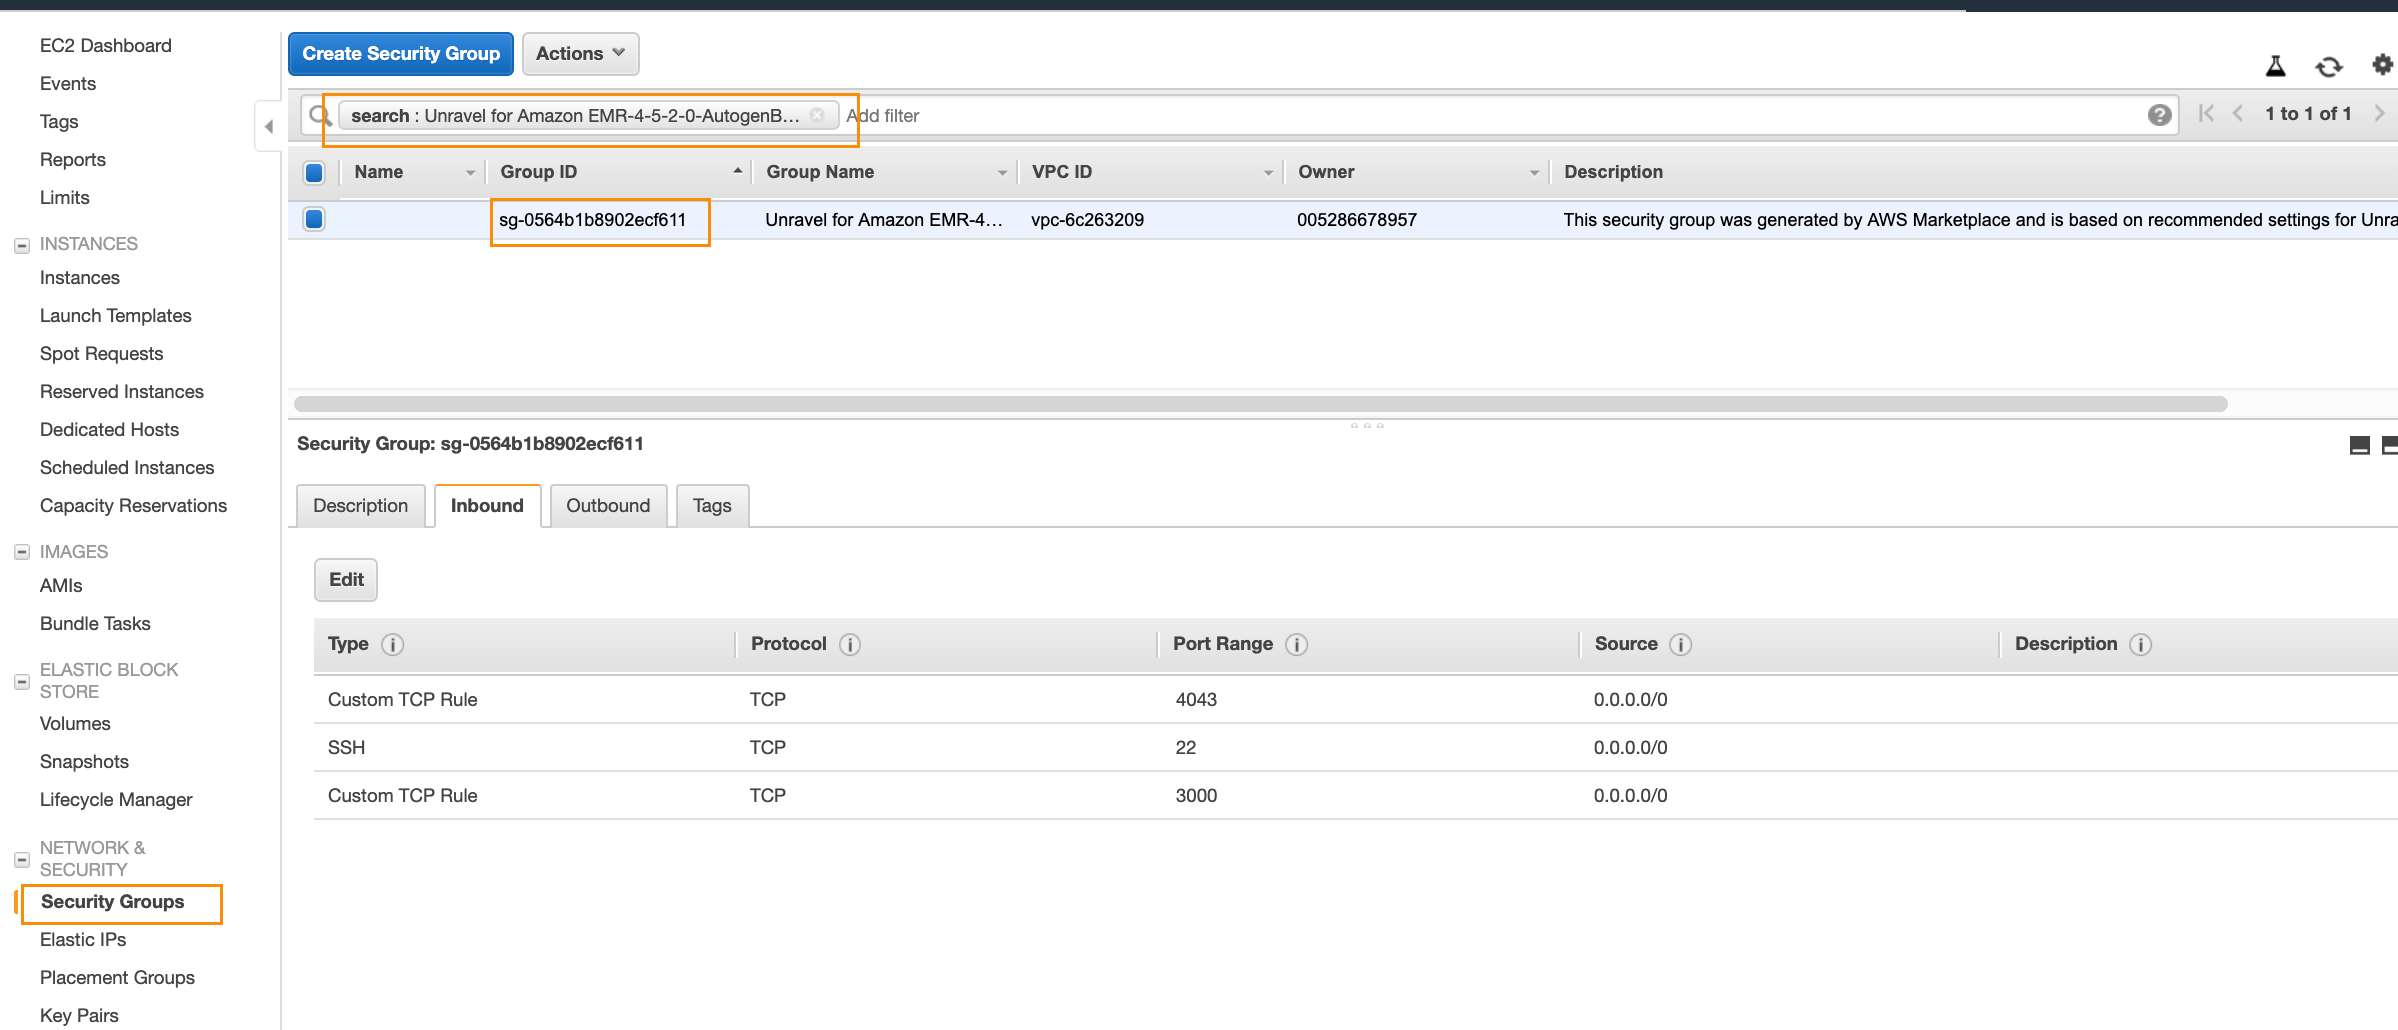
Make a note of the group ID.
For example, in the screenshot above, the group ID is
sg-0564b1b8902ecf611.From the EMR cluster’s screen (where it shows its status in the creation process), navigate to each of the two security groups highlighted in the screenshot below.
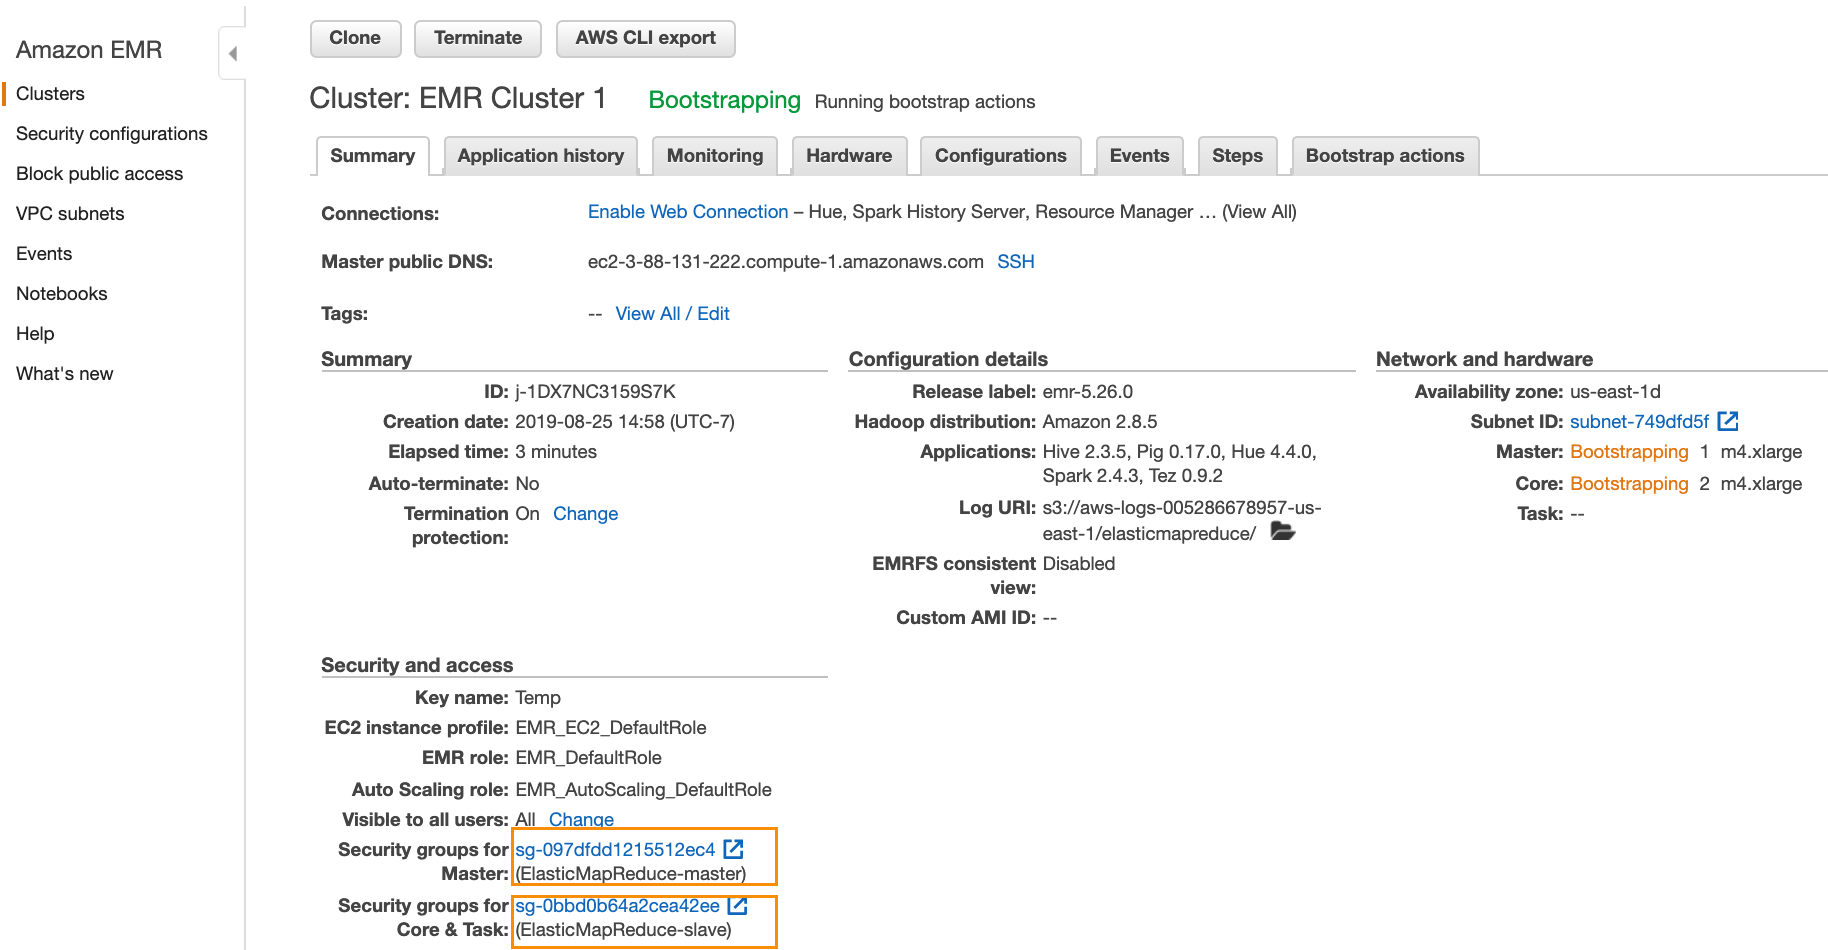
Note
You only need to change these security groups once.
Click the group, select one, click the Inbound tab, and click Edit.
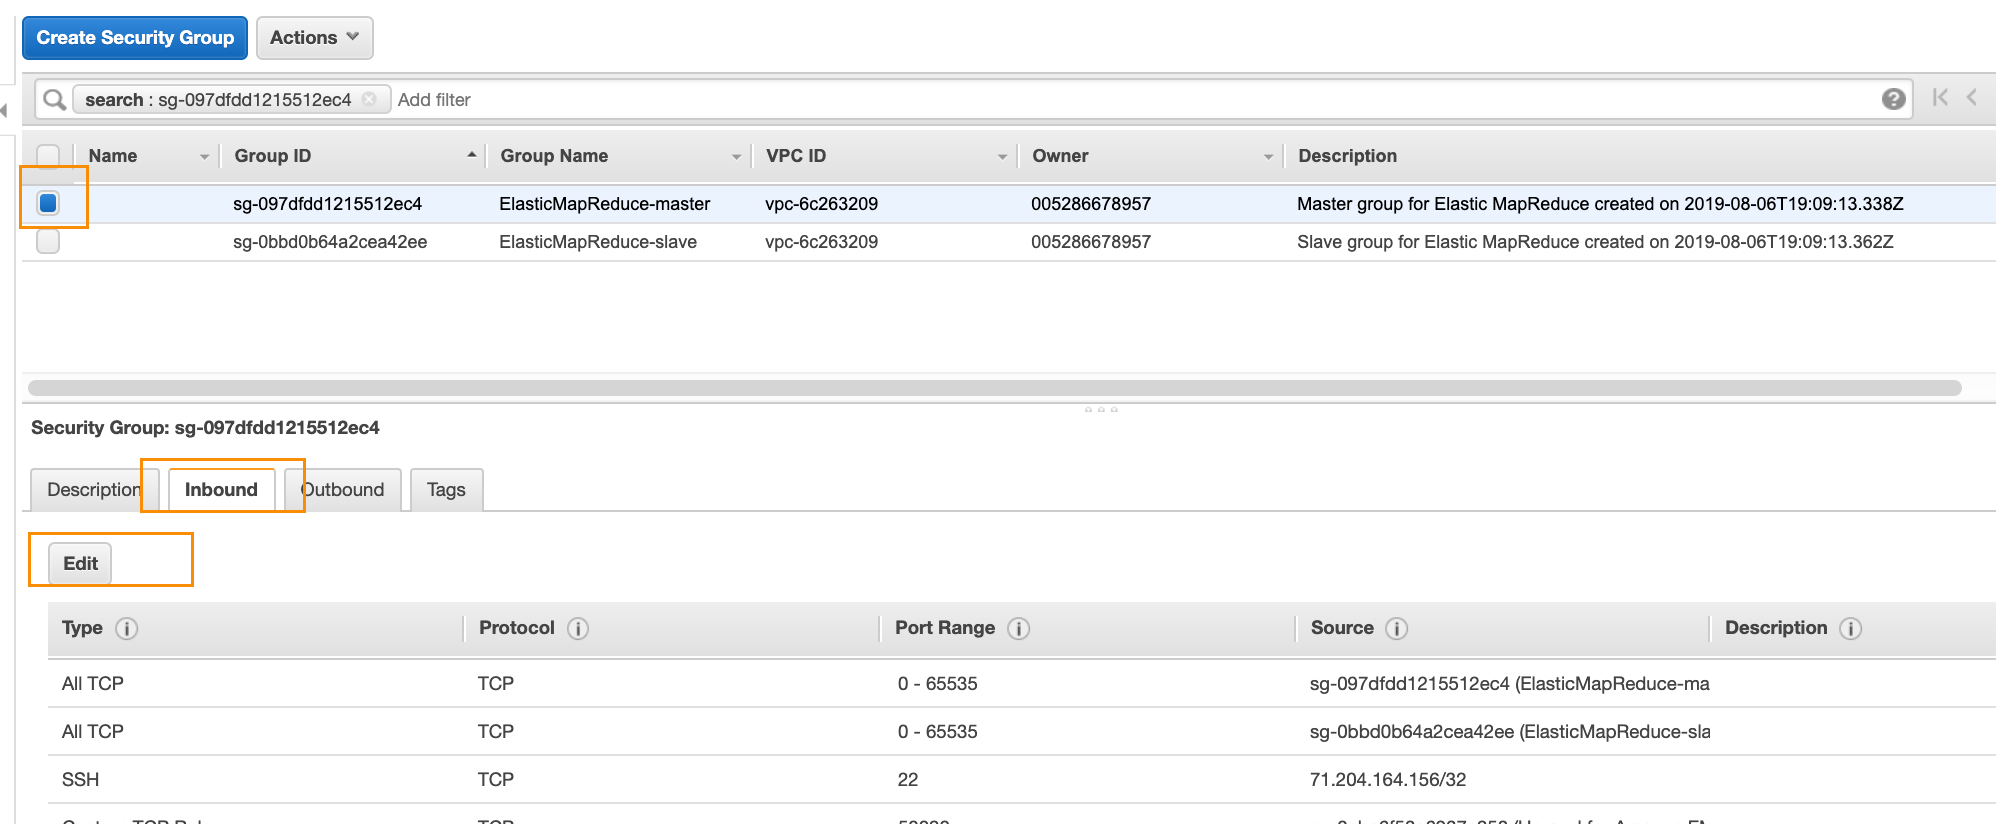
Click Add Rule.

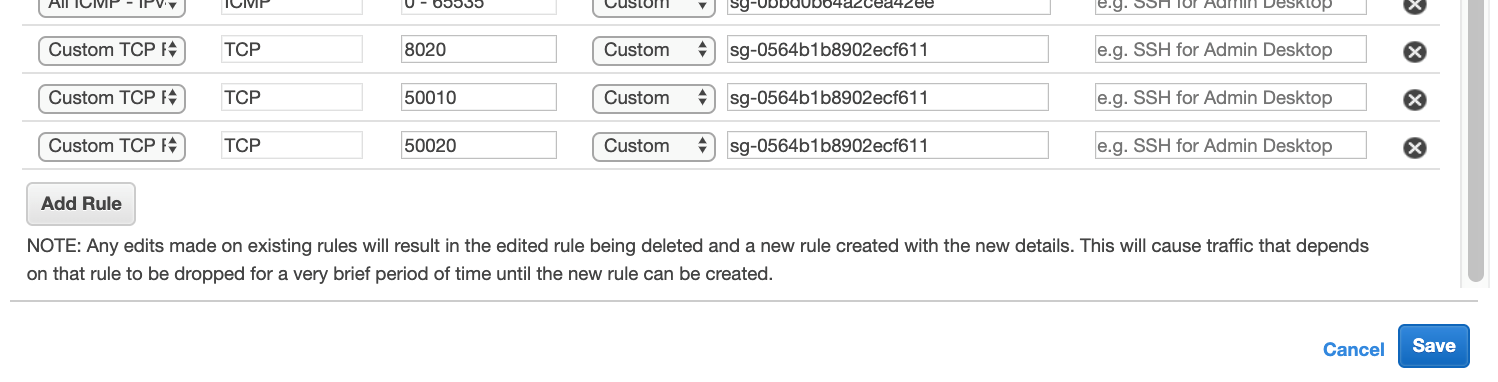
Add three rules as follows and then Save (as shown in the screenshot below):
Type =
Custom TCP, Protocol =TCP, Port Range =8020, Source =security-group-ID-of-Unravel-Server’s-security-groupType =
Custom TCP, Protocol =TCP, Port Range =50010, Source =security-group-ID-of-Unravel-Server’s-security-groupType =
Custom TCP, Protocol =TCP, Port Range =50020, Source =security-group-ID-of-Unravel-Server’s-security-group
Make the above changes to both the security groups corresponding to the EMR cluster.
In order to connect to an existing EMR cluster (instead of a new one) and/or for more advanced options, see Connecting the Unravel EC2 instance to a new or existing EMR cluster.