Setting up Amazon RDS (optional)
Unravel's default installation uses a bundled database for part of its storage. For better performance and ease of management, we recommend replacing the bundled database with an Amazon RDS instance.
1. Create an RDS security group, subnet group, and parameter group
Create an RDS security group on the VPC of Unravel Server and allow access from Unravel Server security group.
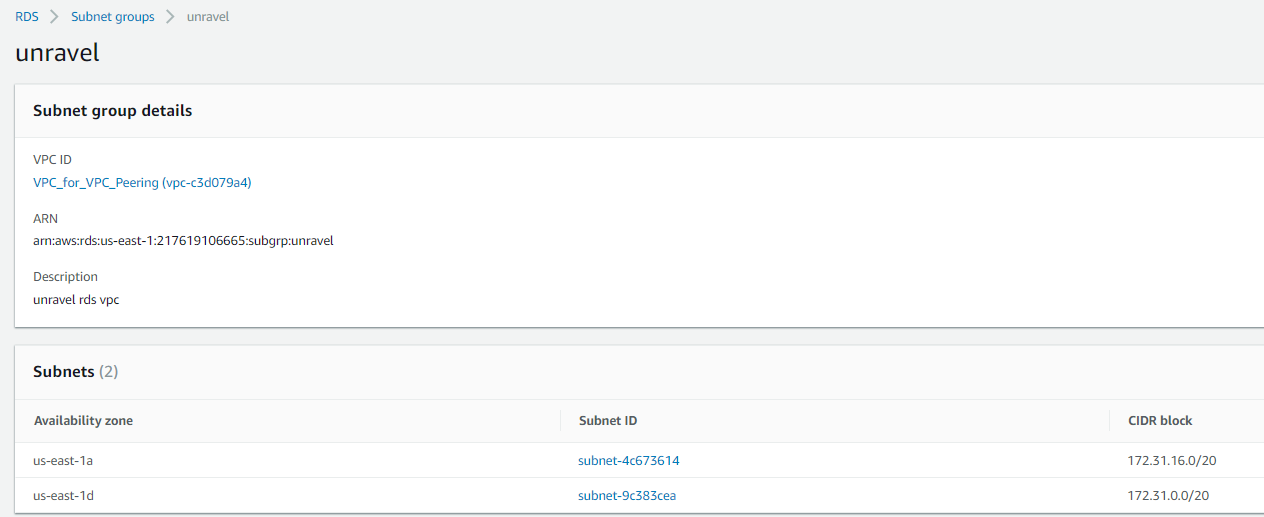
Create a new database subnet group.
A new database subnet group is required for "multiple availability zone" (multi-AZ) deployment. The VPC should at least contains two subnets in at least two availability zones in a given region, in the same VPC. For more information, see AWS documentation.
Create a new database parameter group with custom settings. Choose a MySQL version compatible with Unravel.
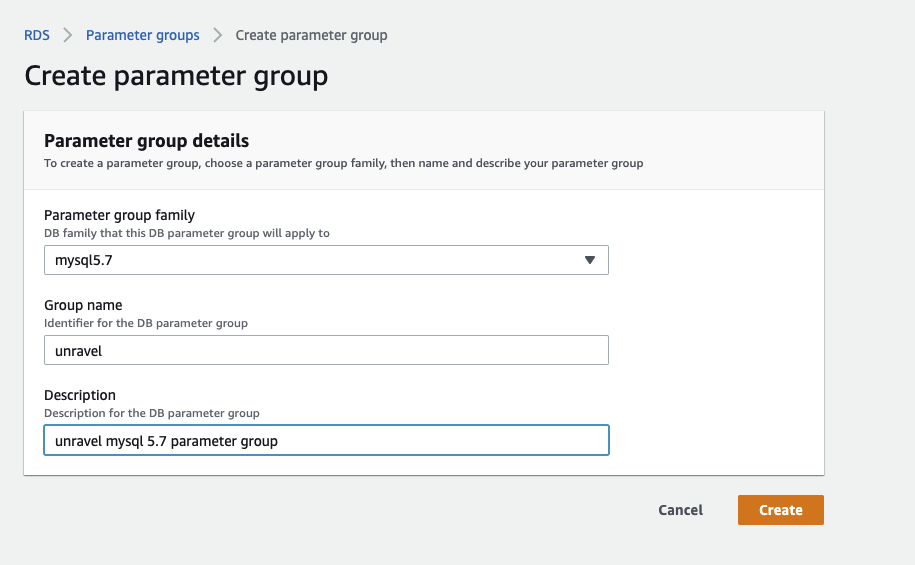
Custom database parameters key_buffer_size = 268435456 max_allowed_packet = 33554432 table_open_cache = 256 read_buffer_size = 262144 read_rnd_buffer_size = 4194304 max_connect_errors=2000000000 net_read_timeout = 300 net_write_timeout = 600 innodb_open_files=9000 character_set_server=utf8 collation_server = utf8_unicode_ci innodb_autoextend_increment=100 innodb_log_file_size = 134217728 innodb_log_buffer_size = 33554432 innodb_flush_log_at_trx_commit = 2 innodb_lock_wait_timeout = 50
Required database parameters Database name: unravel_mysql_prod Port: 3306 DB parameter group: unravel
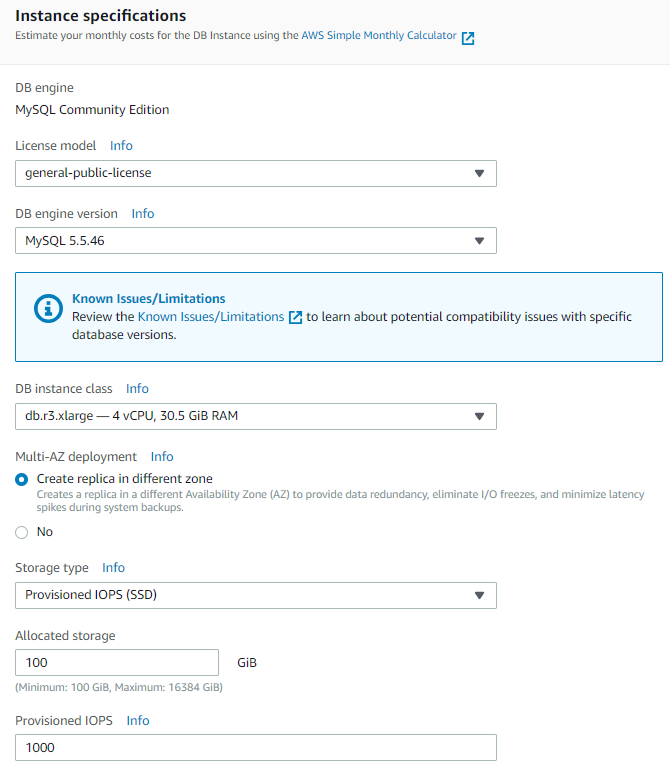
2. Create an Amazon RDS instance
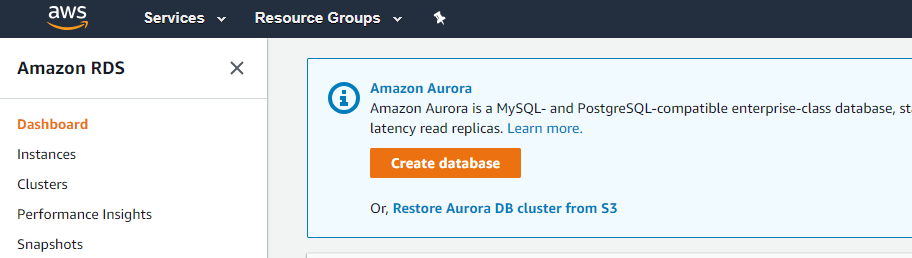
In the Amazon RDS portal, click Create database.
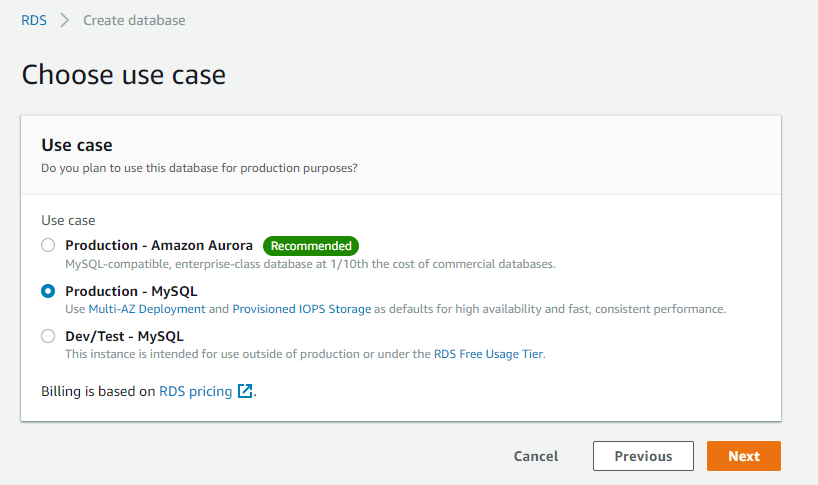
Select MySQL and click Next.
Select Production - MySQL.
Change the following properties, and leave all others with default values.
License model: generic-public-license
DB engine version: 5.7.33
DB instance class: db.r5.large ( 2 vCPU, 16 GiB RAM)
Multi-AZ deployment: Create replica in different zone
Storage type: Provisioned IOPS (SSD)
Allocated storage: 500GB (or more depending on number of jobs and clusters the unravel node will monitor)
Provisioned IOPS: 1000
Specify the database instance ID, username, and password.
DB Instance identifier:
unravel-mysql-prodMaster username:
unravelMaster password: Change_Password
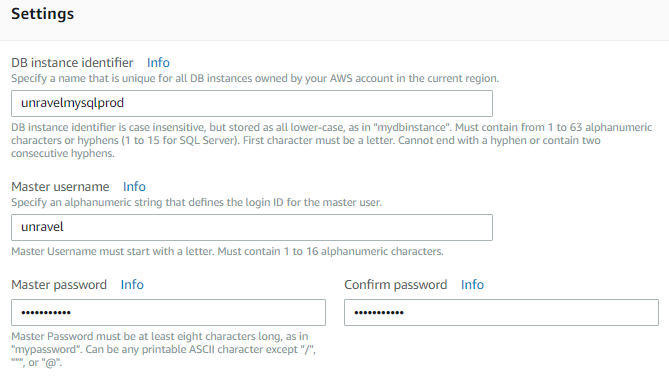
Click Next.
In the Advanced Settings page change the following settings.
You can leave all other settings with default values or specify values suitable to your requirements.
Network & Security Settings
Virtual Private Cloud: Select the VPC that contains minimally two subsets and on the same region that you plan to deploy Unravel and the EMR cluster.
Subnet group: Select the new database subnet group you created, named
unravel.Public accessibility: No
Availability zone : No Preference
VPC security group: Select the new VPC security group you created.
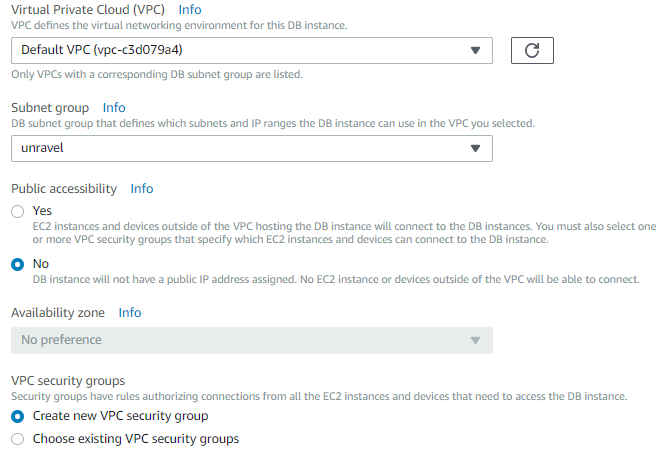
Click Create database.
You should see the following message.

3. Connect Unravel to the RDS instance
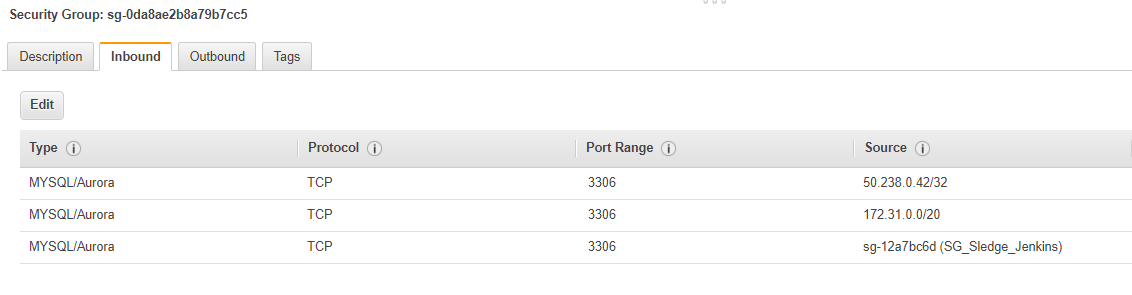
By default, the security group created for the unravel RDS has no network access granted on port 3306 on the subnet connected. You must modify the security group applied on Unravel RDS.
In the Amazon RDS dashboard, locate the MySQL database endpoint.

Look for the security group used for the Unravel RDS instance.

Modify the inbound rule of the security group by adding a new rule to allow connections from either:
The Unravel EC2 instance's security group.
The subnet IP block in which the Unravel EC2 instance located.
Either the security group or IP block works, provided the RDS instance is located on the same region as the VPC.
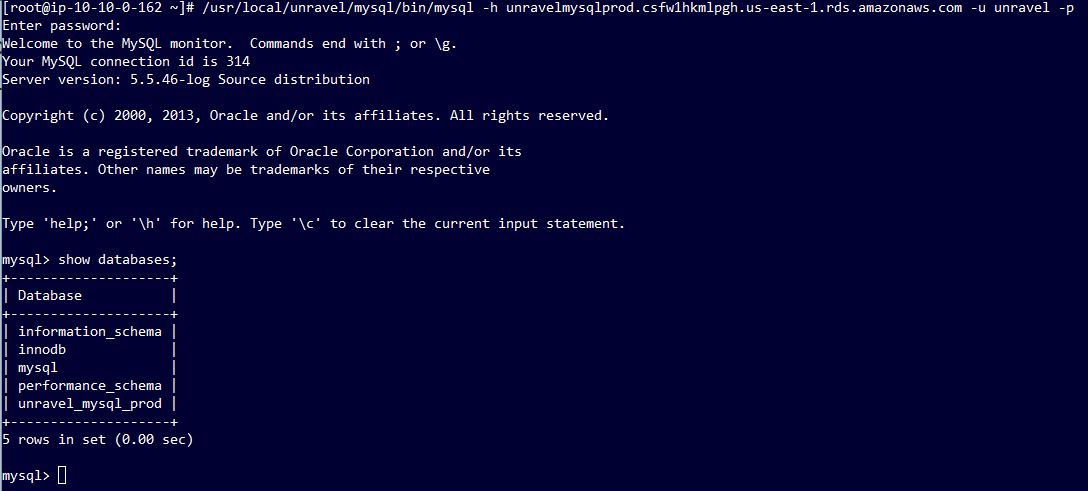
On Unravel Server, verify the MySQL connection.
For example,
/usr/local/unravel/mysql/bin/mysql -h unravelmysqlprod.csfw1hkmlpgh.us-east-1.rds.amazonaws.com -u unravel -p
Verify that the database
unravel_mysql_prodhas been created; if not create it.CREATE DATABASE IF NOT EXISTS unravel_mysql_prod;
4. Create a schema for the RDS instance
Stop Unravel Server.
sudo /etc/init.d/unravel_all.sh stop
Set or add the following properties in
/usr/local/unravel/etc/unravel.propertiesso that Unravel Server knows about the database.If the property isn't found, add it. Use the actual values you set in the steps above.
You can use a hostname; but to avoid DNS lookups use an IP address.
The database password can be encrypted.
unravel.jdbc.username=unravel unravel.jdbc.password=
unraveldataunravel.jdbc.url=jdbc:mysql://unravelmysqlprod.csfw1hkmlpgh.us-east-1.rds.amazonaws.com:3306/unravel_mysql_prodEnsure the schema is up to date using the schema upgrade utility provided by Unravel Server. The script step connects to the database and applies schema deltas, in order, until the schema is up to date. The success or failure of the update is noted.
sudo /usr/local/unravel/dbin/db_schema_upgrade.sh
Note
If table creation privilege is not granted because an internal DBA support group provides the external database, request that they apply the schemas in
/usr/local/unravel/sql/mysql/in numerical order. The schema deltas assume the database name is already picked with a 'use' statement. The schema_migrations table keeps track of what schemas have been applied.Create the default user
adminwith the SQL statement emitted by/usr/local/unravel/install_bin/db_initial_inserts.sh | /usr/local/unravel/install_bin/db_access.sh
5. Start Unravel Server
Disable the bundled database on Unravel Server. Only one of these commands is needed, depending on your exact version of Unravel. The unnecessary command produces an error that you can ignore.
sudo chkconfig unravel_db off
sudo chkconfig unravel_pg off
Start Unravel services.
sudo /etc/init.d/unravel_all.sh start