Setting up a user-assigned managed identity
The recommended method to set up permission for Azure Blob File System driver (ABFS) is to use Managed Identity. Follow the steps to create and set up a user-assigned managed identity.
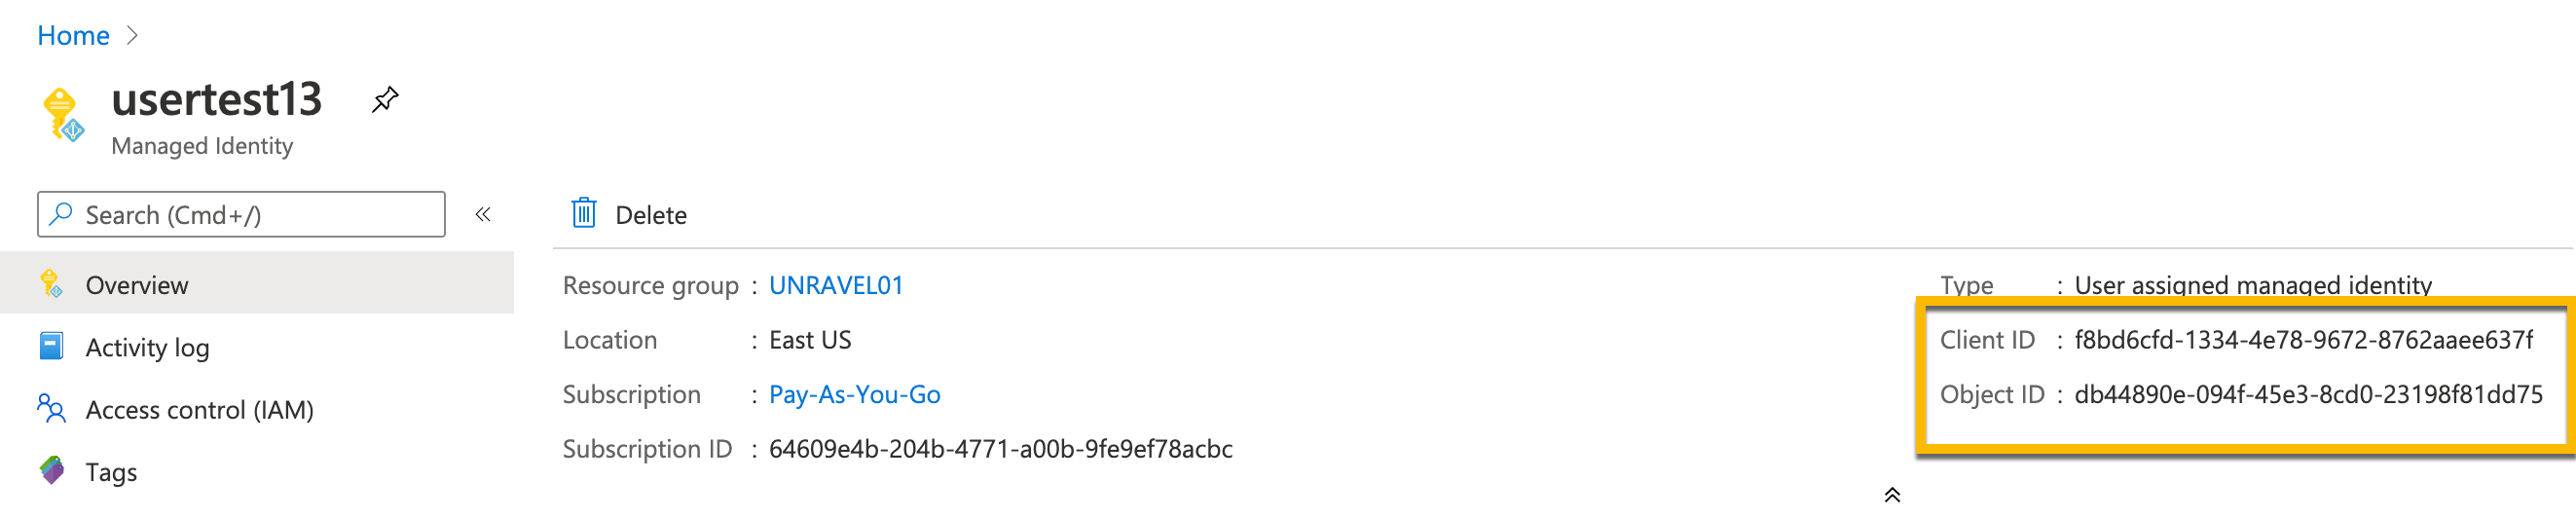
1. Create a user-assigned managed identity
You must set up a user-assigned managed identity and record the Client ID and Object ID.
Go to the Azure portal > Managed Identities.
Click Add and create a new user-assigned managed identity.
Record the Client ID and Object ID shown for the managed identity.
2. Add managed identity to storage account
Go to Azure portal > Storage Accounts.
Select a storage account and then click Container.
Select a container and on the left panel click Access Control(IAM).
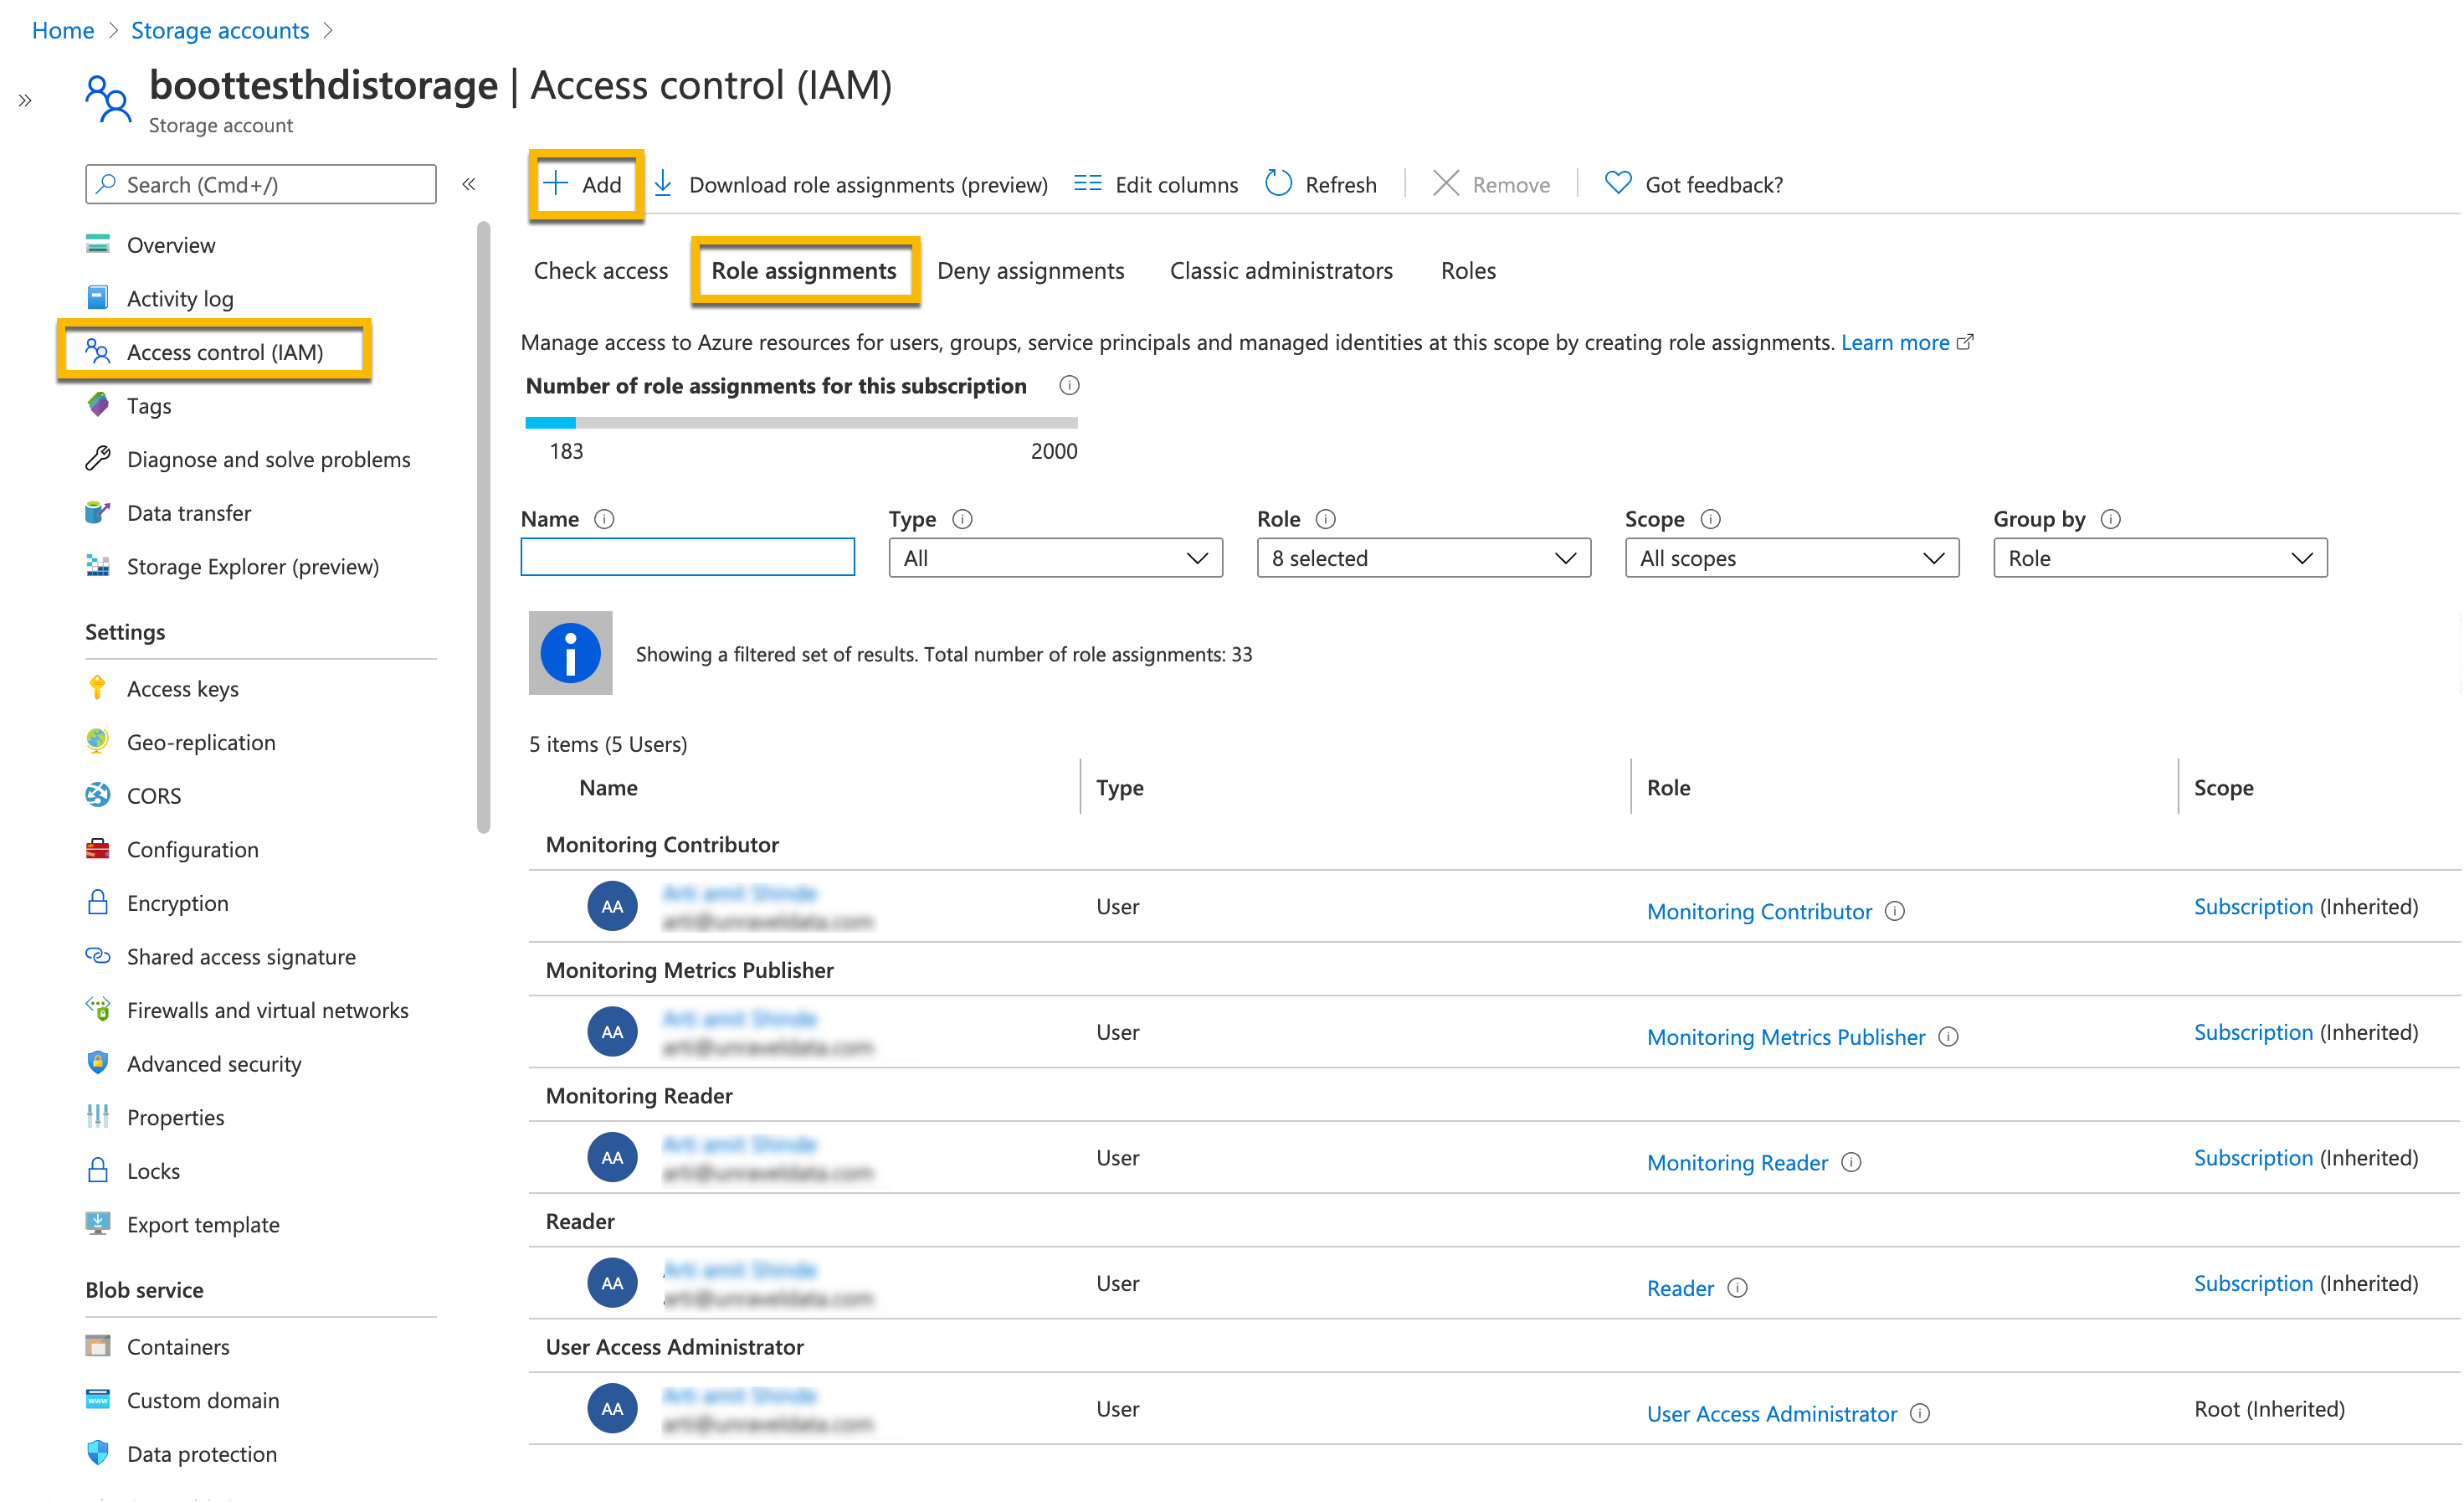
Click Role assignments and then click Add.
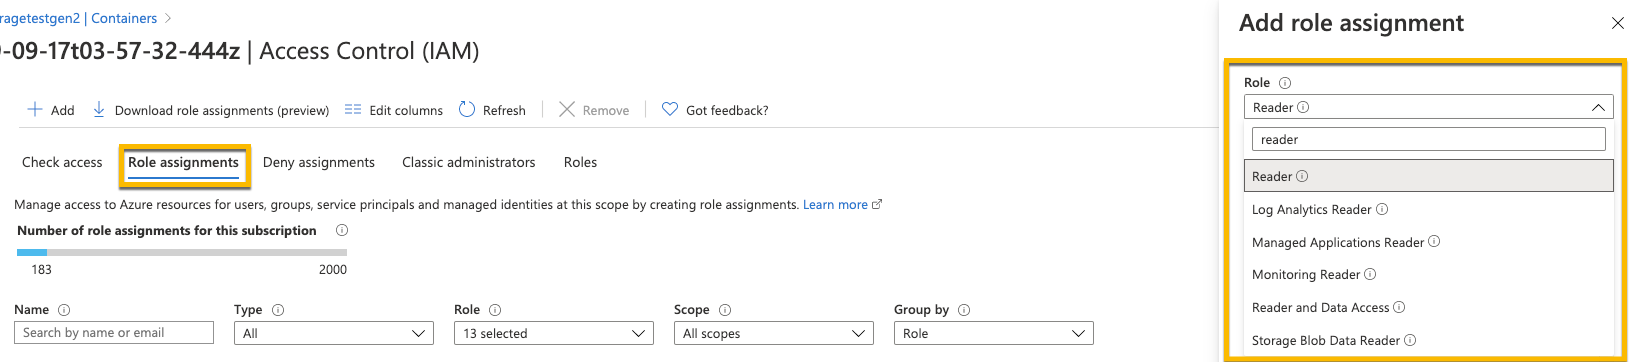
Grant the Reader role to the managed identity. Select the managed identity from the Select list.
From the Storage Explorer view, select a directory and then click Manage Access.
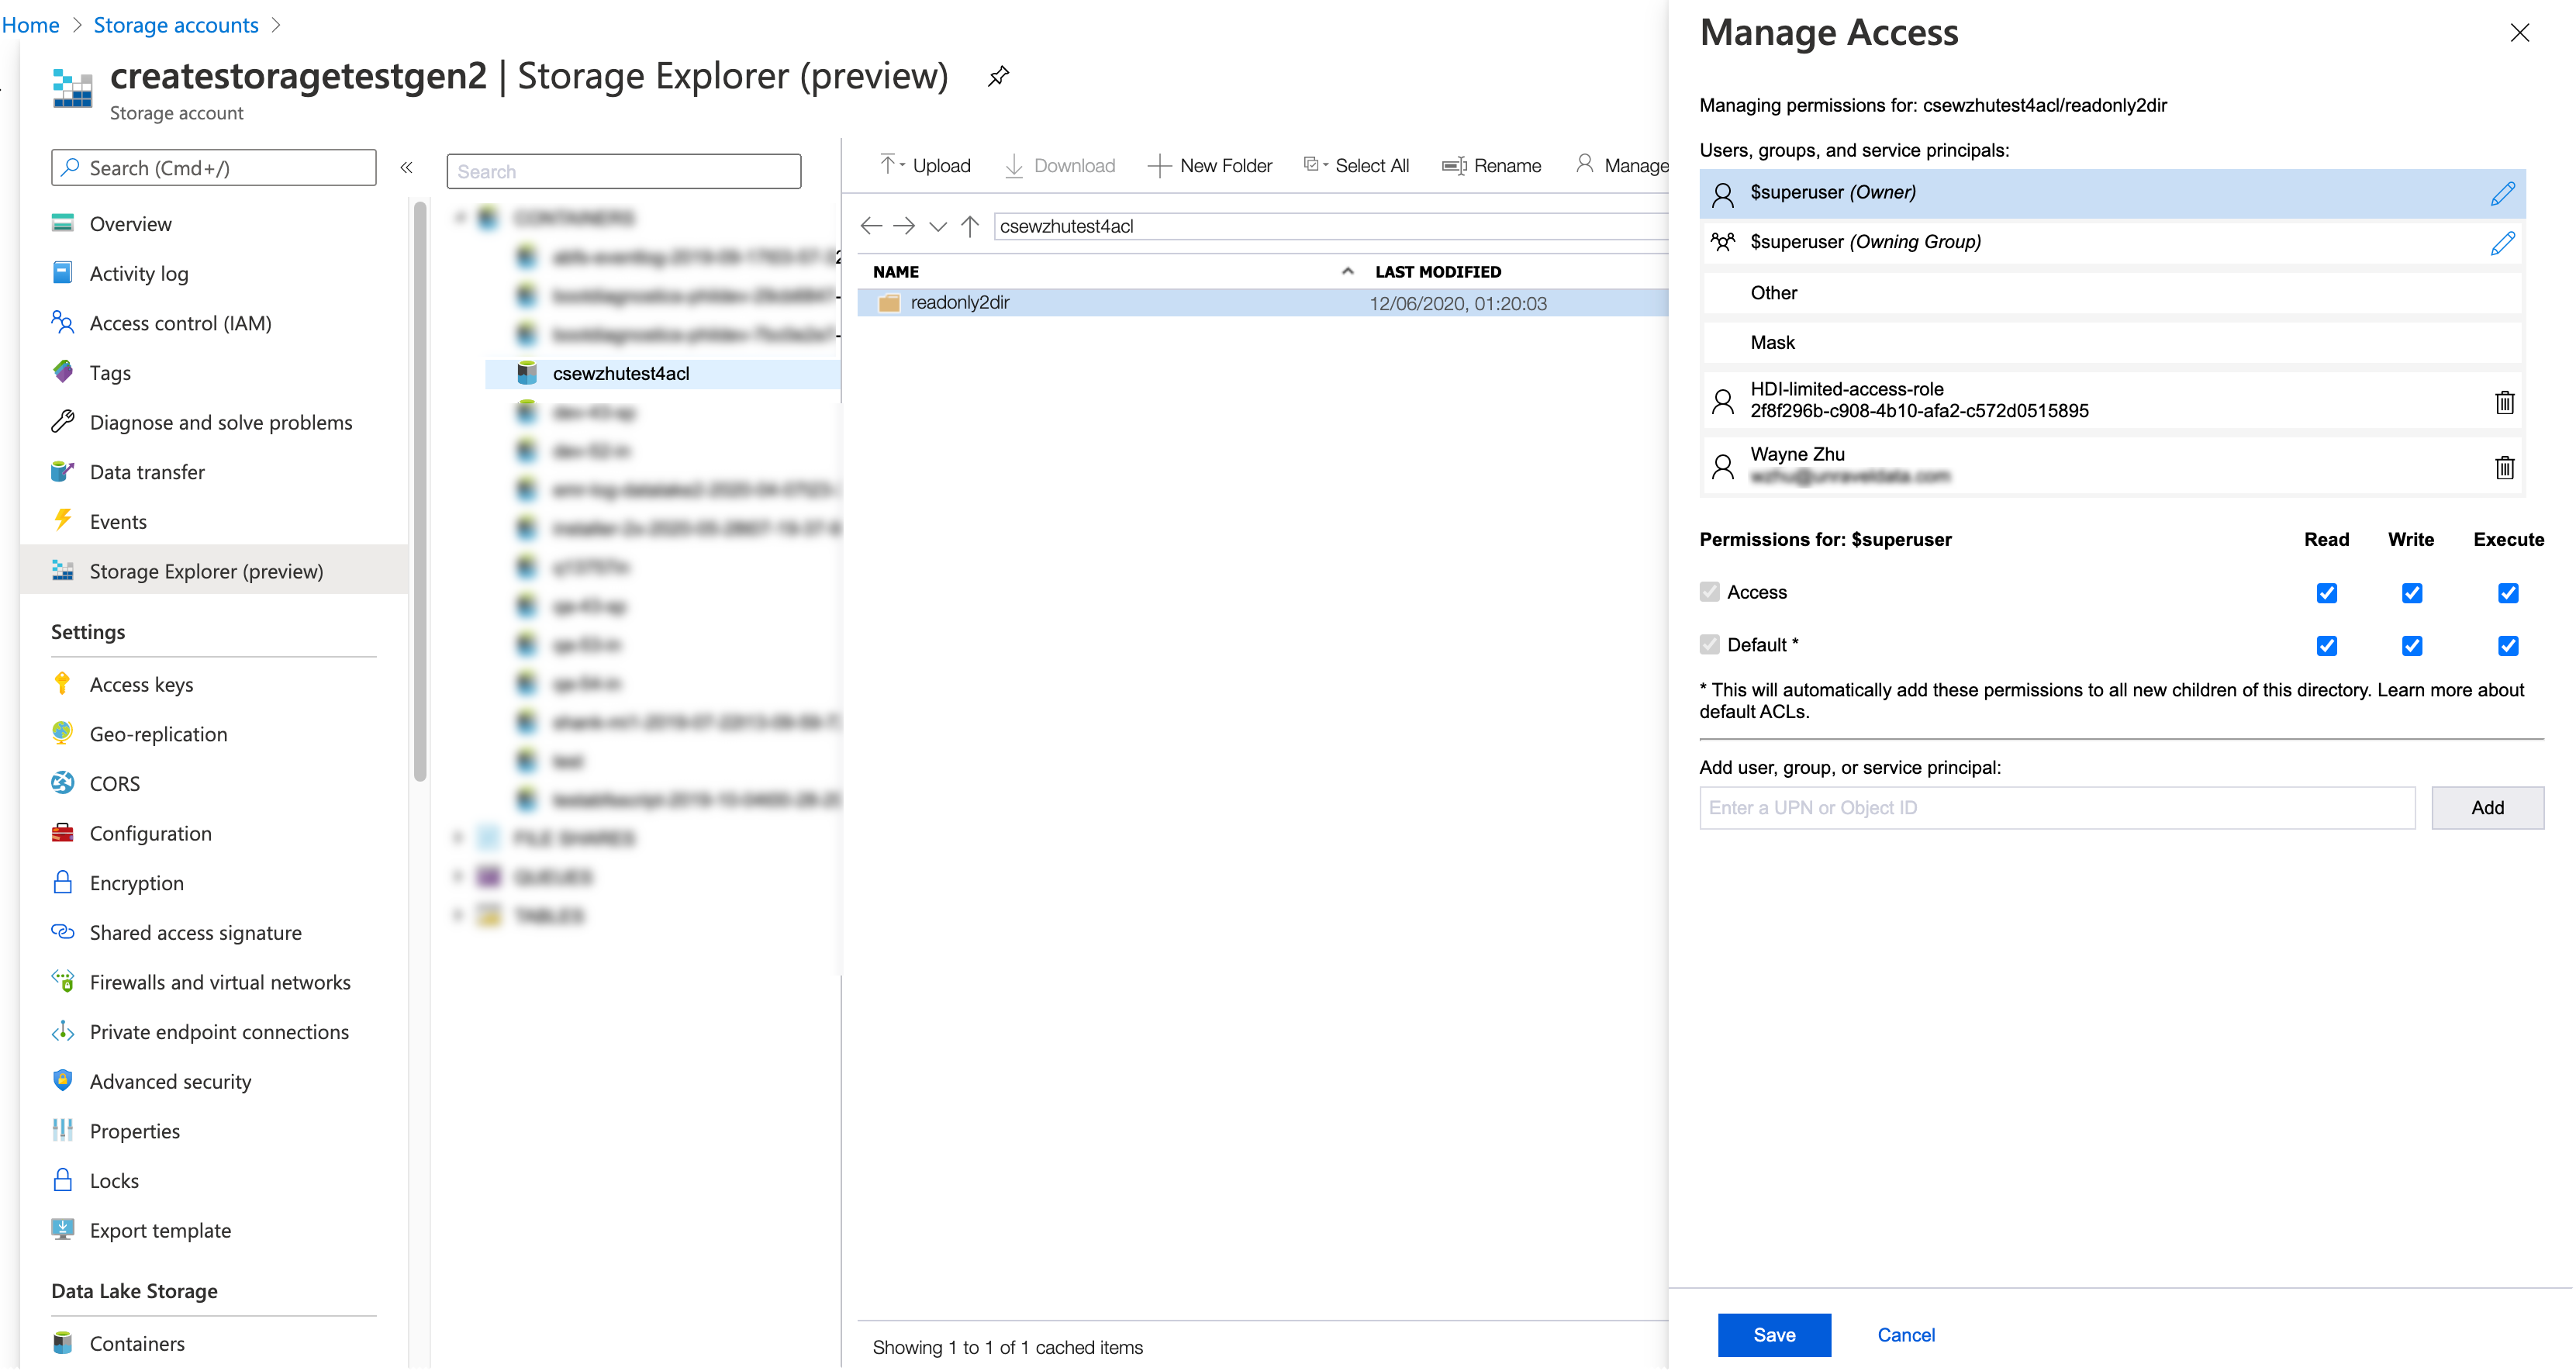
Copy-paste the Object ID of the managed identity in the Add User, group, or service principal box . You can get the Object ID from the corresponding Manage Identity page.
Select Read and Execute permissions for Access as well as for Default and then click Save.
3. Add managed identity to Unravel VM
Go to the Azure portal and click Virtual Machines.
Select a VM to add to the managed identity.
Under Settings, click Identity.
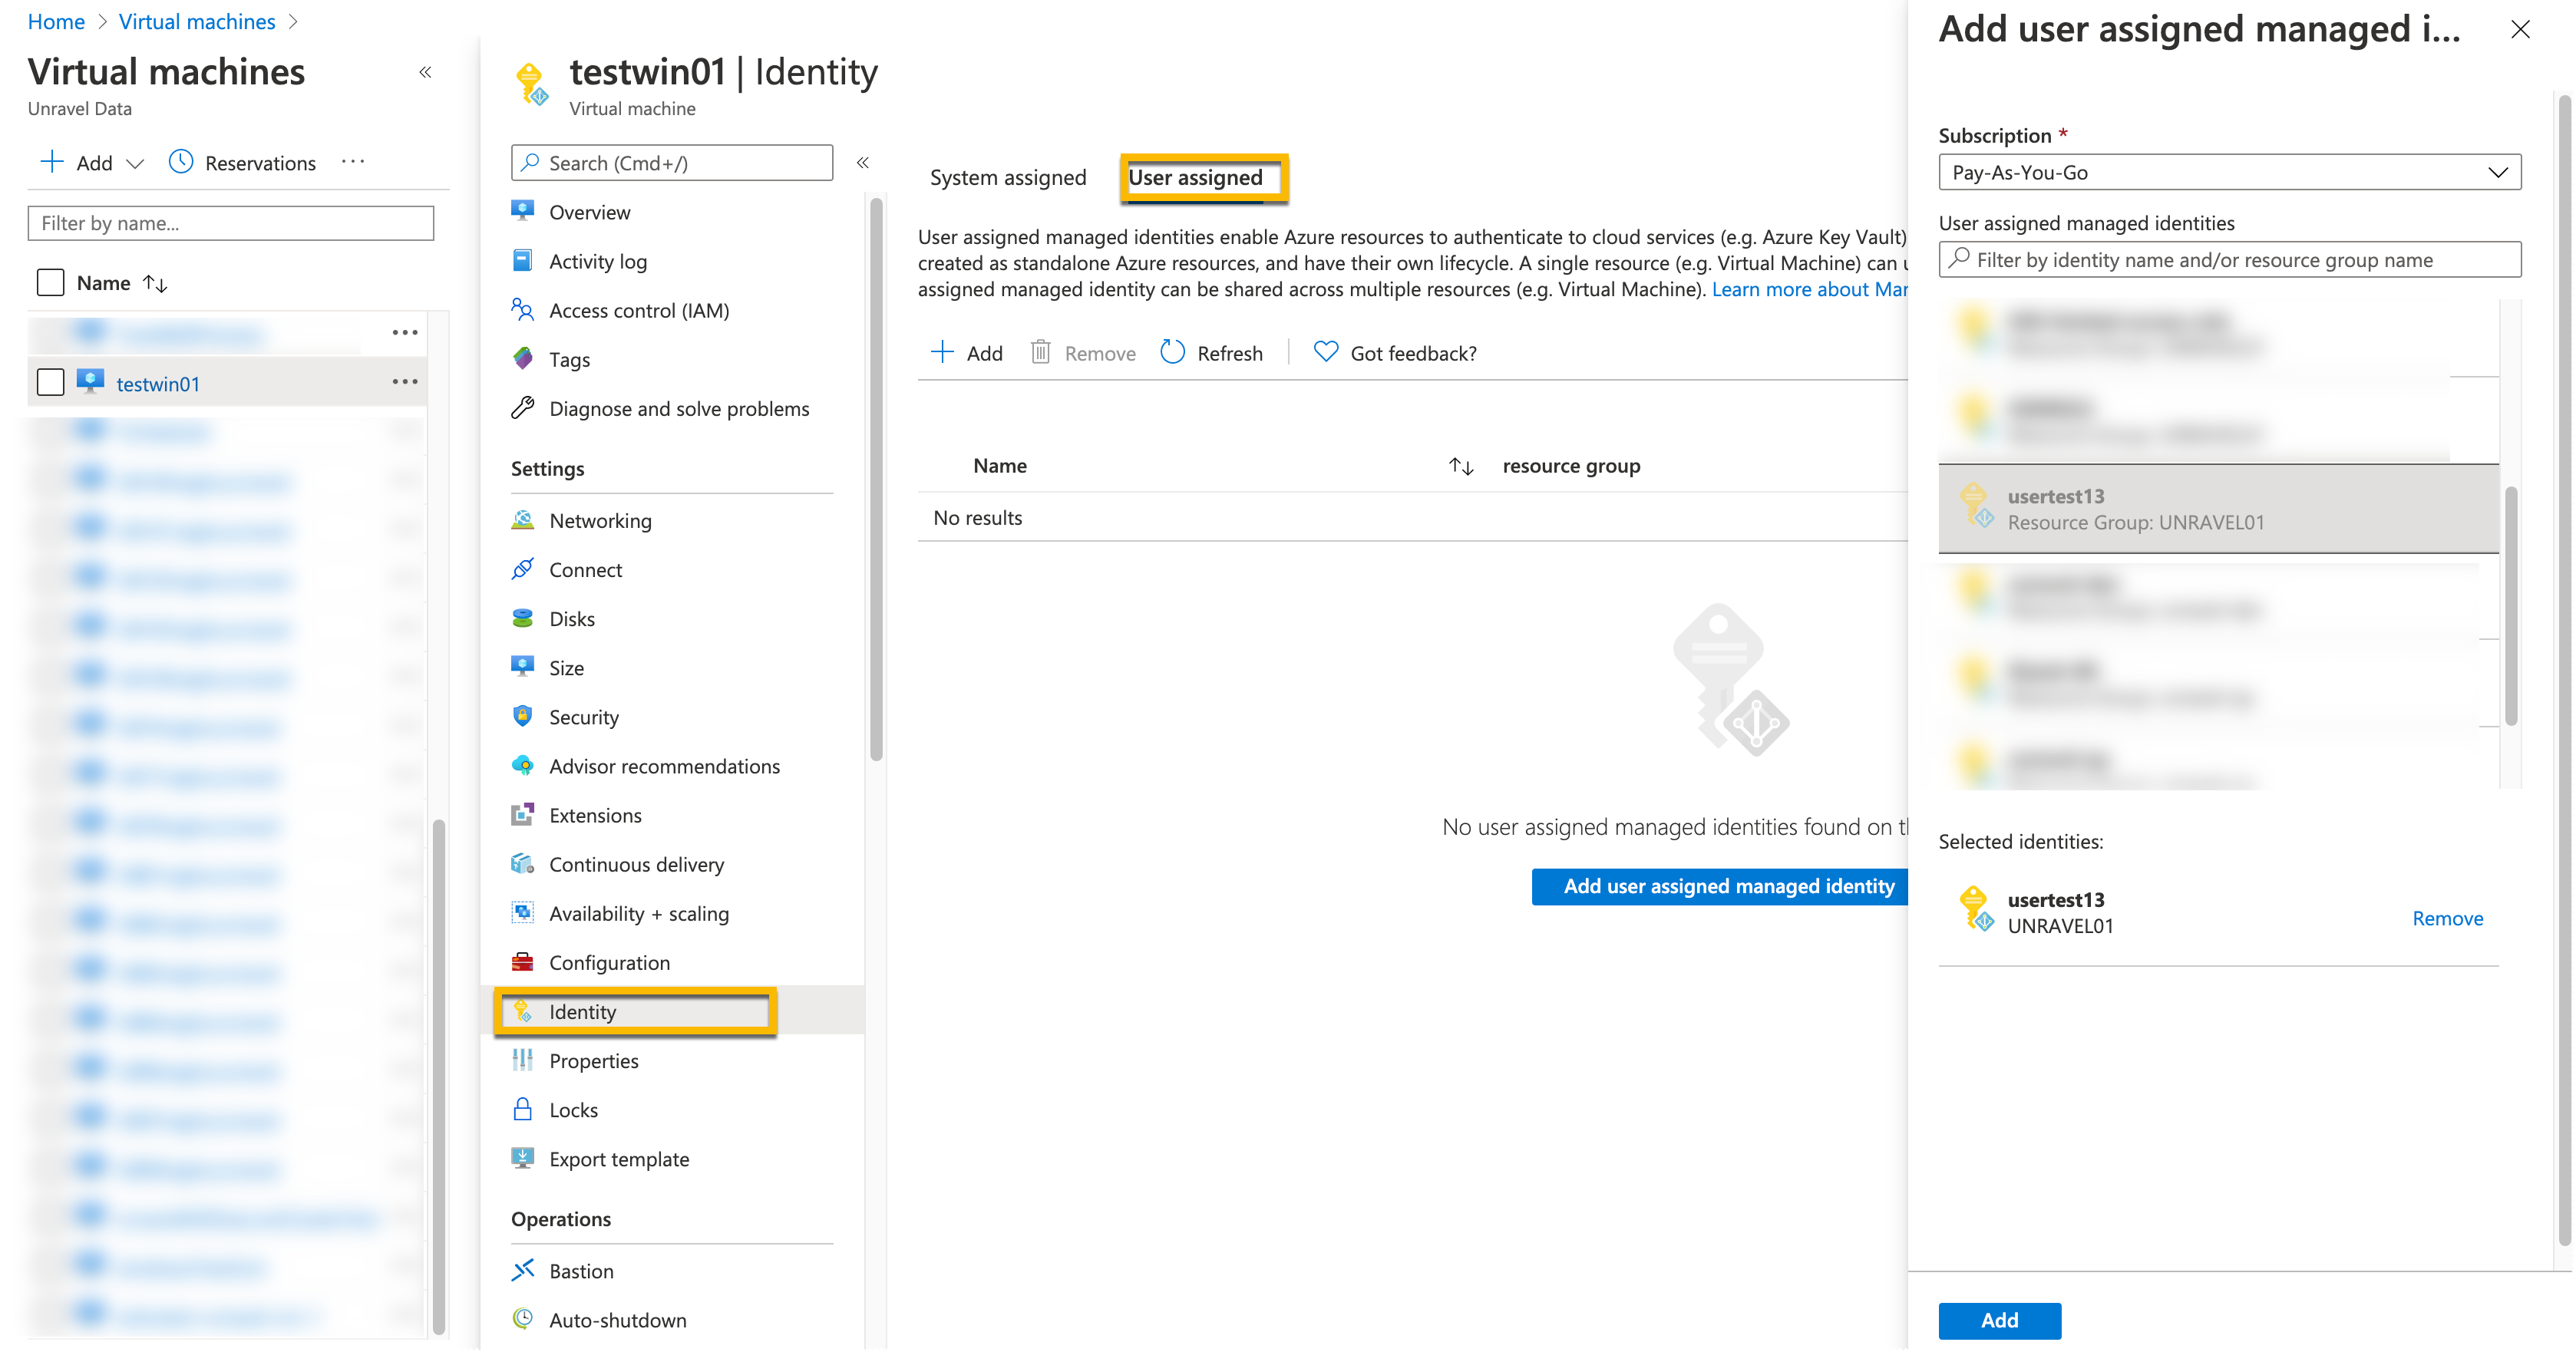
Select User assigned tab and then click Add user assigned managed identity.
From the list, select the managed identity and click Add.
4. Add ABFS properties to unravel.properties
Refer to Properties for ADLS Gen 2 (ABFS)