Installing Unravel
The following section provides information about Unravel binaries, how to deploy these binaries, install Unravel, and verify the installation. This section also includes instructions to install and deploy Unravel for multi-cluster monitoring.
Deploying Unravel binaries
The following section provides information about deploying Unravel binaries. Unravel binaries are shipped as a tar file as well as an RPM package. The Unravel binaries can be deployed in any directory on the server. The user who installs Unravel must have the write permissions to the directory where Unravel binaries are deployed.
Deploying Unravel from a tar file
To deploy Unravel binaries from a tar file, do the following:
Create an Installation directory and grant ownership of the directory to the user who installs Unravel. This user executes all the processes involved in Unravel installation.
mkdir
/path/to/installation/directorychown -Rusername:groupname/path/to/installation/directoryDownload Unravel.
Extract the Unravel tar file to the installation directory which was created as part of the prerequisite.
tar zxf unravel-<version>tar.gz -C /path/to/installation/directory
Deploying Unravel from an RPM package
To install Unravel from an RPM package, run the following command as a root user:
Create a directory
/usr/local/unraveland grant ownership of the directory to a user who will run Unravel.mkdir /usr/local/unravel chown -R
username:groupname/usr/local/unravelRun the following command as a root user:
rpm -i unravel-<version>.rpm
This deploys the binaries to
/usr/local/unravel. In case you want to deploy the binaries to a specific directory, run the following command:mkdir
/path/to/installation/directorychown -Rusername:groupname/path/to/installation/directoryrpm -i unravel-<version>.rpm --prefix/path/to/installation directory
Integrating database for usage with Unravel
Running setup
After deploying the Unravel binaries, run the setup command.
Run setup command:
<
installation_directory>/versions/4.6.x.x/setupFor example:
<Unravel installation directory>/versions/4.6.x.x/setup
Configure unravel using the following commands:
<unravel_installation_directory>/manager config auto
<unravel_installation_directory>/manager start
<unravel_installation_directory>/manager report
These will configure Unravel, start the daemons, and check the status of the daemon processes.
Note
Run --help with the setup command as well as with any combination of the setup command for the complete usage details.
<unravel_installation_directory>/versions/4.6.x.x/setup --help
<unravel_installation_directory>/manager/setup manager config auto --help
Also, refer to Unravel configurations.
Note
If Unravel is installed in RHEL 7.7 environment, the following issues can occur while starting OnDemand service:
Unsafe symlink failure: To resolve this issue, you must manually edit the
/etc/init.dand/etc/systemd/systemfiles and change the location for PID file creation fromusr/local/unravel/ondemandto/var/run.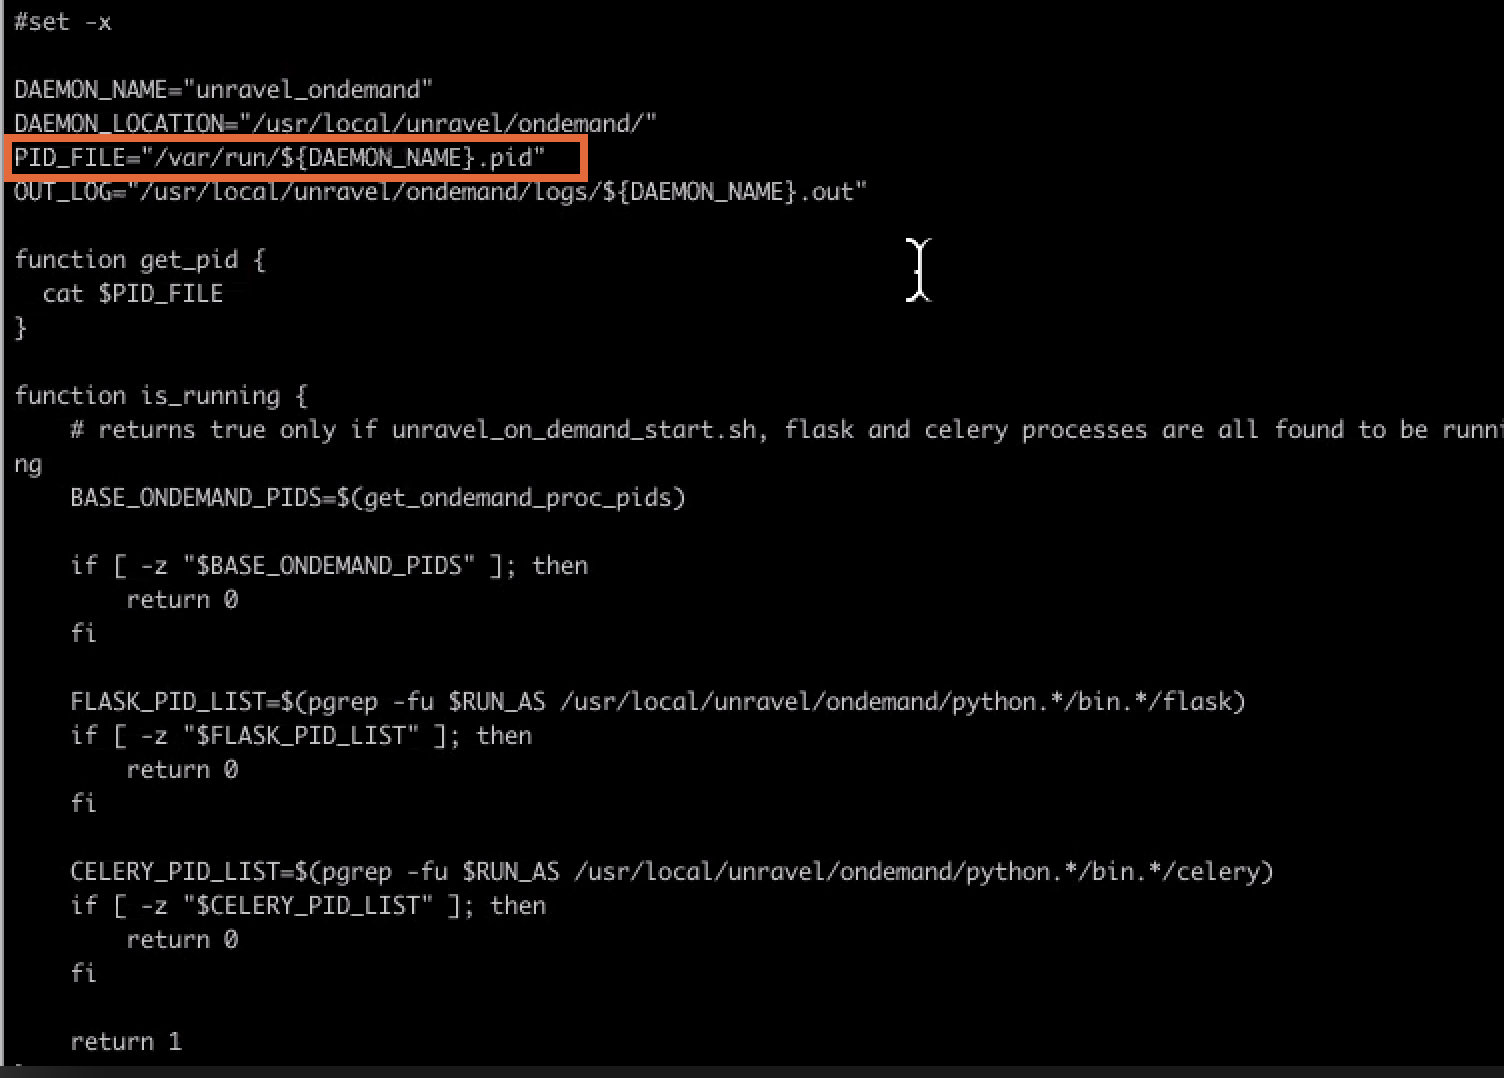
/lib/lsb/init-functions not existing: To resolve this issue, you must remove the existing /lib/lsb/init-functions file and install the redhat-lsb-core package:
rmdir /lib/lsb/init-functions
yum install redhat-lsb-core
Verifying Unravel installation
You can verify the Unravel installation by running the following steps:
Verify the Unravel sensor, properties, and files. Run the following command from the manager tool:
managerverify <sensor|properties|files>
Sensor: Checks the cluster configuration and ensures that the sensor parameters are correct.
properties: Validates
unravel.properties, checking for invalid, unknown, duplicate properties.files: Verifies and reports on any unexpected changes to unravel components, scripts, and configuration.
Start all services and verify the status for all the services.
manager start
manager report
Deploying Unravel for multi-cluster monitoring
The Multi-Cluster feature allows a single Unravel installation to monitor multiple independent clusters. For multi-cluster implementation, you must install Unravel on a core node and then perform the installation steps on all the edge nodes that participate in Unravel monitoring.
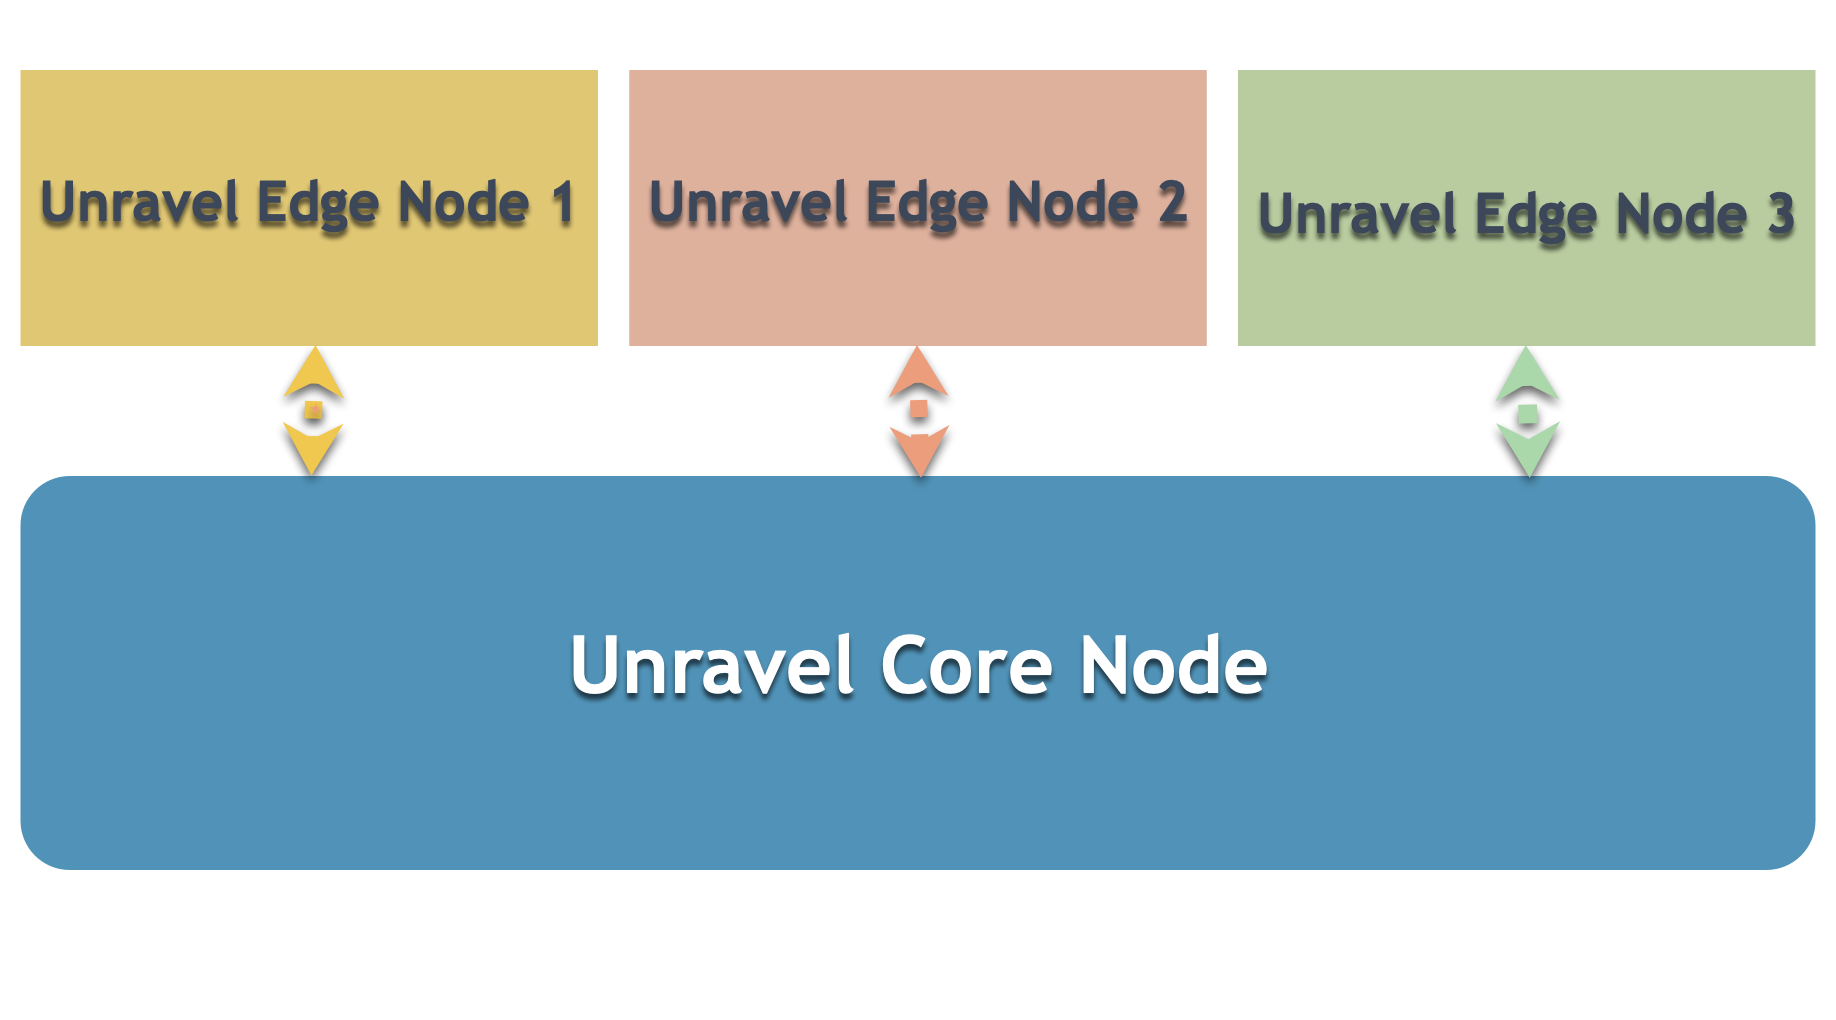
Multi-cluster deployment layout
The following image depicts the basic layout of multi-cluster deployment.
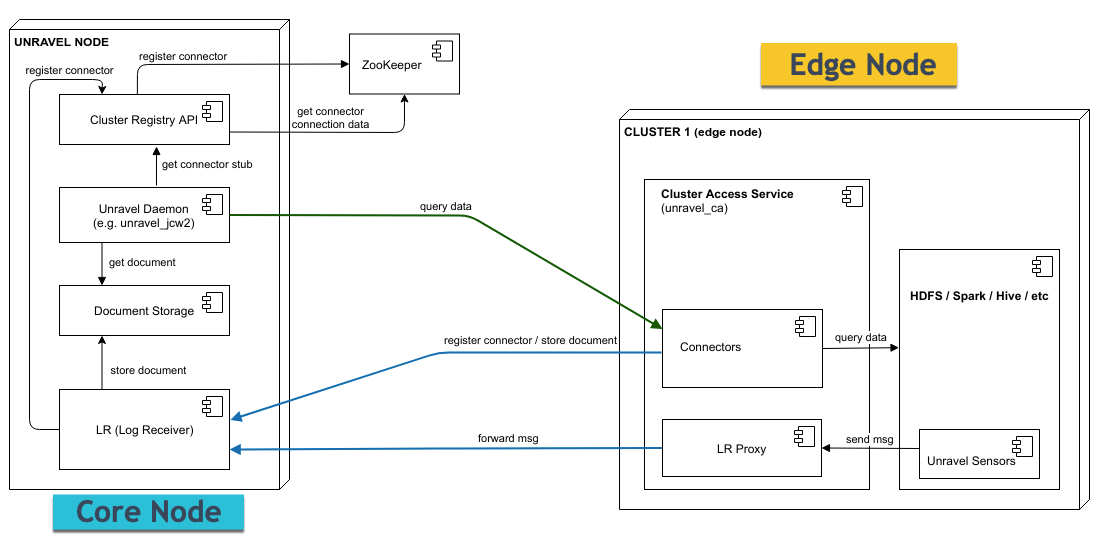
The following image provides the layout of Unravel core to Unravel edge node configuration:
Unravel core node can manage at the most one default on-prem cluster. On a default on-prem cluster:
BTrace sensors and Hive hooks send messages directly to the LR server running on the Unravel core node.
There is no Cluster Access Service on the cluster's edge node. There is no LR Proxy in this setup.
Unravel cluster ID of default cluster is always "default"
Unravel core node has to have access to Hadoop services running on default cluster
The default on-prem cluster can be enabled by adding the following property on Unravel core node:
com.unraveldata.multicluster.default_cluster.enabled=true
The following image displays the basic deployment layout of Unravel core node with Unravel default on-prem cluster and other on-prem clusters:

For more details on components and configurations, refer to Configuring Unravel to monitor multiple clusters.
Implementing multi-cluster
For multi-cluster implementation, do the following:
Perform the following steps on the core node in a multi-cluster setup:
After deploying Unravel, add the following configurations on the core node:
If Unravel manages the on-prem default cluster, the following configuration associated with the default cluster must be given. This indicates that after upgrade the Unravel setup with a single on-prem cluster is multi-cluster ready without additional configuration. The Default cluster option is enabled by default:
com.unraveldata.multicluster.default_cluster.enabled=true
If Unravel does not manage on-prem default cluster then add the following configuration property:
com.unraveldata.multicluster.default_cluster.enabled=false
Perform the following steps on the edge node:
Create an Installation directory and grant the ownership of the directory to the user who installs Unravel on the edge node.
mkdir
/path/to/installation directorychown -Rusername:groupname/path/to/installation directoryRun the setup command as follows:
<installation_directory>/versions/4.6.x.x/setup --cluster-accessSERVER# SERVER is the fully qualified domain name of the Unravel server on the core node.Run auto-configuration:
<unravel_installation_directory>/manager config auto
When prompted, you can provide the following:
Cluster manager URL: Provide the fully qualified hostname where you are installing Unravel.
Username
Password
Start Unravel services.
<unravel_installation_directory>/manager start