Amazon Web Services (AWS) Databricks
Before installing Unravel in AWS Databricks, check and ensure that the installation requirements are completed and follow the below instructions to install and configure Unravel:
1. Create an EC2 instance and connect Databricks to Unravel VM
On your AWS Console, go to the EC2 dashboard and click Launch Instance.
Select the following options based on Unravel's instance requirements:
Base OS
Instance type and size
Ports
Networking
The EC2 instance must be in the same region as the target clusters, which Unravel EC2 node will be monitoring.
Security groups or policies
Create a security group that allows port 3000 and port 4043 from cluster nodes' IP address, and put the security group member used on the cluster in this rule.
Sample inbound rule Type
Protocol
Port range
Source
All traffic
All
All
Security group ID of this group or subnet IP block.
For example, 10.10.0.0/16
SSH
TCP
22
0.0.0.0/0 or trusted public IP for SSH access
Custom TCP Rule
TCP
443
Security group ID used on the cluster or subnet IP block (if the IP block belongs to a different VPC). Required for VPC peering connection
Custom TCP Rule
TCP
3000
Security group ID used on the cluster or subnet IP block (if the IP block belongs to a different VPC). Required for VPC peering connection.
Custom TCP Rule
TCP
4043
Security group ID used on the cluster or subnet IP block (if the IP block belongs to a different VPC). Required for VPC peering connection.
Custom TCP Rule
TCP
4443
Security group ID used on the cluster or subnet IP block (if the IP block belongs to a different VPC). Required for VPC peering connection.
Review the Virtual Private Cloud (VPC) Peering options to connect Databricks with the Unravel VM.
Workspace | VPC Peering Options |
|---|---|
Workspace and Unravel VM are in the same VPC | - |
Workspace VPC is in a different Region | Use VPC Peering: |
Workspace VPC is in a different AWS account | Use VPC Peering: |
2. Download Unravel
3. Deploy Unravel
Unravel binaries are available as a TAR file or RPM package. You can deploy the Unravel binaries in any directory on the server. However, the user who installs Unravel must have the write permissions to the directory where the Unravel binaries are deployed.
After you extract the contents of the TAR file or RPM package, unravel directory is created within the installation directory (<unravel_installation_directory>) and Unravel will be available in <Unravel_installation_directory>/unravel. The directory layout will be unravel/versions/<Directories and files>.
The following steps to deploy Unravel from a TAR file should be performed by a user, who will run Unravel.
Create an Installation directory.
mkdir
/path/to/installation/directoryFor example: mkdir /opt/
Extract Unravel tar file to the installation directory, which you have created in the first step. After you extract the contents of the TAR file,
unraveldirectory is created within the installation directory.tar zxf unravel-
<version>tar.gz -C</path/to/installation/directory>For example: tar zxf unravel-4.7.0.0.tar.gz -C /opt
The unravel directory will be available within
/opt.Grant ownership of the directory to a user who will run Unravel.
chown -R username:groupname
</path/to/installation/directory>For example: chown -R hadoop:hadoop /opt/unravel/
Important
The following steps to deploy Unravel from an RPM package should be performed by a root user. After the RPM package is deployed, the remaining installation procedures should be performed by unravel user.
Create an installation directory.
mkdir /usr/local/unravel
Run the following command:
rpm -i unravel-
<version>.rpmFor example: rpm -i unravel-4.7.0.0.rpm
The unravel directory will be available in
/usr/local.If you want to provide a different location, use the --prefix command.
For example:
mkdir /opt/unravel
rpm -i unravel-4.7.0.0.rpm --prefix /opt
The unravel directory will be available in
/opt.Grant ownership of the directory to a user who will run Unravel. This user executes all the processes involved in Unravel installation.
chown -R
username:groupname/usr/local/unravelFor example: chown -R hadoop:hadoop /usr/local/unravel
Continue with the installation procedures as unravel user.
4. Install Unravel
You can install Unravel either with Interactive Precheck or manually without Interactive Precheck.
Note
Unravel recommends installation with Interactive Precheck.
To install Unravel with Interactive precheck, you must run the Interactive Precheck utility to generate a bootstrap configuration file for installation.
5. Configure Unravel Log Receiver
Note
The LR endpoint configuration will only be set in the unravel.yaml file. It will not be reflected in unravel.properties.
6. Connect Databricks cluster to Unravel
Run the following steps to connect the Databricks cluster to Unravel.
Register workspace in Unravel.
Sign in to Unravel UI, and from the upper right, click
 > Workspaces. The Workspaces Manager page is displayed.
Click Add Workspace and enter the following details.
Field
Description
Workspace Id
Databricks workspace ID, which can be found in the Databricks URL.
The random numbers shown after o= in the Databricks URL become the workspace ID.
For example, in this URL:https://<databricks-instance>/?o=987654321123456, the Databricks workspace ID is the random number after o=, which is 987654321123456.
Workspace Name
Databricks workspace name. A human-readable name for the workspace. For example,
ACME-WorkspaceInstance (Region) URL
Regional URL where the Databricks workspace is deployed. Specify the complete URL. Expected format is protocol://dns or ip(:port). Ensure that the URL does not end with a slash. For example, a valid input is: https://eastus.azuredatabricks.net. An invalid input is: https://eastus.azuredatabricks.net/.
Tier
Select a subscription option: Standard or Premium. For Databricks Azure, you can get the pricing information from the Azure portal. For Databricks AWS you can get detailed information about pricing tiers from Databricks AWS pricing.
Token
Use the personal access token to secure authentication to the Databricks REST APIs instead of passwords. You can generate the token from the workspace URL (Go to User Settings > Developer > Access tokens > Manage > Generate New Token)
See Authentication using Databricks personal access tokens to create personal access tokens.
Note
Users with admin or non-admin roles can create personal access tokens. For non-admin tokens, you must fulfill the requirements as mentioned here.
Note
After you click Add, it takes around 2-3 minutes to register the Databricks Workspace with Unravel.
Add Unravel configuration to Databricks clusters using any of the following options:
Global init script
Global init script applies the Unravel configurations to all clusters in a workspace.
Global init is deployed automatically on the Workspace and needs to be enabled manually from the location shown in the following image:
Go to your workspace, and from the dropdown located in the upper right corner, select Admin Settings.
From Settings, click Compute and then click Manage next to Global init scripts. The Global init scripts page is shown.
Use the toggle key under the Enabled column to enable the Global init scripts.
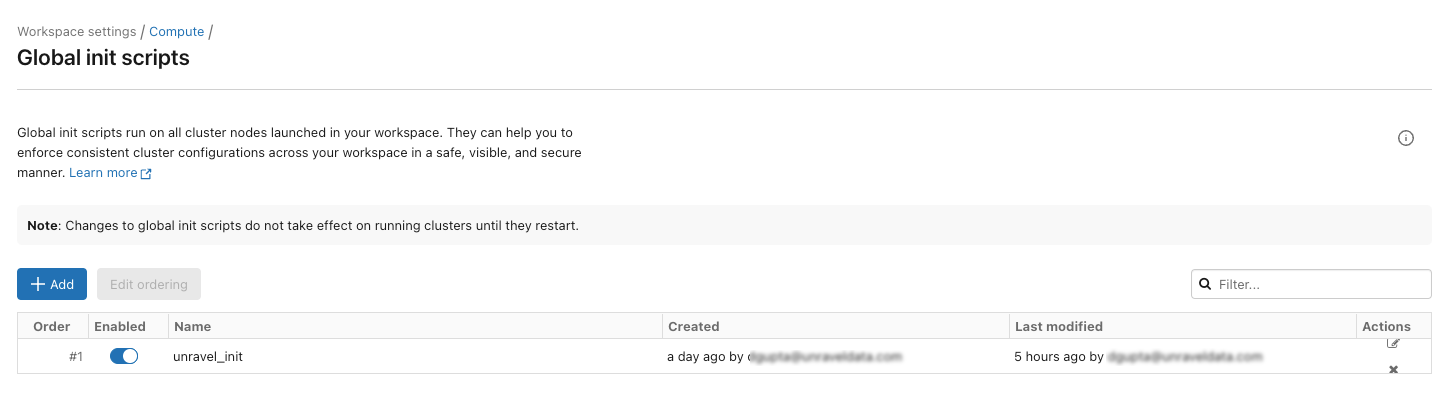
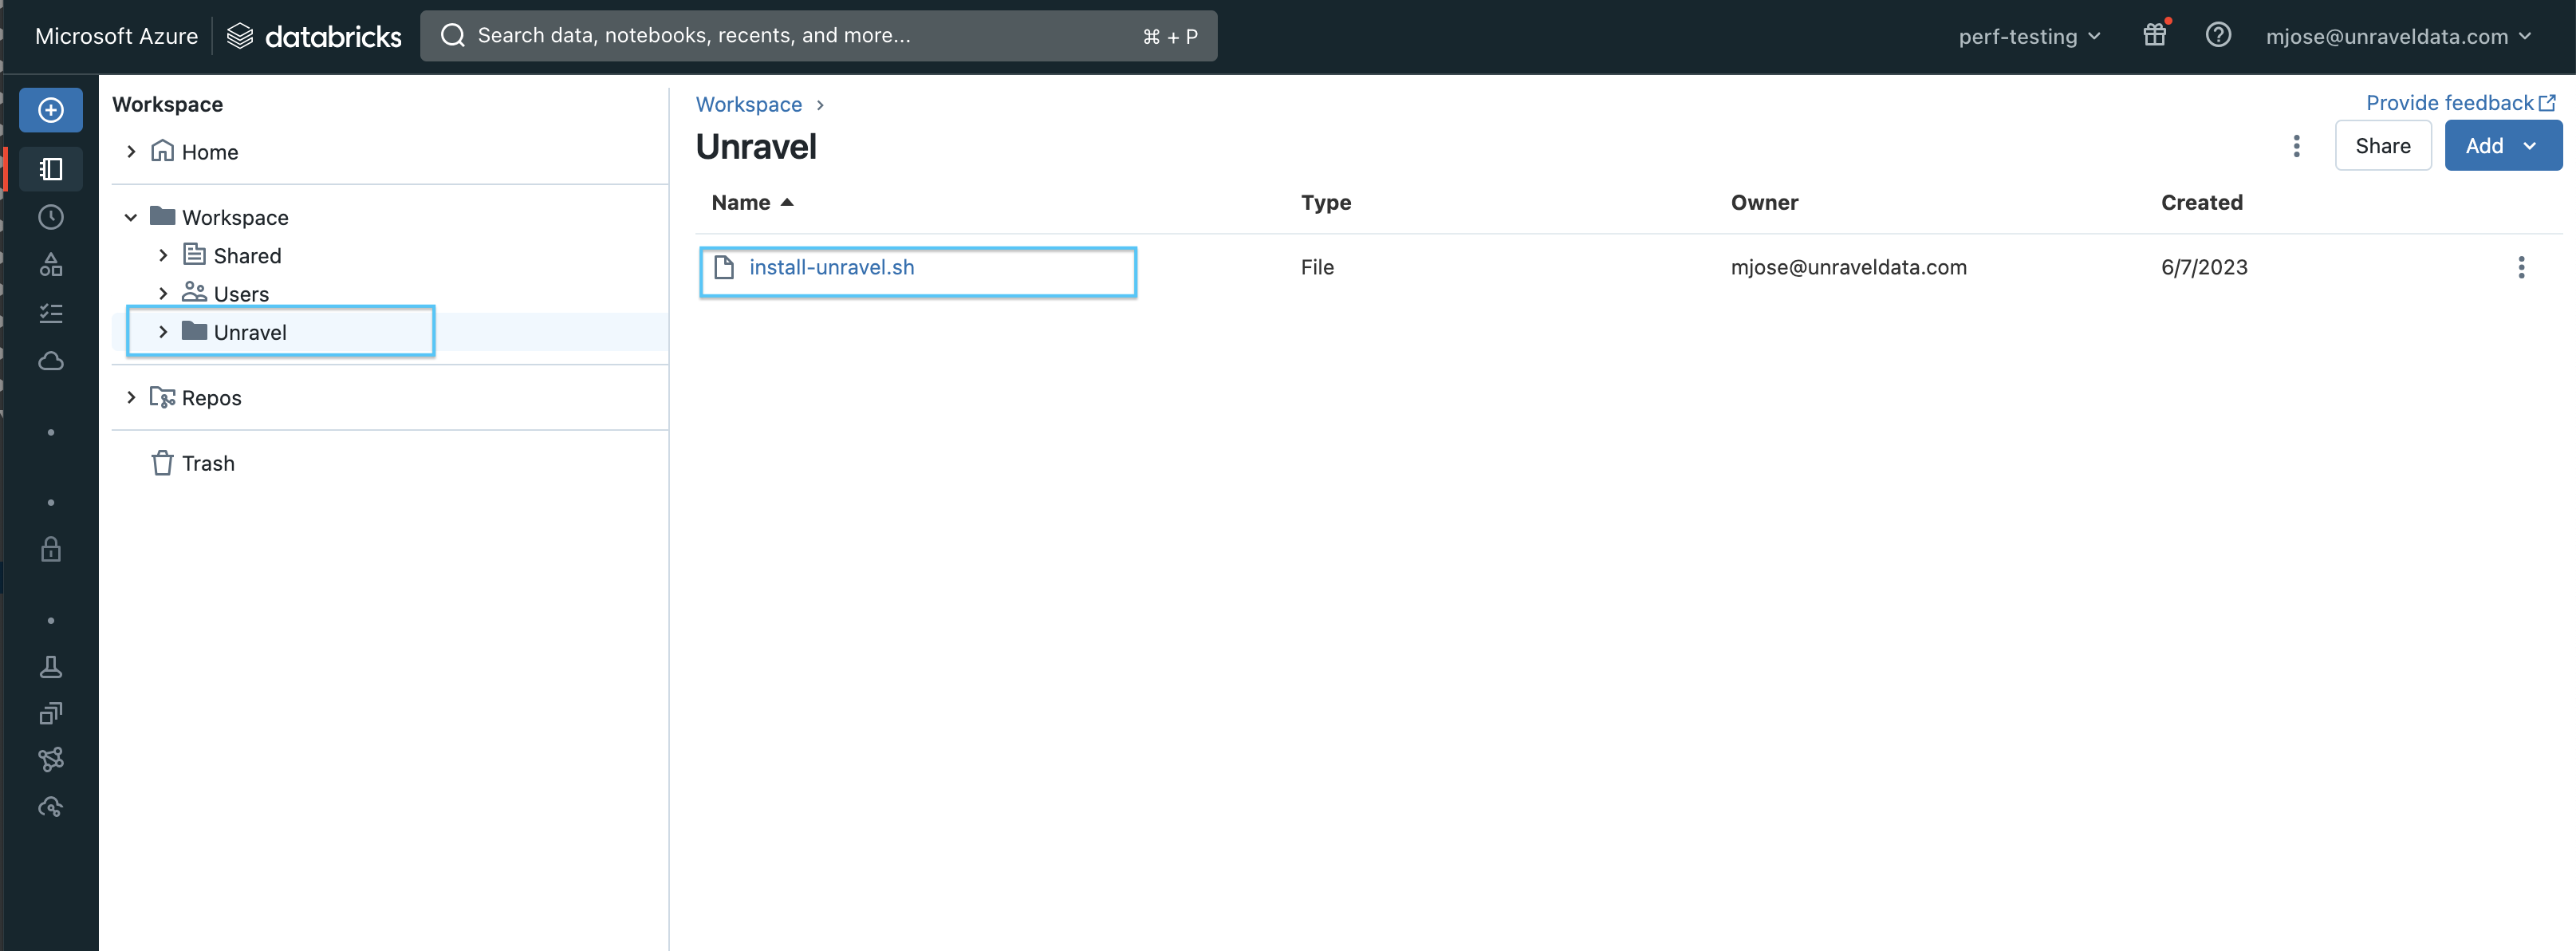
You can also find the Global initialization script in your workspace at this path: /Workspace/Unravel/install-unravel.sh
If it is not deployed automatically, you can do one of the following
Use this script as a Cluster init script.
Add Unravel configuration to Databricks clusters using the Global init script by referring to these instructions.
Note
Cluster logging should be enabled at the cluster level. See Logging in Cluster init script for instructions.
Important
When you upgrade from an Unravel version below v4.7.5.0, you must disable or remove all the previously set up global init scripts (unravel_cluster_init, unravel_spark_init).
Cluster init script
Cluster init script applies the Unravel configurations at the cluster level. To setup cluster init scripts from the cluster UI, do the following:
Go to Unravel UI, click Manage > Workspaces , and select the Workspace URL.
Log in to the Workspace.
Access the required cluster you want to monitor through Unravel.
Set the path to /Unravel/install-unravel.sh as shown in this image.
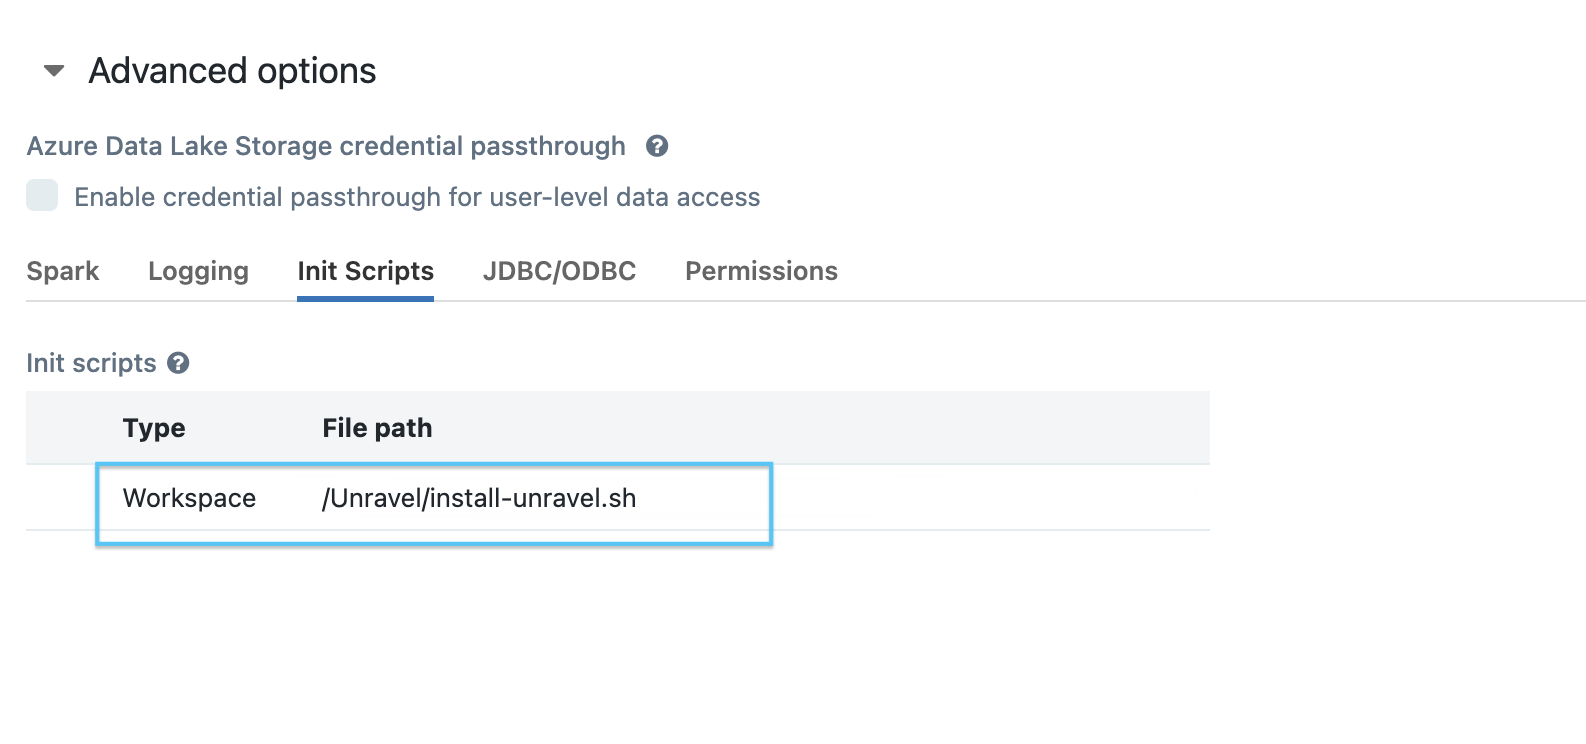
Note
Prior to configuring the new cluster-level init script, ensure you remove any existing cluster-level init script configurations that are pointing to the DBFS location. For cluster-level init script setup, make sure to configure it using the workspace file path: /unravel/install-unravel.sh.
Note
To add Unravel configurations to job clusters via API, refer to How to set up cluster init scripts via cluster API.
Managing tokens for workspace access
If you have a premium workspace and the workspace access control is enabled, you must provide the appropriate tokens when adding a workspace. The type of token required depends on whether the workspace is an Admin workspace or a read-only (RO) workspace.
Admin workspaces
Admin access token
Token of a user who has Can Manage permission on Workspace
Standard workspaces
Navigate to Workspace Settings > Access Tokens > Manage Tokens and generate a Read-Only Access Token.
In the case of workspaces with only the Can Read permission token, the Global Init and Cluster Init scripts will not be automatically added to the locations. You must add them manually from Unravel/install-unravel.sh.
Setting the backward compatibility for init scripts
To maintain the backward compatibility of your init scripts, run the following command:
<Installation_directory>/unravel/manager config databricks copy-to-dbfs --id
<workspace-id>--unsafe-copy-init-to-dbfsThis command copies the init scripts to the DBFS (Databricks File System) location, specifically the
dbinfolder. By default, during workspace addition, updates, or Unravel upgrades, thedbinfolder can be removed. However, running this command prevents its removal and guarantees that it is also transferred to the DBFS.For example:
/opt/unravel/manager config databricks copy-to-dbfs --id 6679977360960347 --unsafe-copy-init-to-dbfs
Alternatively, you can use the --all option in the command instead of specifying --id for a single workspace. This streamlined approach ensures that the same step is applied to all currently registered or added workspaces in Unravel.
For example:
/opt/unravel/manager config databricks copy-to-dbfs
Set the public hostname/IP for your Unravel server
By default, unravel uses the server name and unravel's UI ports and TLS configuration when generating URLs, this allows you to specify a different name, port or generating https URLs without enabling TLS on the unravel side. To set the public hostname/IP for your Unraver server, run the following manager command:
Note
This is an optional step and is only needed if the default setup doesn't work.
manager config set public_hostname {host} {port} {--tls} {--no-tls}Here:
{host}: The public hostname or IP address.
{port}: The port number on which the server will accept connections.
{--tls}: Use this if you want TLS to be terminated in front of the Unravel server without enabling TLS on the Unravel side.
{--no-tls}: Use this if you do not want TLS termination.
For example:
manager config set public_hostname unravel.example.com 1234 --tls
With this, unravel will generate URL like: https://unravel.example.com:1234.
Set additional configurations if required.
Configure the Workspace for Data page.
Optionally, you can run healthcheck, at this point, to verify that all the configurations and services are running successfully.
<unravel_installation_directory>/unravel/manager healthcheckHealthcheck is run automatically on an hourly basis in the backend. You can set the healthcheck intervals and email alerts to receive the healthcheck reports.
Tip
The workspace setup can be done anytime and does not impact the running clusters or jobs.