Viewing AutoAction and its details
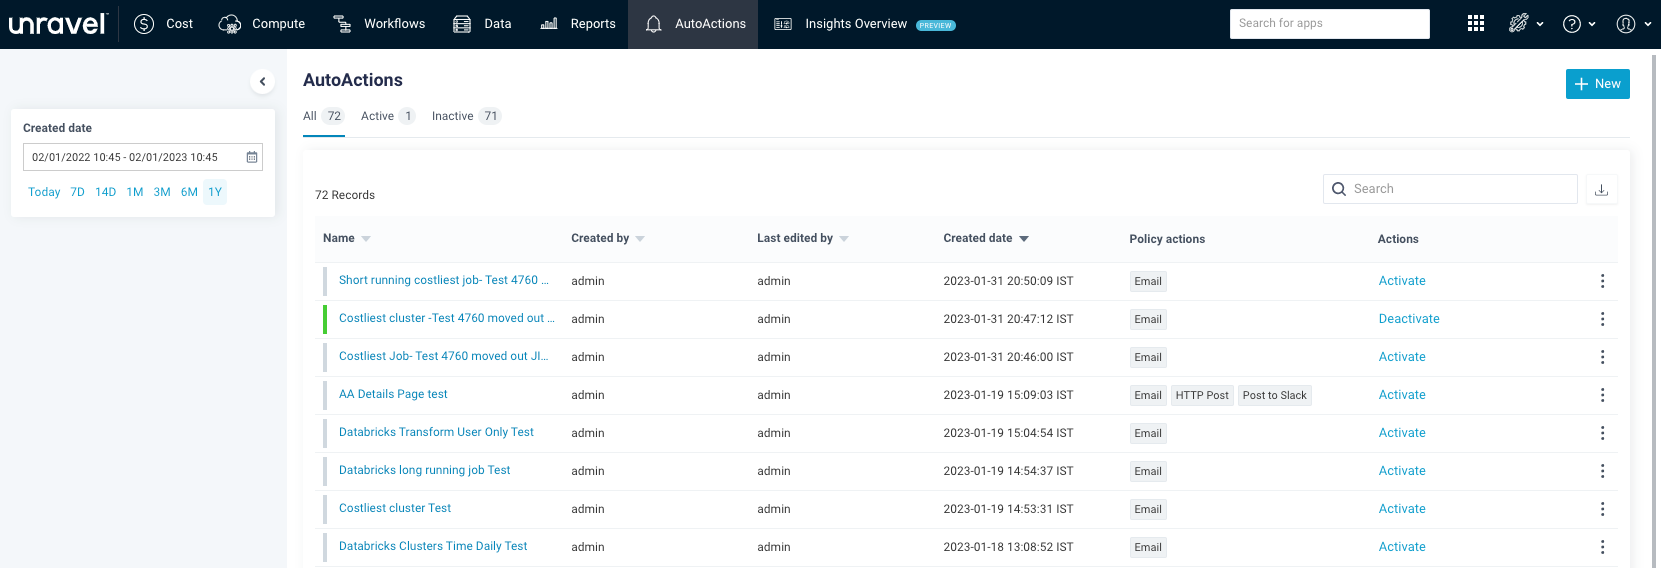
From the AutoActions page, you can add a new AutoAction and view a list of existing AutoActions.

The AutoActions are listed in the following categories:
All: Lists all AutoActions (active and inactive).
Active: Lists all active AutoActions with a green
 bar adjacent to each AutoAction.
Inactive: List all inactive AutoActions with a grey
 bar adjacent to each AutoAction.
You can filter AutoActions based on Created Date. Select a date range to view the list of AutoActions. You can either specify a custom range or choose one of the date range options (Today, 7 days, 14 days, 1 month, 3 months, 6 months, 1 year)
The AutoActions page shows a table with the following columns:
Name: Lists the available AutoActions. Select the AutoAction name to view more details.
Created by: User who created an AutoAction
Last edited by: User who last modified the AutoAction
Created date: Latest timestamp and timezone when the AutoAction was created. The column is sorted by the latest created date and time.
Policy actions: Displays the name of the action to send an alert when the condition of the AutoAction policy is met. The actions are Email, HTTP Post, or Slack.
Actions: Click the corresponding Activate or Deactivate link to activate or deactivate an AutoAction.
You can perform the following tasks from the AutoActions page:
Icons | Action |
|---|---|
 | Create a new AutoAction. See Creating AutoActions. |
 | Search for a specific AutoAction using its name |
| Download a list of AutoActions as a CSV file |
 | Click the toolbar next to each AutoAction name and perform the following actions:
|
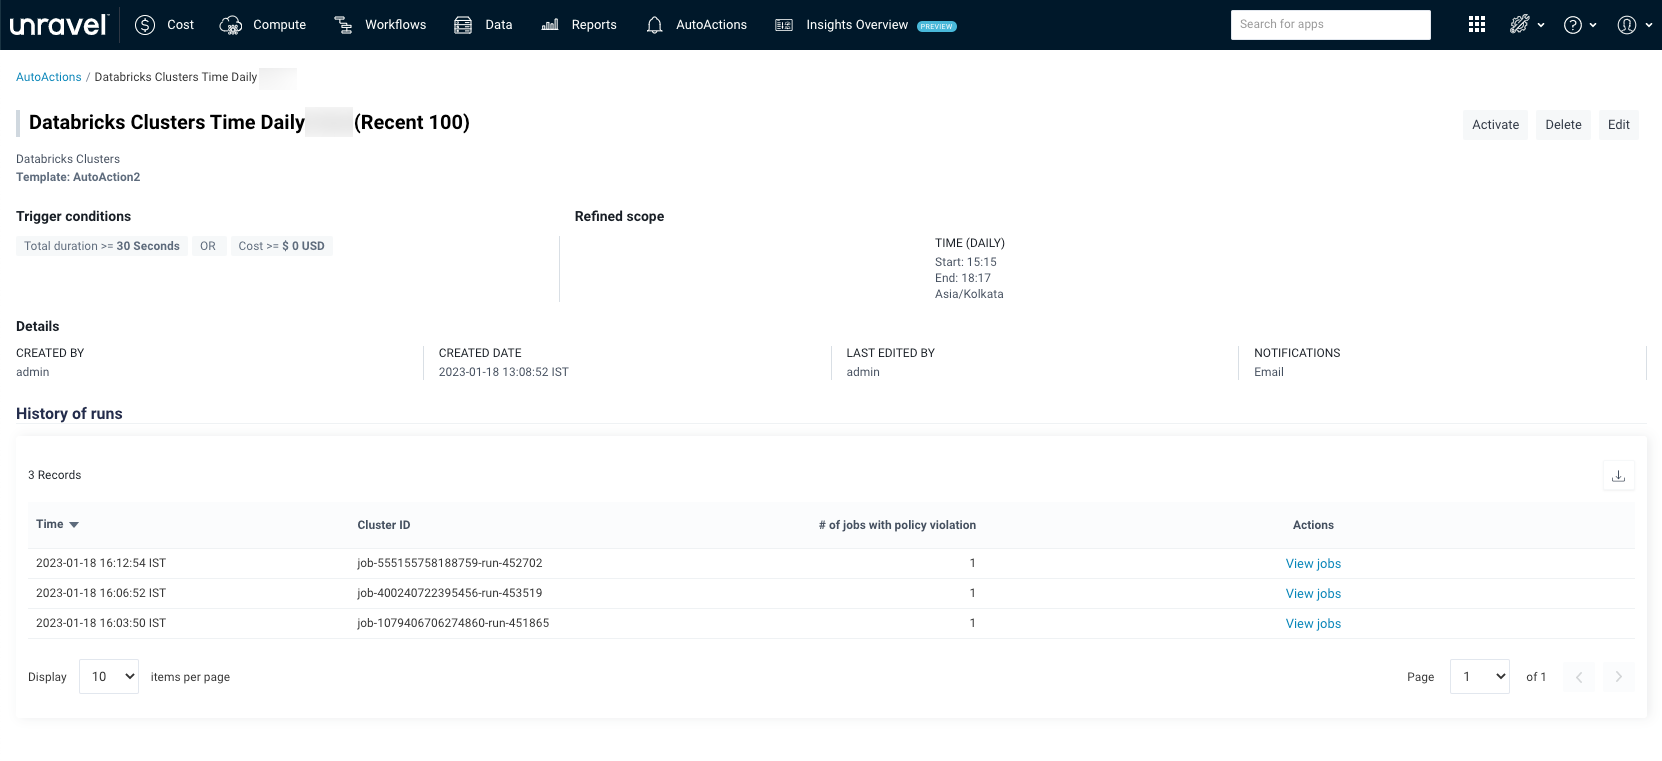
Click the name link of the AutoAction to view the history of runs and the details of the applications that violated the policy.

