Setting up Google Cloud SQL (optional)
Step 1: Create database on Google Dataproc.
Log in to GCP.
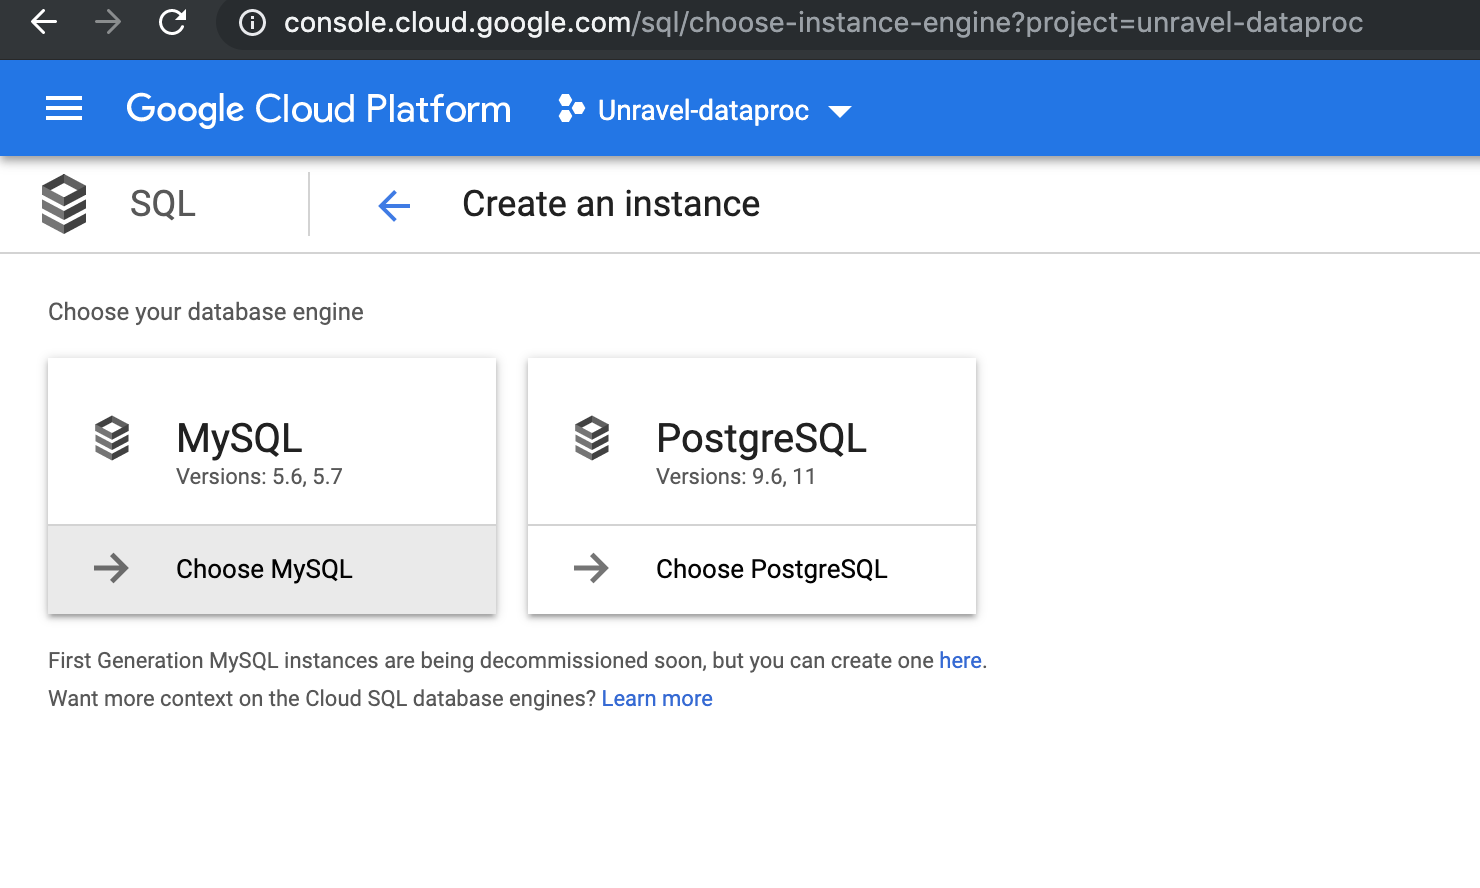
Navigate to Google Dataproc console.
Select Choose MySQL.
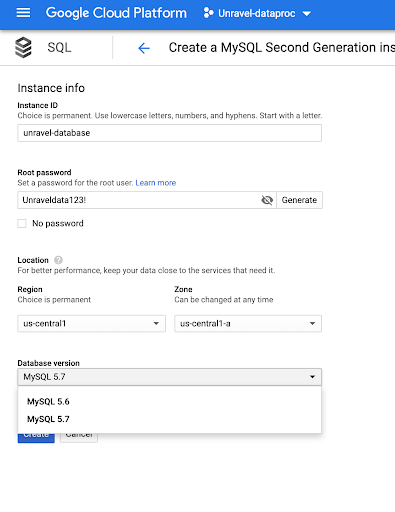
Complete the Instance Info including the Instance ID, Root Password, LocationRegion and Zone, and the Database version. Click Save.
Important
To ensure connectivity, the Instance must be in the same region as Unravel.
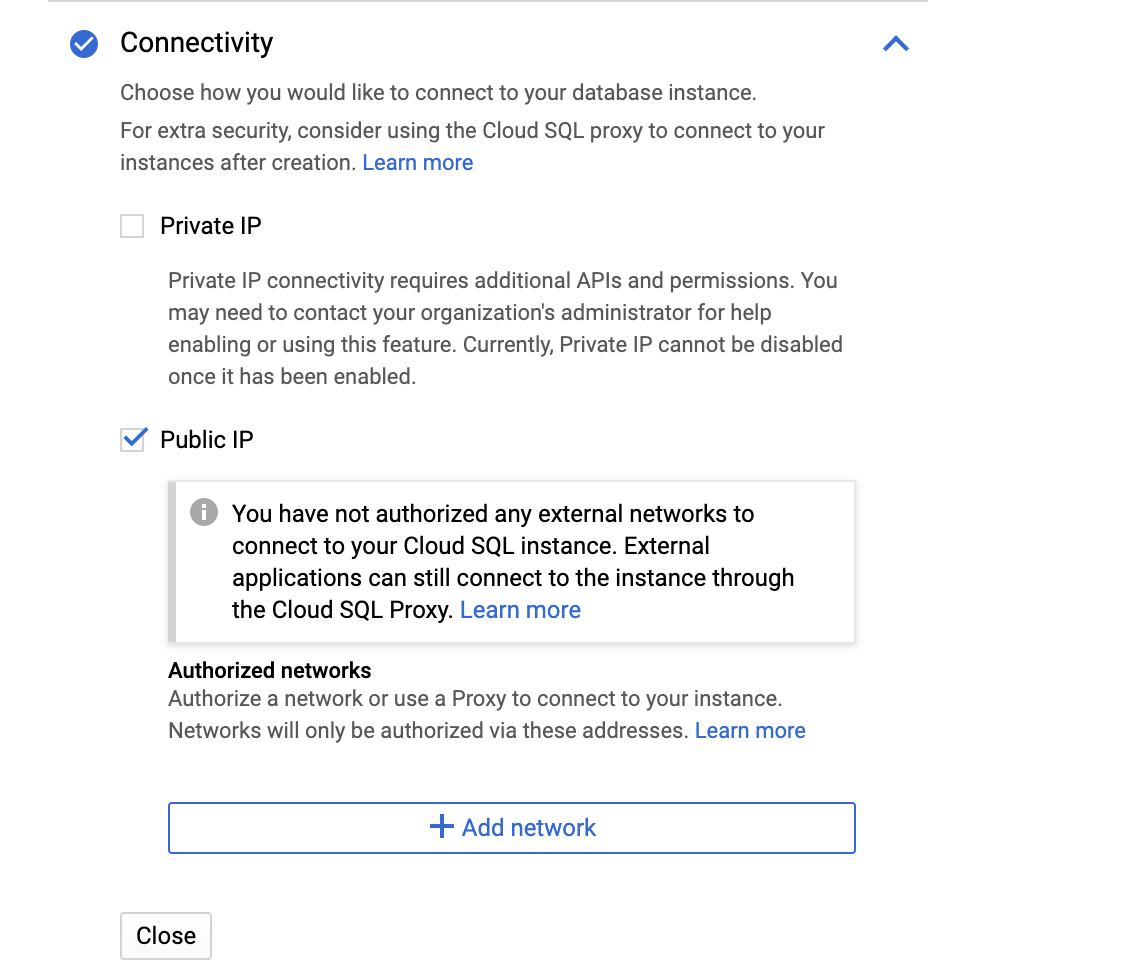
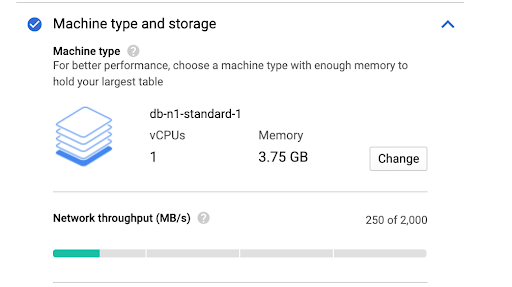
Under Connectivity select Public IP and the Instance type (Machine Type) to create the SQL Instance.
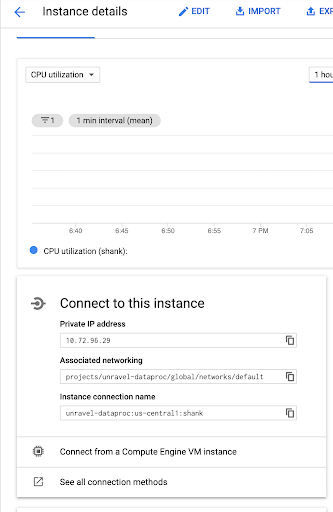
After the database is created go to the overview of the instance. Make note of its Private IP address as you need this address to configure Unravel.
If you are using Public IP navigate to Connections > Add network. Add the unravel private IP to the list to authorize the connection to the SQL Instance
Important
The Public IP changed upon rebooting the Unravel VM.
Upon reboot you must add the new Public IP to the Authorized Network.
Step 2: Log into the Unravel node and install the MySQL Client
sudo yum install mysql
Step 3: Log into the MySQL with the Public IP of the SQL Instance and verify the connection is valid. Exit once verified.
mysql --host=sql_instance _IP--user=root --password
Step 4: Install the MySQL JDBC driver.
Download the JDBC driver for MySQL to
/tmp.wget https://dev.mysql.com/get/Downloads/Connector-J/mysql-connector-java-5.1.47.tar.gz -O /tmp/mysql-connector-java-5.1.47.tar.gz
Navigate to
/tmpand extract the driver.cd /tmp tar xvzf /tmp/mysql-connector-java-5.1.47.tar.gz
Copy the MySQL JDBC JAR to
/usr/local/unravel/share/java/.sudo mkdir -p /usr/local/unravel/share/java sudo cp /tmp/mysql-connector-java-5.1.47/mysql-connector-java-5.1.47.jar /usr/local/unravel/share/java sudo cp /tmp/mysql-connector-java-5.1.47/mysql-connector-java-5.1.47.jar /usr/local/unravel/dlib/unravel
Configure Unravel to connect to the MySQL server. Using mysql, create a database and user for Unravel.
CREATE DATABASE unravel_mysql_prod; CREATE USER 'unravel'@'%' IDENTIFIED BY '
password'; GRANT ALL PRIVILEGES ON unravel_mysql_prod.* TO 'unravel'@'%';In
/usr/local/unravel/etc/unravel.properties, update the following properties:unravel.jdbc.username (username will be unravel) unravel.jdbc.password (password thats given in above step) unravel.jdbc.url ()
Example:
# username is always unravel
unravel.jdbc.username=unravel

# use the password used in Step 4
unravel.jdbc.password=unraveldata

# use public IP of SQL instance from Step 6
unravel.jdbc.url=jdbc:mysql://127.0.0.1:3306/unravel_mysql_prod
Restart unravel daemons,
/etc/init.d/unravel_all.sh restart
Step 5: Create a schema for the Unravel tables.
sudo /usr/local/unravel/dbin/db_schema_upgrade.sh
Step 6: Create the default admin user for Unravel UI.
sudo /usr/local/unravel/install_bin/db_initial_inserts.sh | sudo /usr/local/unravel/install_bin/db_access.sh
Step 7: Run db_access.sh to verify the connectivity.
sudo /usr/local/unravel/install_bin/db_access.sh