Testing and troubleshooting
This is an excerpt from the User Guide. For more details, see the full document.
Testing the deployment
Connect to the Unravel UI through an SSH tunnel.
Create an SSH tunnel to port 3000 on the Unravel EC2 instance.
For example,
ssh -i ssh_key.pem centos@
unravel-ec2-ip-L 3000:127.0.0.1:3000Start your browser from your workstation and navigate to
http://127.0.0.1:3000.Log in with username
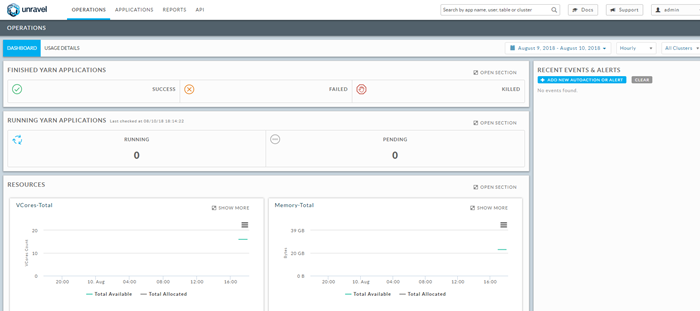
adminand passwordunraveldataThe OPERATIONS tab appears.

Tip
Trial versions include a message in the top menu bar about the trial license and the number of days remaining until it expires. To extend your trial period or find out more about our licensing, contact us.
Run sample jobs from the EMR master node.
The EMR master node has sample MapReduce and Spark jobs on it. Run these jobs to verify that the Unravel EC2 node is collecting data from the EMR cluster. Your usage may vary depending on what applications you installed on your cluster.
Sample MapReduce job Connect to the EMR master node via SSH:
ssh -i ssh_key.pem ec2-user@
EMR-master-public-IPRun this MapReduce "Pi" job:
sudo -u hdfs hadoop-mapreduce-examples pi 100 100
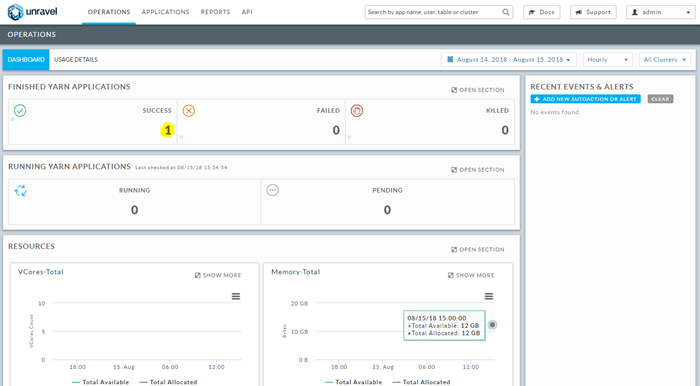
When the MapReduce job finishes, check Unravel UI.
You should see one successful application labeled MR on the dashboard.

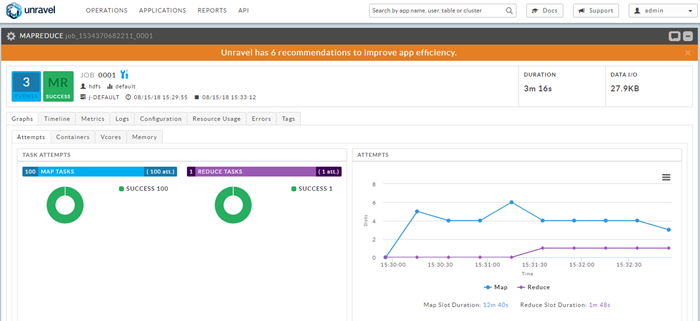
To see details about the MapReduce job, click the APPLICATIONS tab, and expand the MR job.
The job's details are displayed.


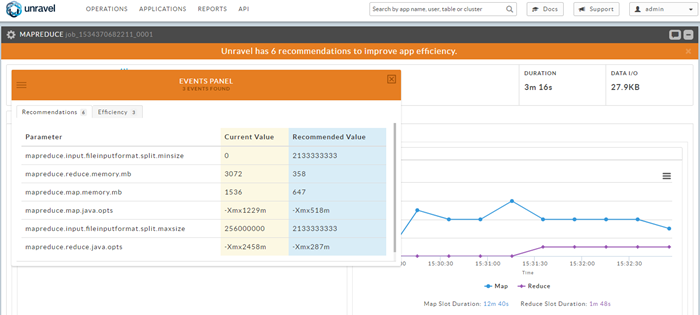
Click the orange bar that notifies you that Unravel has recommendation(s) for tuning this job.

Explore other metrics about this job by clicking the tabs within the job's details.

Sample Spark job Connect to the EMR master node via SSH:
ssh -i ssh_key.pem ec2-user@EMR_master_public_IP
Run this Spark "Pi" job:
sudo -u hdfs spark-submit --class org.apache.spark.examples.SparkPi --master yarn --num-executors 1 --driver-memory 512m --executor-memory 512m --executor-cores 1 /usr/lib/spark/examples/jars/spark-examples.jar 1000
When the Spark job finishes, check Unravel UI: You should see one successful application labeled SPARK on the dashboard.

To see details about the Spark job, click the APPLICATIONS tab, and expand the Spark job. The job's details are displayed.
Click the orange bar that notifies you that there Unravel has recommendation(s) for tuning this job.
Explore other metrics about this job by clicking the tabs within the job details screen.
Copy
/usr/local/unravel/install_bin/hive_test_simple.shfrom the Unravel host to the EMR master node.Run
/usr/local/unravel/install_bin/hive_test_simple.sh(wherehive.execution.engine=tez)Check Unravel UI for Tez data. For instructions, see Tez Application Manager.
Sending diagnostics to Unravel Support
In the upper right corner of Unravel UI, click the pull-down menu, and select Manage.
Wait for the page to fully load.
Select the Diagnostics tab.
Click Send Diagnostics to Unravel Support.
This sends an email message with a diagnostics report to Unravel Support and also to the users listed in the
com.unraveldata.login.adminsproperty.If you don't have access to push the bundle through Unravel UI:
On the Unravel host, bundle the diagnostic information.
/usr/local/unravel/install_bin/diag_dump.sh
Log into Unravel Support and upload the bundle.
Reconnecting to your EMR cluster
If you used our CloudFormation template to create your Unravel EC2 instance, it's protected by ASG, which sets the target/maximum number of instances at 1. In the rare scenario of your EC2 instance failing, ASG will recreate it with the same configuration, and restore its prior history from a backup saved in an S3 bucket. In this case, your existing EMR clusters just need to be reconnected to the newly created Unravel EC2 instance as described in Testing and troubleshooting.
Diagnosing Oozie errors
You may see this common error:
org.apache.oozie.action.ActionExecutorException: JA010: Property [fs.default.name] not allowed in action [job-xml] configuration
This might indicate that you have an older version of a configuration file which contains some deprecated properties. The workaround is to comment-out the <job-xml> element in workflow.xml.
Adjusting the historical data in Unravel UI
Settings are needed to adjust the time horizon. In this example, it is set to 2 years with recent data showing the max amount minus 2 weeks:
In Unravel UI, navigate to Manage | Core, and scroll down to the Retention section.
Under TIME SERIES RETENTION DAYS, adjust the number of days to retain data. This corresponds to
com.unraveldata.retention.max.daysin/usr/local/unravel/etc/unravel.properties.In
/usr/local/unravel/etc/unravel.properties, setcom.unraveldata.history.maxSize.weeks=104Restart all services.
sudo /etc/init.d/unravel_all.sh restart
Checking Ansible playbook logs
Check Ansible playbook logs in /tmp/unravel/unravel_sensor_ansible.log.
If the EMR cluster is created in a different VPC, configure VPC peering.